Below are the steps to Create a Product Recommendation Quiz in Digioh! Product Recommendation Quizzes are valuable for driving product sales, increasing user engagement, and capturing valuable customer data.
Before following these steps, you must first install Digioh on your site. (See Installing Digioh and Choosing the Right JS Snippet)
Here’s a step-by-step video to help you build and launch your Product Recommendation Quiz:
1. Prepare for your Product Recommendation Quiz
Before you can build your quiz, consider the following questions:
- What will a successful Product Recommendation Quiz look like for you? Examples: sales increased in 6 months, a certain number of new subscribers, increased user engagement measured by site metrics, etc.
- When do I want to launch my quiz? This will help you decide how simple the quiz should be at launch.
Prepare the following:
- Decide where you want the quiz to show on your site, as well as where your quiz CTAs (buttons, navigation links, etc.) should display.
- Finalize your list of quiz questions. We can help you draft these questions.
- List possible product results and when they should show (often referred to as “quiz logic”). Based on every answer, specific products can be recommended or excluded
- List any quiz question branching logic.
- Gather information about your website’s CMS (Shopify, WooCommerce, Magento, etc) and product organization (are products categorized, do product variants have a unique SKU, etc.)
- Decide where you want to send quiz data (e.g. Mailchimp, Hubspot, Klaviyo) and gather any API keys, ListIDs, etc. necessary for sending data to each platform.
- Set up a non-navigation page on your site where the Product Recommendation results will show to users (e.g. www.yourstore.com/quiz_results).
2. Create a New Quiz
Follow these steps to set up your quiz using the Digioh Qwizard.
1. In your account, click “Create New Quiz.”

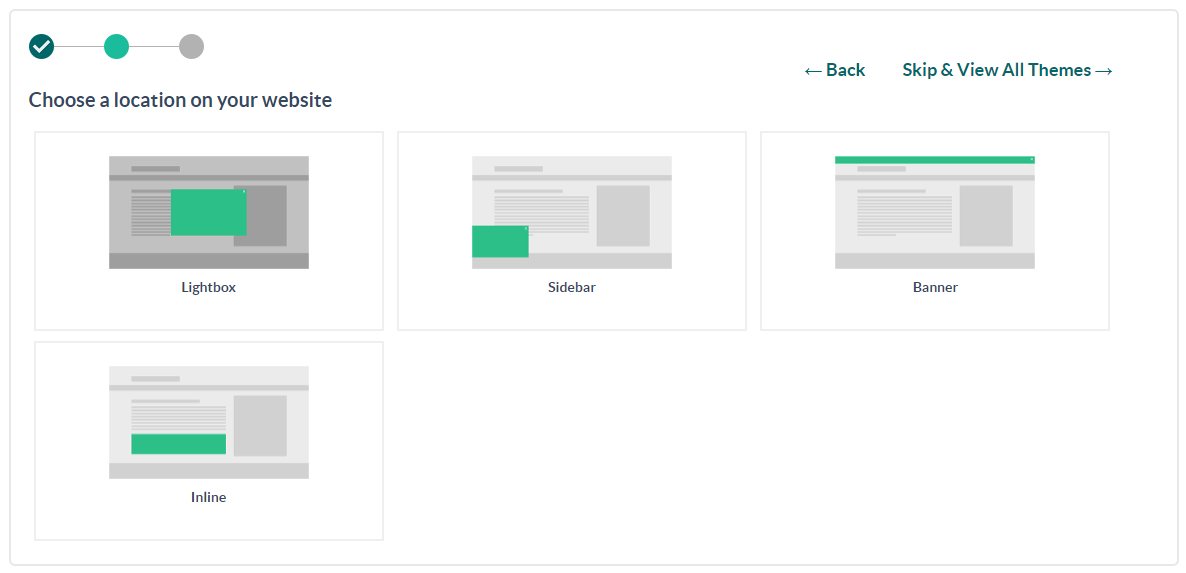
2. Choose a location on your website for the quiz
For a Product Recommendation Quiz, we recommend an Inline lightbox. This will be embedded in your site on either it’s own page or on a page of your choosing
3. Choose a theme for your quiz and click OK.
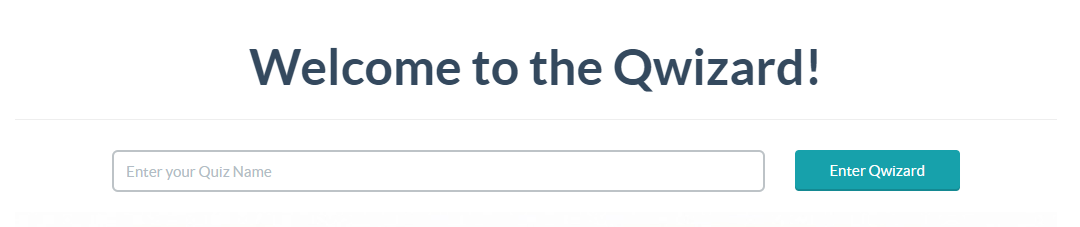
4. Name your quiz.
5. Select your Store Type from the Store Type dropdown.
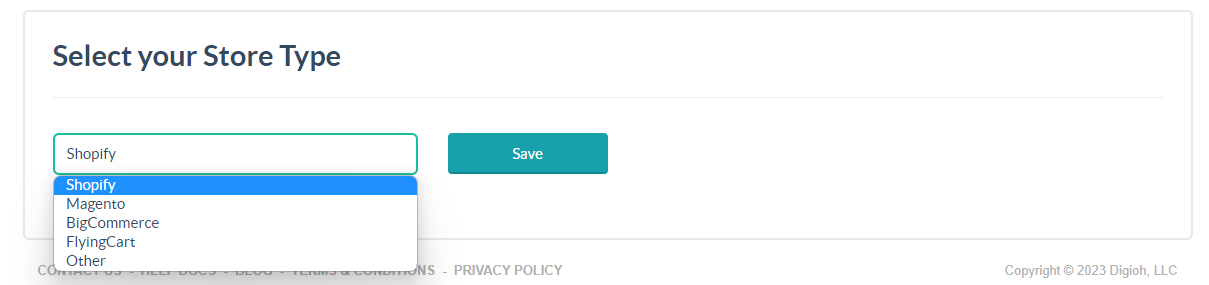
6. Enter your Store Information:
This is the CMS data collected in the first step – Prepare for your Quiz.
After entering your store type, you will be asked to fill in information based on your store type.
Fill in the information and click “Save”
7. Select an Integration
Select your integration from the integration dropdown. Then, fill in the information (gathered in Step 1 – Prepare for your Quiz).
Digioh needs this information to send your product data and product recommendations to your integration platfom, allowing you to see the data collected in that platform. This will allow you to leverage your integration platform to see trends, send emails, sms, etc.
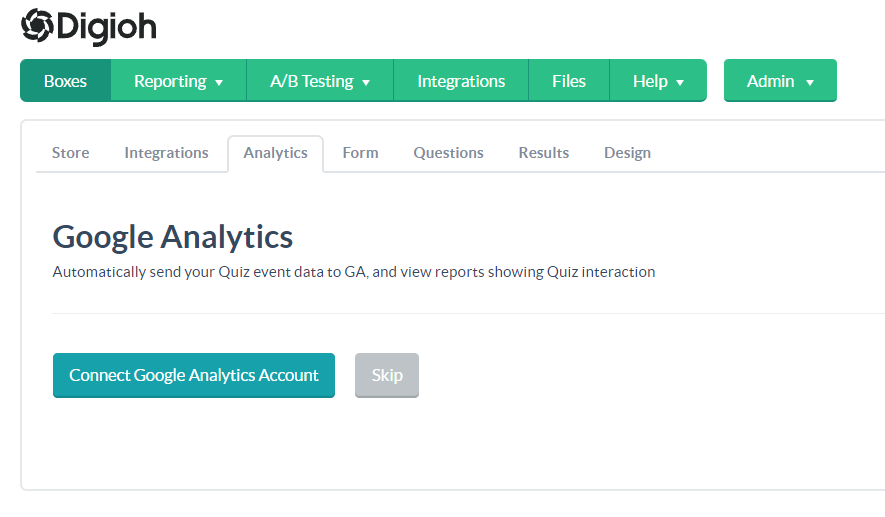
8. Connect your Google Analytics
By connecting your Google Account and setting up your Google Analytics to leverage Digioh’s platform, you are already connecting your quiz so that you can measure and track views, interactions and other important metrics of your quiz with the power of Google Analytics and Digioh together.
To do this, click “Connect Google Analytics Account” at this step
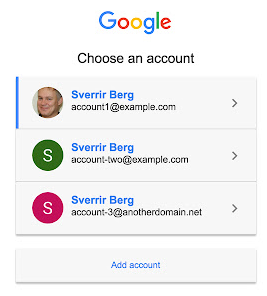
Choose the appropriate Google account when shown the option
Allow Digioh the necessary permissions to link with your Google Analytics by clicking “Allow
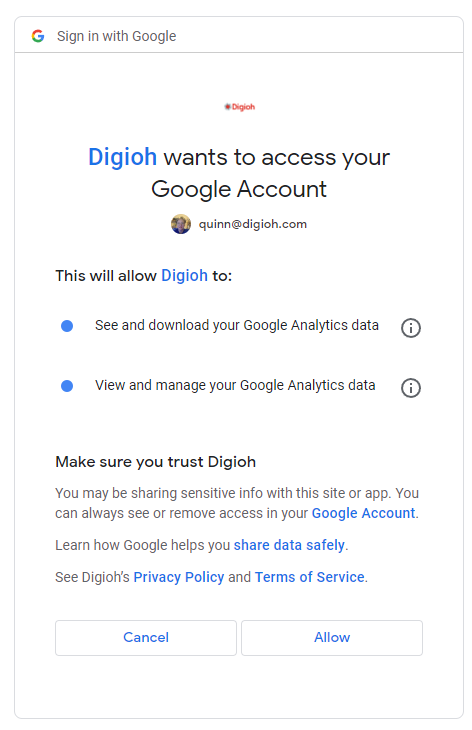
You have connected your account and will now be redirected back to the QWizard!
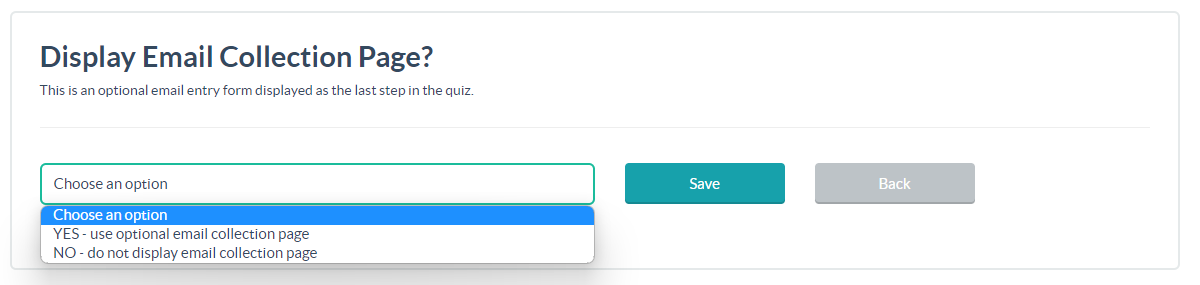
9. Set up your Email Collection Page.
Capturing an email is a great way to grow your list and drive post-quiz revenue.
You can also include a “Skip” button so users aren’t required to provide their email address).
10. Set up your Splash Page.
The splash page is typically your quiz’s Start Page, like “Start Quiz” or “Do you want to Take a Quiz”. This page is optional; you can also start the quiz with the first question.
- Choose Page Layout
- Input Page
- Input Question
- Input Subtext
- Input Answer #1
- Add Weighting for Answer
- Input and Weigh Remaining Answers

11. Set up the first question of your quiz.
- Choose your page layout
- Enter your Page name
- Enter the page Question
- Enter the page Subtext
- Enter Answer Text
- Weighing your answers:
- “Regular Weighting” option will:
- Positively weigh all products chosen in the “Include Products” input
- This makes those products more likely to be recommended because this particular answer was chosen
- Negatively weigh all products chosen in the “Exclude Products” input
- This makes those products less likely to be recommended because this particular answer was chosen
- Positively weigh all products chosen in the “Include Products” input
- “Priority Weighting” will guarantee:
- Any products chosen in “Include Products” will be show as results
- Any products chosen in “Exclude Products” will not be shown as results
- “Regular Weighting” option will:
12. Repeat Step 11 – Set up the first question of your quiz – for each question of your quiz.
13. Click “Done” at the bottom of the page to move on through the QWizard

14. Customize and Copy your Results Page HTML
- Choose the maximum number of results you would like to show in the “Max Results” dropdown
- Choose the number of products per row you would like to show in the “Results Grid Layout” dropdown
- Choose whether to have a highlighted hero product in the “Display Hero Product?” dropdown
- Copy the code by clicking “Copy Code” to the right of the dropdowns
- Store this code in a document easily accessible to you and your team members
- Scroll down to continue to Step 15 – Copy your Email Template Code
15. Copy your Email Template Code
Copy the code for your Email template by clicking “Copy” next to the Results Email Template title
Store this code in a document easily accessible to you and your team members.

16. Edit the Design of your quiz
Navigate to the “Design” tab of the QWizard
From here, you can add your Global Design Settings. This allows you to easily design all elements based on type (for example, choose the design of all of the buttons in the quiz, all of the text in the quiz, etc.
Available options include:
- Setting a box layout and background for your quiz using border, background color, background image, tc
- Adding custom fonts to match your site’s fonts
- Setting Question text size and font to your preferred design throughout the quiz
- Setting button borders and fonts to be your preferred design throughout the quiz
Remember, as you add design settings, to scroll to the bottom of the page and click “Save Design”
When you have saved your Design settings, scroll back up the page and click “Finish Quiz”

17. Wait for Digioh to generate your quiz.
3. Provide Analytics Reporting Access
This step should be completed when building the quiz using the Quiz Wizard (in this doc, in Step 2 – Create a New Quiz – under step 8 – Connect your Google Analytics Account). If it was not done in that step, it should be completed at this time
- Google Analytics (GA4)
- Give Google Analytics account access to analytics@digioh.com
- From your Digioh Account
- click the top-right account name menu
- navigate to “GA Integration”
- select “Connect Account” to complete your GA Connection
- Set up custom dimensions in GA4 following this linked documentation
- Once the custom dimensions are created, share your GA instance access with analytics@digioh.com
- We will then be able to go in and create the necessary report for you
- For more information, please review our GA4 documentation linked here.
4. Customize your Quiz
If you would like to make updates to your quiz, you can do so in the editor:
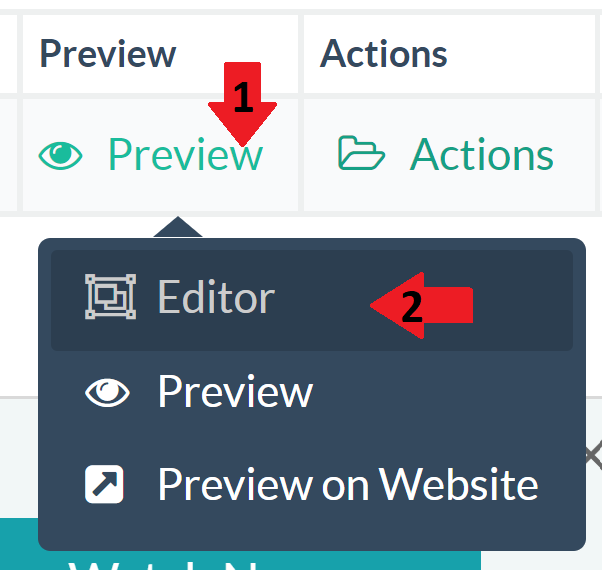
- Access the editor by navigating to the “Boxes” section of your account

- Click the “Preview” button next to the quiz you want to update, then select “Editor” to edit your quiz.
Helpful Links for customizing your quiz:
- Digioh Editor Overview
- How to add a Page Background Image in the Editor
- How to make a Branded Quiz with Custom Fonts
If everything looks good, proceed to the next step.
5. Weigh your Quiz Results
Ideally, this step will be completed when building the quiz in the Qwizard (in this document Step 2 – Create a New Quiz – Step 11 – Set up a the first question on your quiz). If you did not complete this step while building your quiz in the Qwizard, you must complete it at this point in quiz creation.
There are two methods for weighing your results:
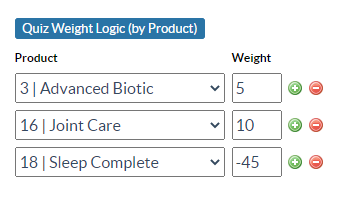
- Advanced Weighting – With this approach, you can add specific weights product by product on an answer button
- In the Editor, click on any button on which you want to weigh a product
- Navigate to the Quiz Weight Logic (by Product) section by scrolling down in the left hand side of the Editor
- Select the product you want to weigh from the input box in the “Product” column
- Weigh the product in the corresponding “Weight” column input
- Save your changes
- You can add multiple products in a single button. If necessary, you can negatively weigh products by adding a negative value
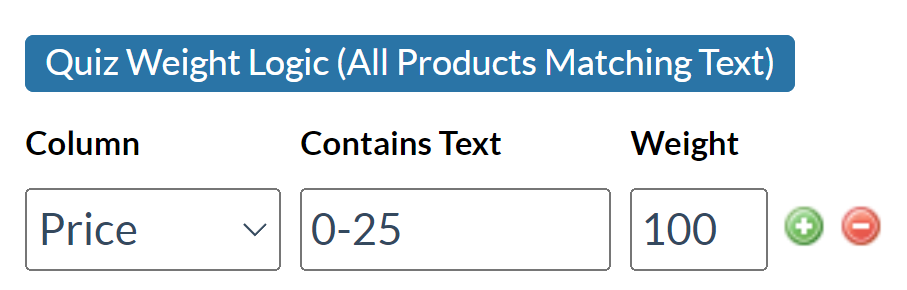
- Weighing Based on Property Values – You can also weigh products based on specific product properties, such as SKUs, Names, Categories, etc. By using this approach, you can weigh hundreds of products with a single command.
- In the Editor, click on any button on which you want to weigh a product
- Navigate to the “Quiz Weight Logic (All Products Matching Text)” Section
- Choose the property (ex: “Price”) you would like to weigh from the dropdown
- Enter which property option (ex: “0-25”) should be weighed
- Enter the appropriate weight in the corresponding “weight” input
- Save your changes
Helpful Links for weighing your quiz:
6. Place Smart Tag HTML on Your Website
To show your quiz on your site, add a Smart Tag HTML wherever the quiz could show.
1. Copy the Smart Tag HTML
- Navigate in the Editor to the Widget tab and click its title to expand the accordion menu
- In the Smart Tag HTML code, copy the code to your devices clipboard
2. Set the Lightning Load Image
- Set the image for your quiz’s Lightning Load feature in this same section by following the documentation linked here
3. Place the Smart Tag HTML in your store HTML wherever the quiz should show
Options include:
- embedded on its own page path (for instance “www.yourwebsite.org/quiz_page_path”)
- embedded on already-existing pages
Note: your quiz will show inside the container where the div is placed, so if the containing HTML element is half of the page width, the quiz will display in that container and will be bound by the width of the container element.
7. Set up your Results Page
For users to see their quiz results, you must set up a results page on your site.
Helpful Documentation:
8. Test your Quiz
It is important to dedicate time to testing before launching your quiz. If this step becomes a hurdle, remember that presence is always preferred over perfection.
You can view how product recommendations appear by using our “Show Results Calculation” functionality. This is available by viewing your quiz in “Preview.”
- Access your boxes by navigating to the “Boxes” section of your account
- Locate the quiz you want to update, and click the “Preview” button. Then, select “Preview” to preview the quiz
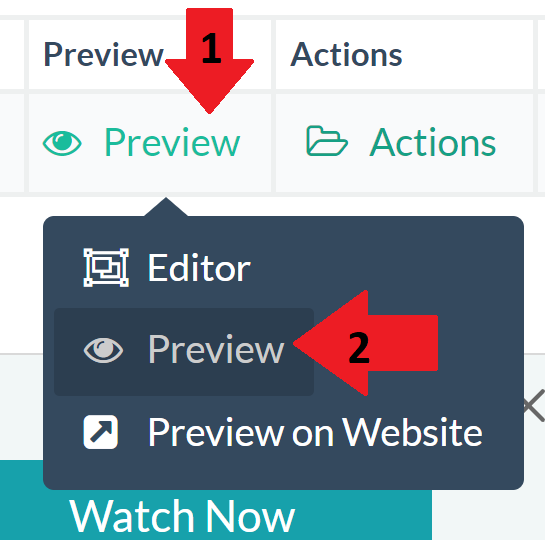
- After proceeding to the next page of your quiz, click “Show Results Calculation” in the top-right corner to see a table showing how and why products are weighted at each page of the quiz.

9. Create Breakpoints
After testing your quiz, create any breakpoint designs you would like. If you don’t need multiple breakpoint designs, Skip to step 11 – Set up Quiz Display Conditions.
See help here – How to create Breakpoints in Digioh
10. Test Breakpoints
Once the breakpoint is set up, test that the new breakpoints look and function appropriately using the same methods listed in Step 8 – Test your Quiz
11. Set up Quiz Display Conditions
Determine when you want the Product Recommendation Quiz to show, and set box conditions accordingly.
See help here – Overview of Using Conditions in Digioh
12. Set up Quiz CTA(s)
To ensure your quiz’s success, set up (or ask for our help in setting up) methods to bring users to your quiz.
Some of these include:
- Exit-Intent promotions
- An Exit-Intent lightbox can be leveraged to let your users know there is a quiz available to help them find exactly what they are looking for!
- Sidebar Teasers
- A Sidebar Teaser is a good way to work within your existing design and let user’s know at a certain time and place in your store that there is a quiz available to help them find exactly what they are looking for
- Banners
- Banners are great for conversion optimization and attracting traffic! You can use a Digioh Banner to direct users to your quiz and increase engagement
13. Launch your Quiz
To launch your quiz, you need to:
- Remove any test blocks in the conditions of your quiz in the editor
- Set your results landing page live in your site
- Set your quiz live in the editor
- Remove any test blocks in the conditions of your CTA options (discussed in step 11)
- Set your CTA options to live in the editor
Helpful Links
- How to Increase Product Recommendation Quiz Performance After Launch
- Klaviyo Dynamic Email Template – Display your product recommendations in your email
If you have any further questions or would like to set up a Product Recommendation Quiz that integrates with Shopify and Klaviyo, please contact us.
Questions? Comments? Let us know at support@digioh.com