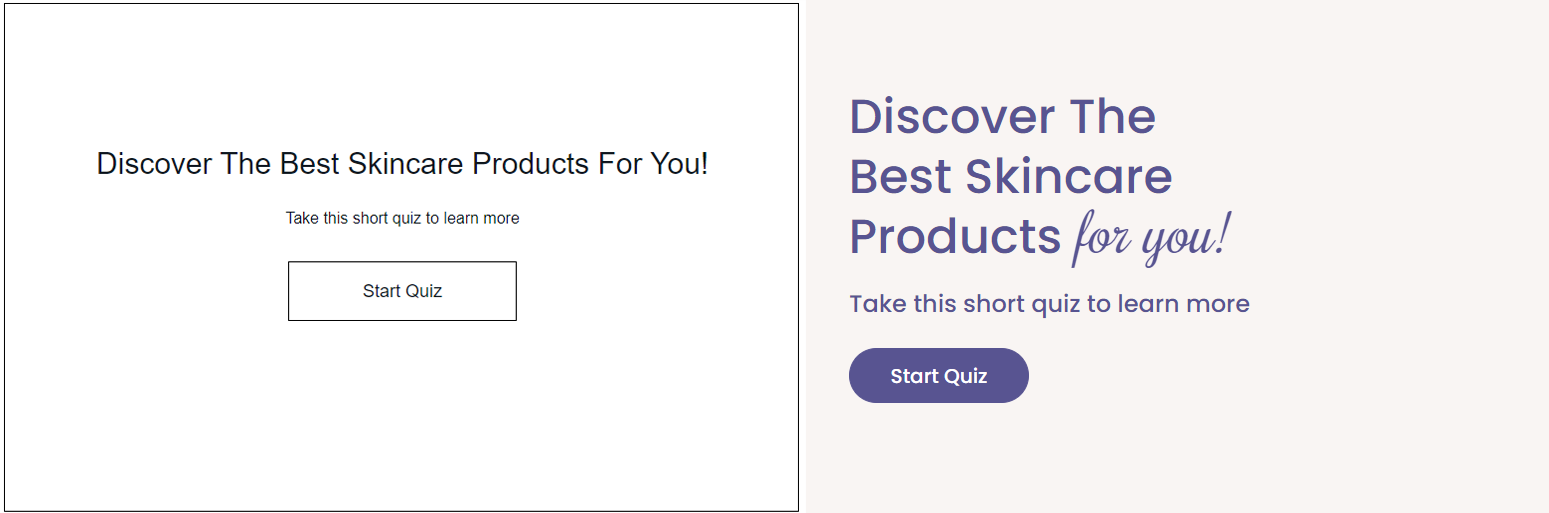
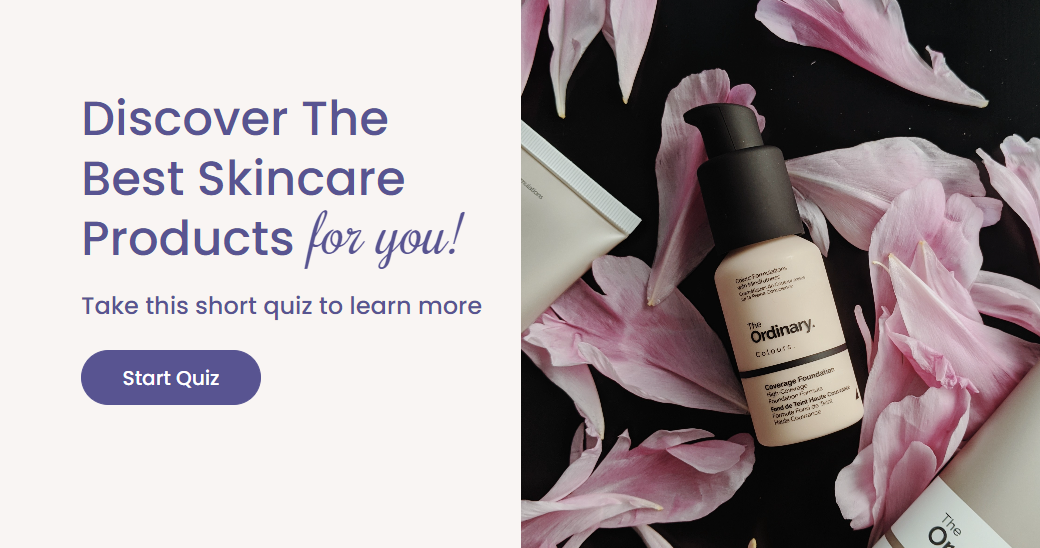
When making a product recommendation quiz, there’s a lot to consider! Quizzes help boost revenue, grow your contact list, gather zero-party data, and build stronger relationships with your customers—if they’re done right. The technical aspects and quiz logic are important, but one factor that can’t be overlooked is branding. If your quiz doesn’t look like the rest of your site and feels like a mismatched third-party plugin, customers may be less likely to trust it enough to provide their information.
This guide will walk you through making a branded product recommendation quiz. We’ll cover how to add custom fonts to your quiz, how to style the text and buttons to match your website, and what other details to consider in your design.
Step 1: Create a Wireframe for Your Quiz
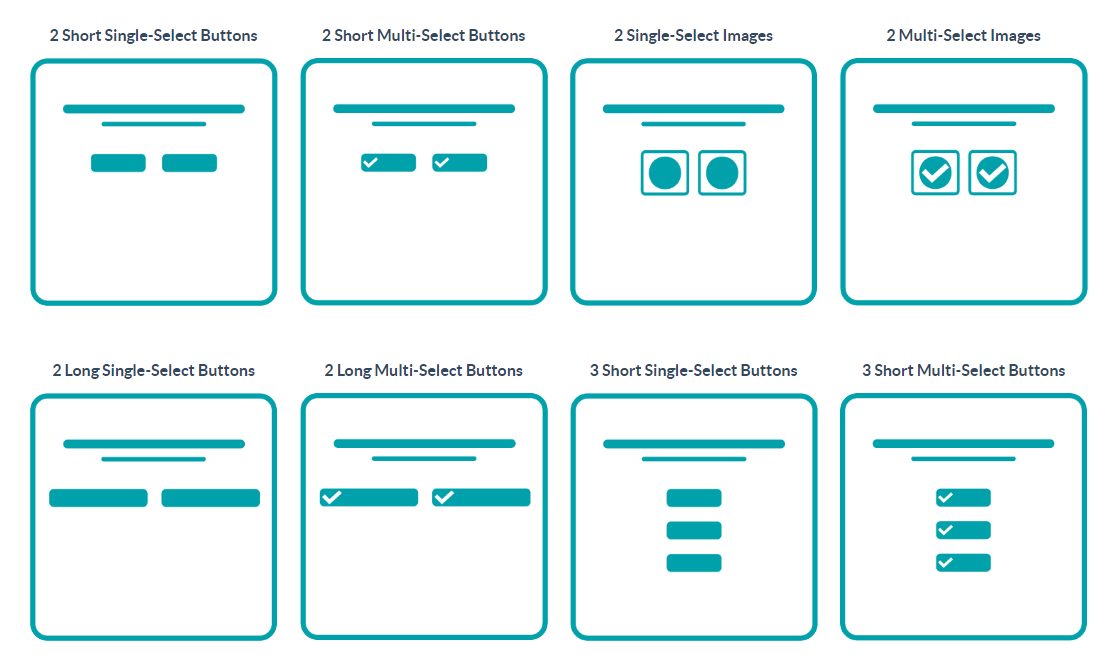
Assuming you’ve already written your quiz questions, put together a basic wireframe for your quiz. (If you don’t have questions yet, try out our Question Generator Quiz for ideas!) The quiz wireframe will include your basic layout, questions, and button answers, but won’t have any of your branding’s styles or fonts applied yet.
The easiest way to create a quiz wireframe is with the Digioh Qwizard. Just choose the layout for each question, then type in your questions and answers. (Optionally, you can also add logic to each answer at this stage or save this step for later.)
After completing your wireframe, it’s time to adapt the quiz to your brand guidelines and website.
Step 2: Refer to Your Brand Style Guide
The key to building an on-brand quiz is in the details. For example, it’s not enough to use your brand’s font; you also have to consider font weight, letter spacing, line height, etc. It’s also helpful to have guidelines for things like button sizes, colors, borders, and other elements.
You can typically find style guidelines in the following places:
- Brand Style Guide: This is a document with information about your brand’s colors, typography, logo, and imagery. They usually include hexadecimal codes for colors, fonts, and font weights. They may also include information about buttons, forms, etc.
- Style Mockup – If you’re fortunate enough to have a mockup using a tool like Figma or Zeplin, you can easily view CSS information about every element, making it easy to match your brand styles down to the pixel.
- Your Website – If you don’t have mockups or guides, your website will serve as the best source of truth.
Tip: Don’t just eyeball elements on your site, check your code. Right-click on any element on your website to view the CSS values.
For example, to make sure your quiz buttons match the buttons on the rest of your site, right-click on a button to see the background color, border radius, padding, etc.
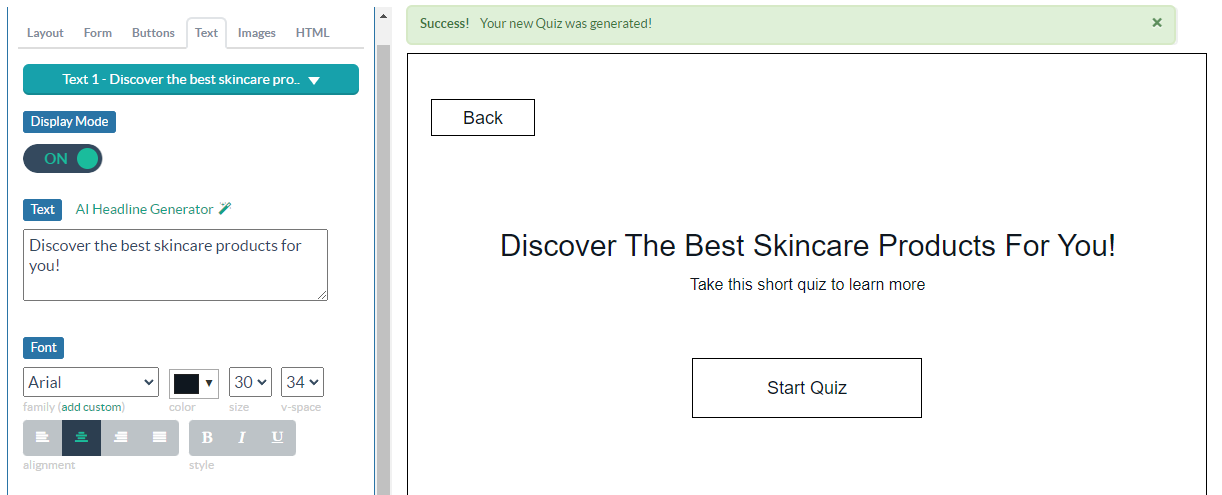
Step 3: Add Custom Fonts to Your Quiz
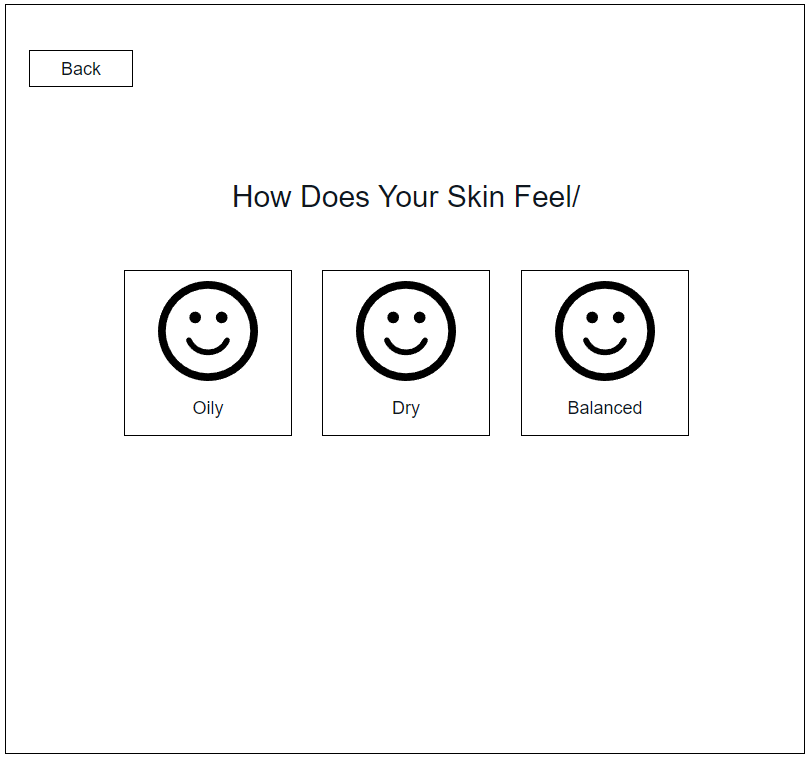
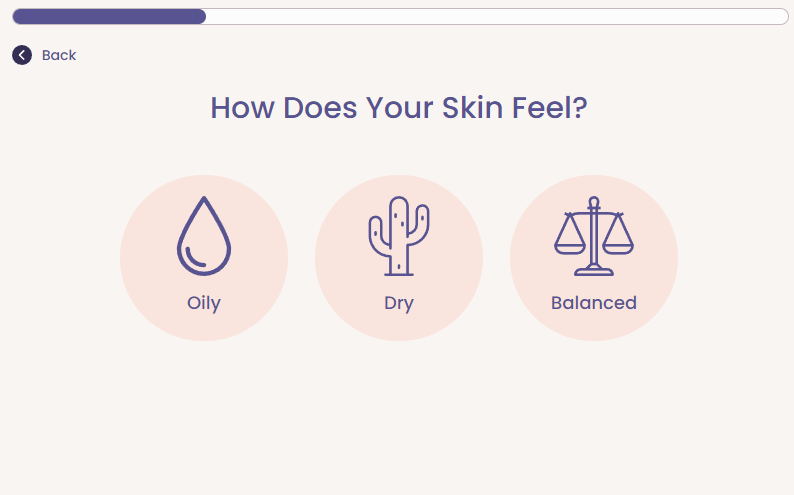
Typography is a huge part of branding (see the examples of nonbranded vs. branded quizzes below), so being able to use your brand’s fonts in a quiz can make or break the design.
A) Upload and Configure Your Custom Fonts
To use custom fonts in your quiz, upload the font files to Digioh and configure the font in your account.
If you have the font files, follow this quick tutorial on how to add fonts to your Digioh account. If you’re using Adobe Fonts, the process is different but very easy!
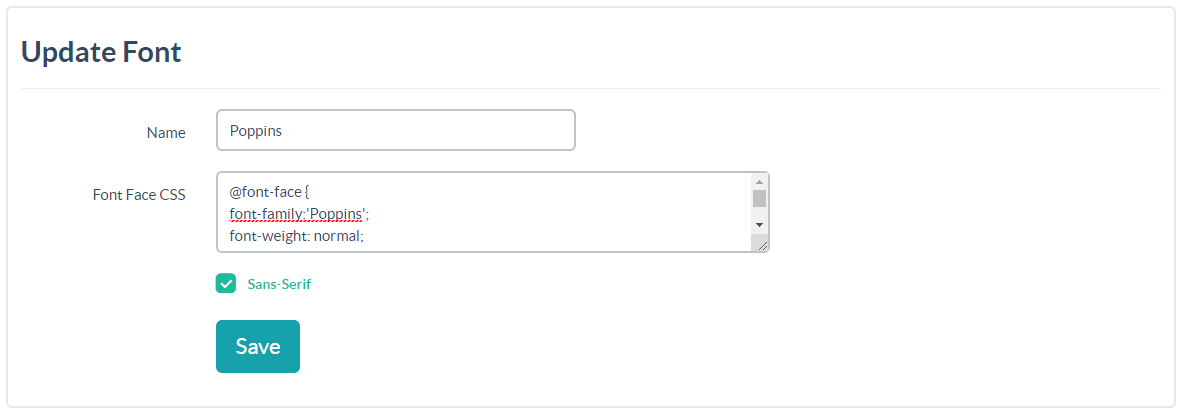
After uploading and configuring your custom font, it will appear in the Digioh editor’s font dropdown for use in your quiz.
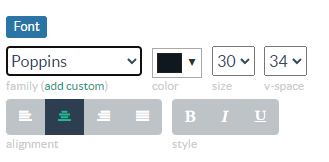
B) Apply Fonts to All Text Fields and Buttons
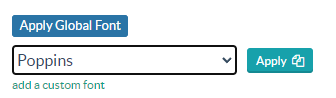
After adding fonts to your account, you can apply them to any text, button, or field in the quiz individually. However, to save time, you can apply the font to all text within a campaign easily. Go to the Main Page > Layout, then scroll down to “Apply Global Font.” Here, choose your font from the dropdown and hit the Apply button.
C) Use a Secondary Font (Optional)
If your brand uses more than one font, you can easily select each element manually and choose a different font.
Because quizzes use consistent elements across each page, you can easily apply settings across your entire quiz with the “Apply Design Settings to” feature.
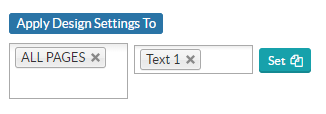
Note: make sure your text looks exactly the way you want it to (color, size, weight, letter spacing, etc.) before applying the settings to other fields.
D) Add Extra CSS Styles to Your Quiz
Fonts alone aren’t always enough to keep your typography on-brand. Achieving the right look for your brand’s fonts also involves kerning, tracking, font weight, letter case, etc.
By adding Extra CSS Styles to a text element or button, you can control every aspect of your quiz’s fonts, even beyond what’s built into the Editor.
Examples of commonly-used CSS styles include:
- font-weight
- text-transform
- letter-spacing
- line-height
The “Apply Design Settings to” feature also applies Extra CSS settings to other fields, so all your custom font settings will carry over to every page of your quiz.
Step 4: Update The Quiz Background
Color is a huge part of branding and, therefore, quiz design. You can use the same background across each question page, or get creative with different looks for different questions. When it comes to quiz backgrounds, there’s no limit to your creativity.
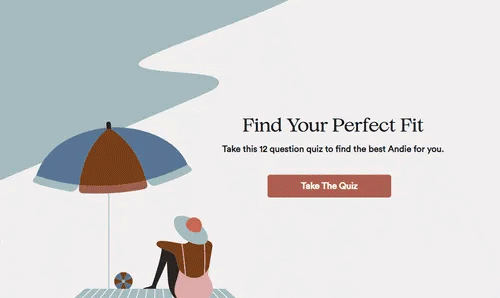
For example, Andie Swim’s quiz uses different background colors and images but still feels cohesive.
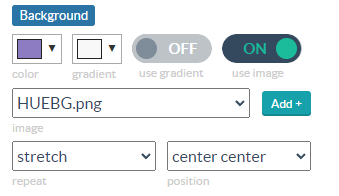
To change your quiz’s background color, go to the Layout tab and choose a background color, gradient, or image. If your design uses Edge to Edge, make sure your background is set to “stretch” if you want it to fill the whole screen.
Step 5: Style The Quiz Buttons
If your brand guide doesn’t include button guidelines, look to your website for button styling.
Important button details to consider include:
- Color
- Border Radius
- Hover Color
- Other details like shadows, icons, etc
You may also need to create new styles for different types of quiz buttons to differentiate things like Back, Next, Answer Buttons, and Multi-Select Answer Buttons.
For instance, the example below has 3 types of buttons: Back Button, Multi-Select Buttons, and a Next Button. However, the button styles are so similar that it’s difficult to tell them apart.
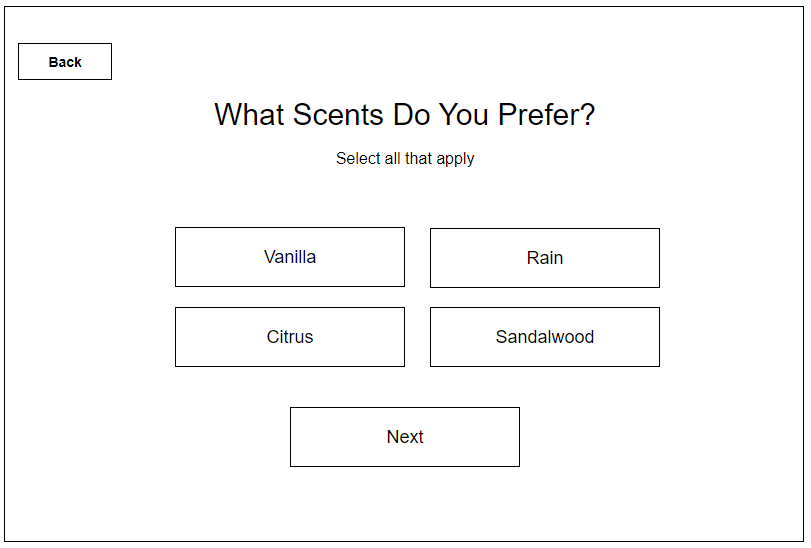
Giving your buttons unique looks based on function makes the user experience more intuitive.
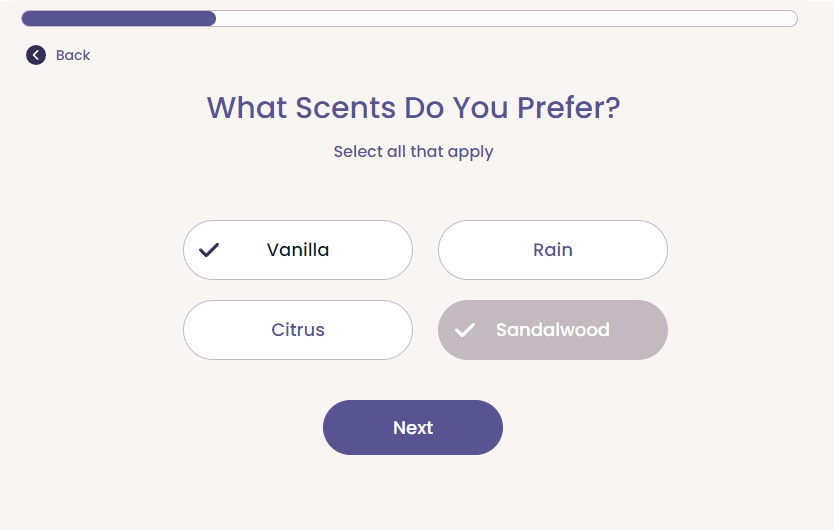
Adding an arrow image to the back button makes it easier to tell what the button does, and making it smaller minimizes its importance compared to other options. Selected buttons have a checkmark to show that the selection is made (vs. the background color change that denotes a button’s hover state). The Next button uses the brand’s standard.
To learn how to design multi-select buttons, read the Select Buttons guide.
You can also add icons to buttons to make your quiz more visually appealing and easy to use.
By default, if you choose image buttons in the Qwizard, you will get placeholder image buttons.
However, you can customize these buttons with different images, colors, and custom CSS.
Just upload an image to the button and add CSS styles to the button however you’d like.
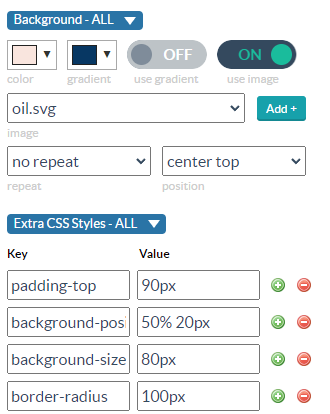
In this example, the following CSS has been added:
- padding-top: 90px
- background-position: 50% 20px
- background-size: 80px
- border-radius: 100px;
These extra CSS styles control the background image size/placement and add padding to the top of the text to make room for the button background image. The border-radius is what creates the round shape.
Without those Extra CSS settings, you end up with something like this:
![]()
Step 6: Style Your Quiz Progress Bar
Progress bars are an important element of quizzes, especially for longer quizzes. But they’re also an opportunity to incorporate your brand’s unique style within your quiz.
You can style progress bars in many different ways. Even a simple filled bar can take on a lot of your brand’s style through shapes and colors.
For example, brands that use sharp edges might opt for a squared-off look.

Brands that use lots of rounded edges can style their progress bar to match. You can even add a gradient to the fill bar if that suits your brand’s style.

Of course, you can add even more personality to your progress bars with images. A great example of this is Andie, which uses a swimmer as its quiz progress bar.

For more details on how to create and edit a progress bar, check out the Progress Bar help doc.
Step 7: Add On-Brand Images to Your Quiz
An on-brand lifestyle photo or graphic can easily elevate your quiz design. However, it’s important to use images intentionally. Not every quiz page needs an image, and cramming in generic stock photos can make a quiz look less on-brand and professional.
You can upload images to your quiz by clicking on the “Images” Tab in the editor. This is ideal for images that “float” and don’t extend to the edge of your quiz design.
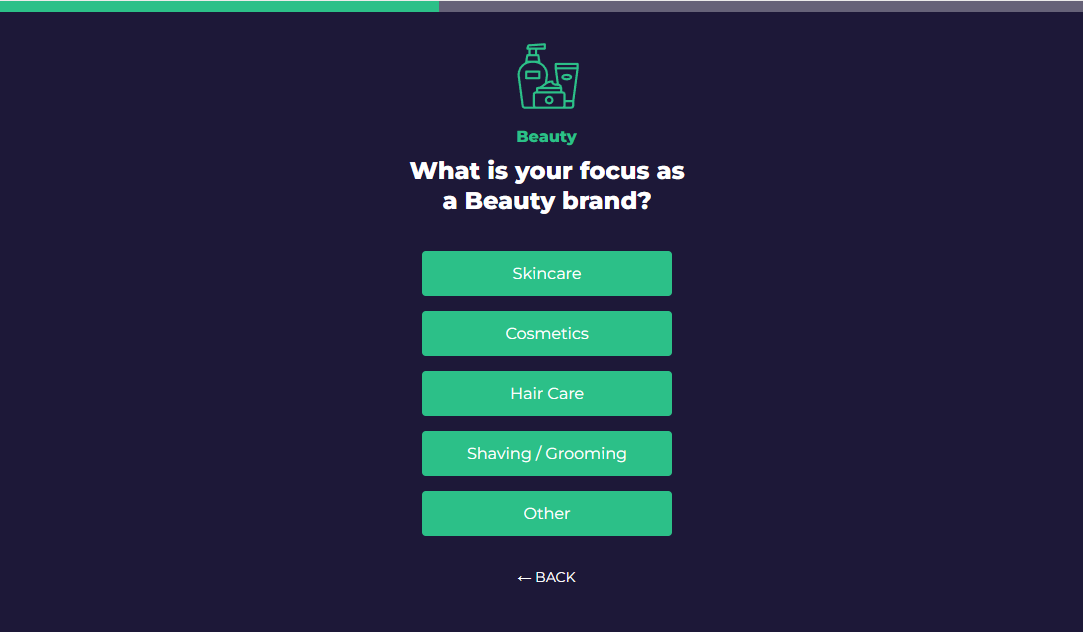
In the example below, an image icon appears above the question to emphasize the “beauty” category.
However, to add a background image you can upload it in the Layout Tab. By default, background images won’t scale based on the window width, so if you’re using Edge to Edge settings and your quiz expands to fill any screen size, you can use the Half Page Background Image App.
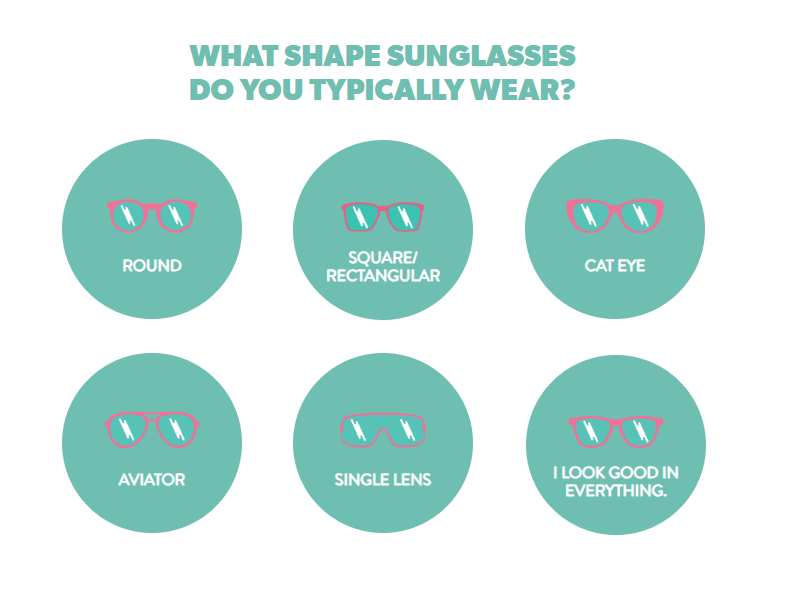
Another way to add images to your quiz is to use them as your answer buttons. Image buttons add visual interest and convey an idea much more clearly than words.
Goodr uses images to display sunglasses shapes and styles to make the buttons very clear to the quiz taker.
You can also add background images to your quiz pages; just be mindful of readability and contrast.

Turtlefur uses a faded lifestyle image for the background of its email capture page, which balances visual interest and readability.
Step 8: Add a Custom Loading Image to Your Quiz
Another subtle way to make your quiz design on-brand is with a loading GIF.

To add a loading GIF to Digioh, click the “Form” tab and choose “Use a custom loading image” to upload your GIF.
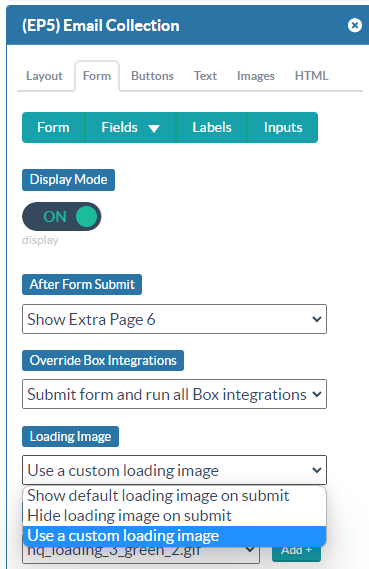
Note: Adding loading images between each question can make the quiz feel sluggish. The best place to add a loading image is right before your results page.
Create a Quiz That’s On-Brand and On-Point
Between custom fonts, colors, images, and CSS, Digioh provides everything you need to make your product recommendation quiz feel like a part of your website and brand.
If you’d like one of our quiz designers to help you style your quiz, please contact us.