What you’ll learn:
- How to set up and configure Digioh’s integration with Braze.
- How to format and customize payloads for different data types.
- How to connect the integration to specific Digioh campaigns.
Braze is a customer engagement platform that powers relevant, personalized customer experiences in real-time. Digioh integrates with Braze to collect and pass customer data from pop-up forms, quizzes, surveys, landing pages, and preference centers.
Follow these steps to set up your Braze integration.
Note: If you are setting up a Digioh integration by yourself, we first recommend reading about Digioh Integration Basics.
Braze Integration Requirements
Before setting up your integration, you will need the following parameters from Braze:
- Instance URL for Braze Dashboard
- Braze API Key With User Data Permissions
To find these parameters in Braze, please see steps 5 and 6 below.
1. Log into your Digioh account.
2. Hover over “Integrations.” and click “New Integration”

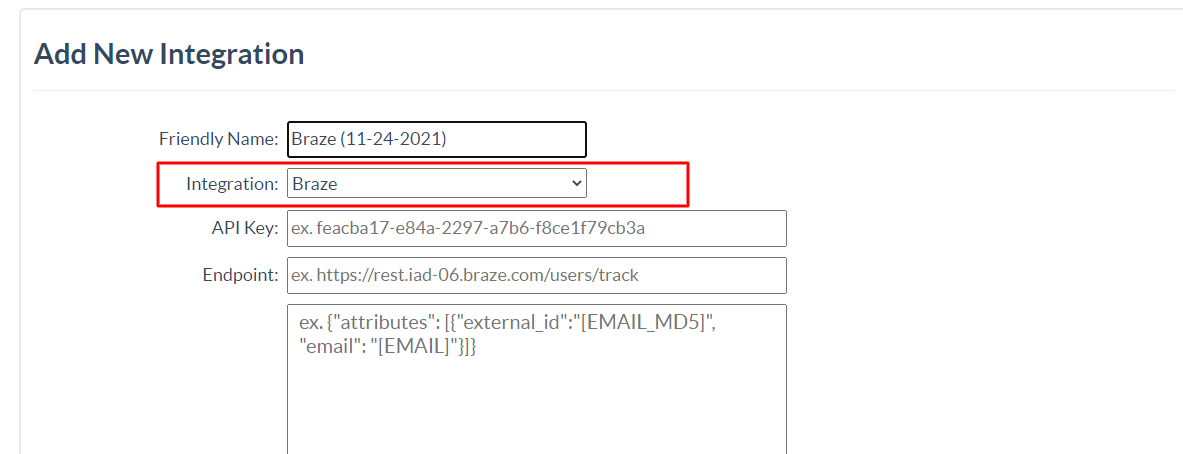
3. Name your integration, then select Braze from the dropdown menu.
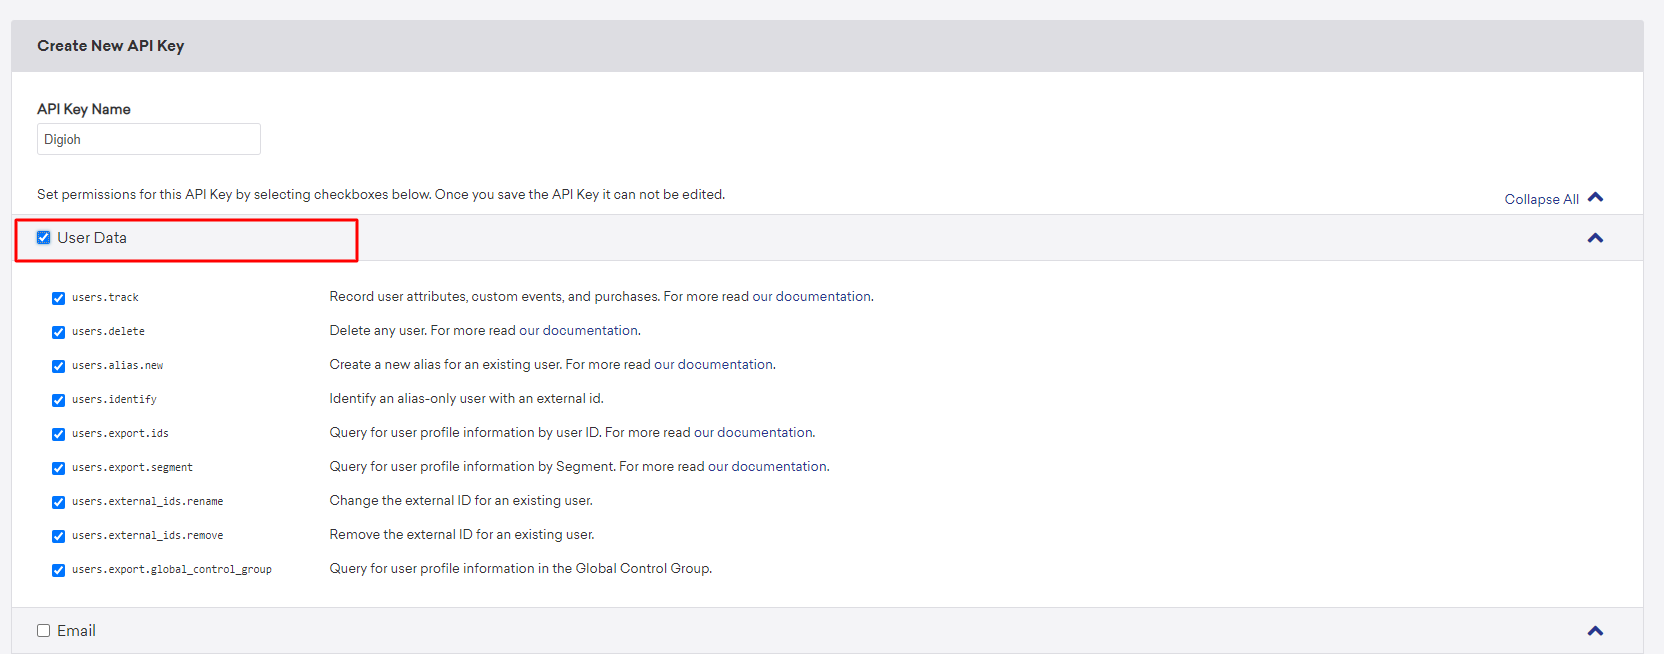
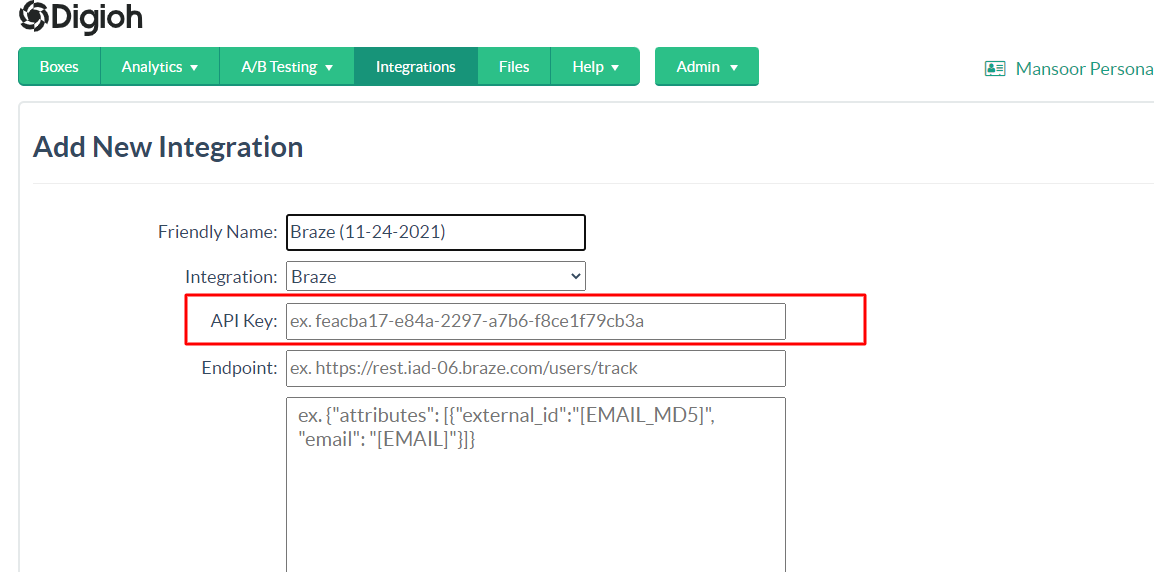
4. Enter Braze API key (For your Braze API key, please check Braze API documentation).
Note: When creating the API key, select the user data permission that is needed for adding the users to Braze.
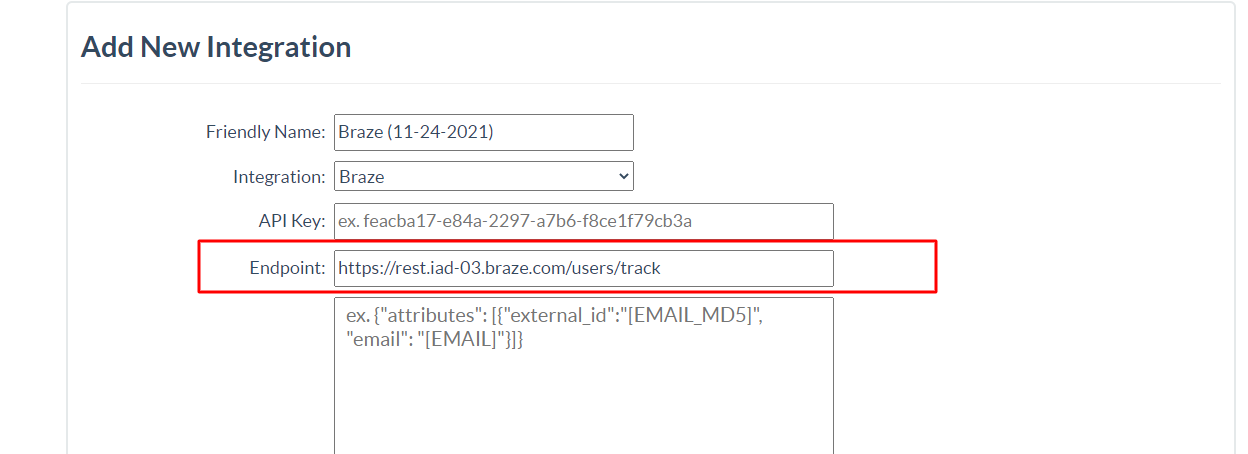
5. Enter Braze /users/track API Endpoint.
Braze manages a number of different instances for our dashboard and REST Endpoints. When your account is provisioned, you will log in to one of the following URLs. Use the correct REST endpoint based on which instance you are provisioned to. Copy the Rest of Endpoint According to your Dashboard URL Reference
| INSTANCE | URL | REST ENDPOINT |
|---|---|---|
| US-01 | https://dashboard-01.braze.com |
https://rest.iad-01.braze.com |
| US-02 | https://dashboard-02.braze.com |
https://rest.iad-02.braze.com |
| US-03 | https://dashboard-03.braze.com |
https://rest.iad-03.braze.com |
| US-04 | https://dashboard-04.braze.com |
https://rest.iad-04.braze.com |
| US-05 | https://dashboard-05.braze.com |
https://rest.iad-05.braze.com |
| US-06 | https://dashboard-06.braze.com |
https://rest.iad-06.braze.com |
| US-08 | https://dashboard-08.braze.com |
https://rest.iad-08.braze.com |
| EU-01 | https://dashboard-01.braze.eu |
https://rest.fra-01.braze.eu |
| EU-02 | https://dashboard-02.braze.eu |
https://rest.fra-02.braze.eu |
6. Format your payload:
Note: If you are using the Update user profile by email address feature. Then you have to remove the external_id from below payload.
- Payload For Email Only
{
    "attributes" : [
         {
           "external_id": "[EMAIL_MD5]",
           "email" : "[EMAIL]",
           "source": "[LIGHTBOX_NAME]"
         }
     ]
}
- Payload For Email and Phone (Multi Step Campaign)
{
    "attributes" : [
         {
           "external_id": "[EMAIL_MD5]",
           "email" : "[EMAIL]",
           "phone": "[PHONE]",
           "source": "[LIGHTBOX_NAME]"
         }
     ]
}
Note: You have to add 2 Braze integrations for Multi Step Forms Email Only and Email and Phone, In this use case Digioh Page Level integration will be used (The Email Only Integration will be assigned to Email capture page and the Email and Phone Integration will be assigned to the Phone capture page).
If you want To configure one Tap SMS For Mobile Traffic. You can follow this guide to set it up.
- Payload For Phone Only
{
    "attributes" : [
         {
           "external_id": "[CLIENT_ID]",
           "phone": "[PHONE]",
           "source": "[LIGHTBOX_NAME]"
         }
     ]
}
You can add additional custom fields as needed:
For example, for adding the box name and source you can use the following payload
{
    "attributes" : [
         {
           "external_id": "[EMAIL_MD5]",
           "email" : "[EMAIL]",
           "box_name": "[LIGHTBOX_NAME]",
           "source": "[SUBMIT_URL]"
         }
     ]
}
Here is the list of fields that Digioh can push:
Digioh Analytics Fields Example
{
    "attributes" : [
         {
            "external_id": "[EMAIL_MD5]",
            "email" : "[EMAIL]",
            "vendor_id": "[VENDOR_ID]",
            "lightbox_id": "[LIGHTBOX_ID]",
            "lightbox_name": "[LIGHTBOX_NAME]",
            "variation_id": "[VARIATION_ID]",
            "variation_name": "[VARIATION_NAME]",
            "ab_test_id": "[AB_TEST_ID]",
            "client_id": "[CLIENT_ID]",
            "submission_id": "[SUBMISSION_ID]",
            "city": "[CITY]",
            "region": "[REGION]",
            "country": "[COUNTRY]",
            "country_code": "[COUNTRY_CODE]",
            "postal_code": "[POSTAL_CODE]",
            "web_source": "[WEB_SOURCE]",
            "search_engine": "[SEARCH_ENGINE]",
            "device": "[DEVICE]",
            "operating_system": "[OPERATING_SYSTEM]",
            "browser_type": "[BROWSER_TYPE]",
            "browser_version": "[BROWSER_VERSION]",
            "page_visits": "[PAGE_VISITS]",
            "past_visits": "[PAST_VISITS]",
            "referring_url": "[REFERRING_URL]",
            "landing_url": "[LANDING_URL]",
            "submit_url": "[SUBMIT_URL]",
            "submit_date": "[SUBMIT_DATE]"
         }
     ]
}
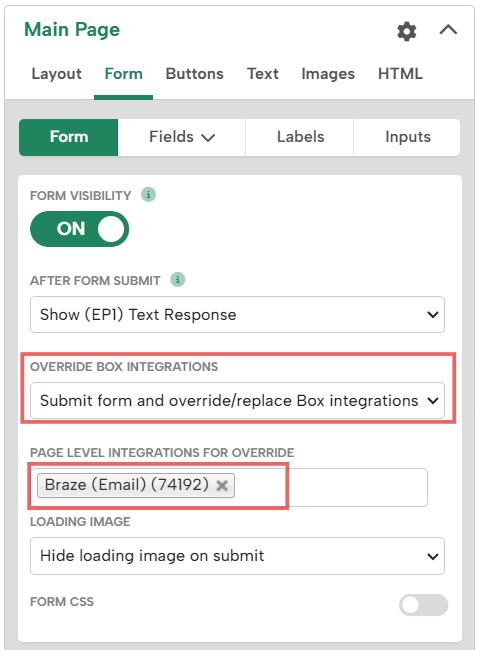
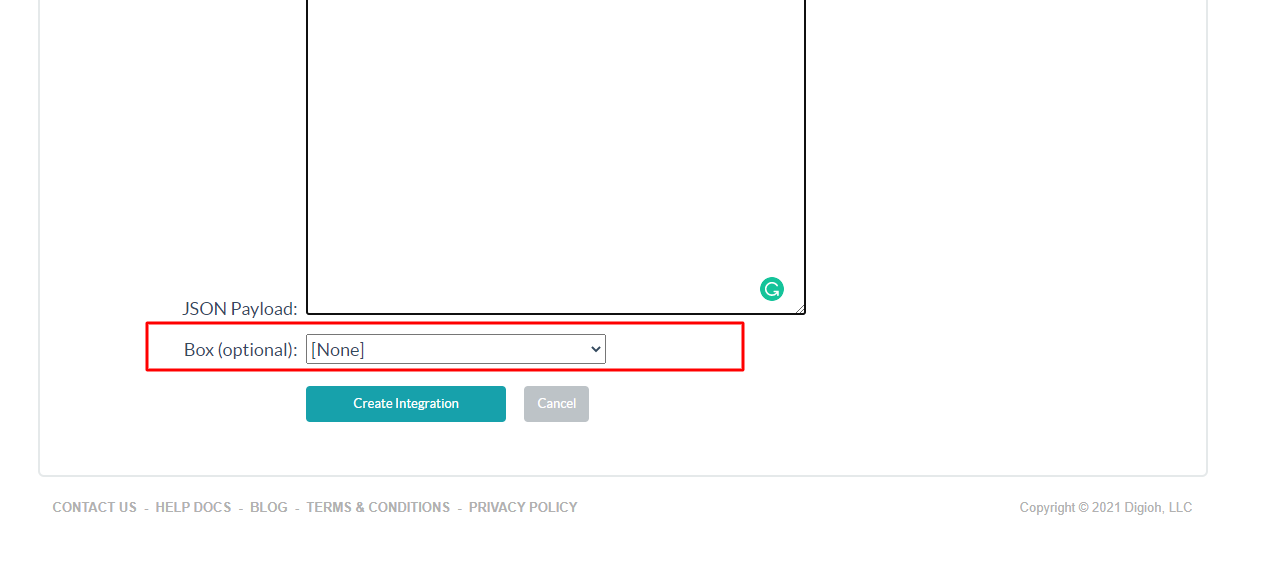
7. If you want to connect the integration to a Campaign at this time, select the Campaign from the dropdown. Then, click Create Integration.
Your integration setup is now complete. If you have questions about setting up your Braze integration, contact us, and we’ll be glad to help.
Note: This integration only adds users to your Braze account. We also have advanced Braze integrations to push custom fields, add users to subscription groups, read data from your Braze account, and delete/update users. Contact us to set this up for you.
Related Reading: