Mailercloud gives you the best email marketing tools and empowers you to flourish your business plans with user-friendly, automated, and targeted campaigns.
Digioh’s Mailercloud integration allows you to capture leads with pop-up forms, pop-ups, surveys, and quizzes, then pass that data to Mailercloud as contacts in real-time.
If you are setting up a Digioh integration by yourself, we first recommend reading about Digioh Integration Basics.
Follow these instructions to set up a Mailercloud integration.
Steps
1: Log in to Digioh
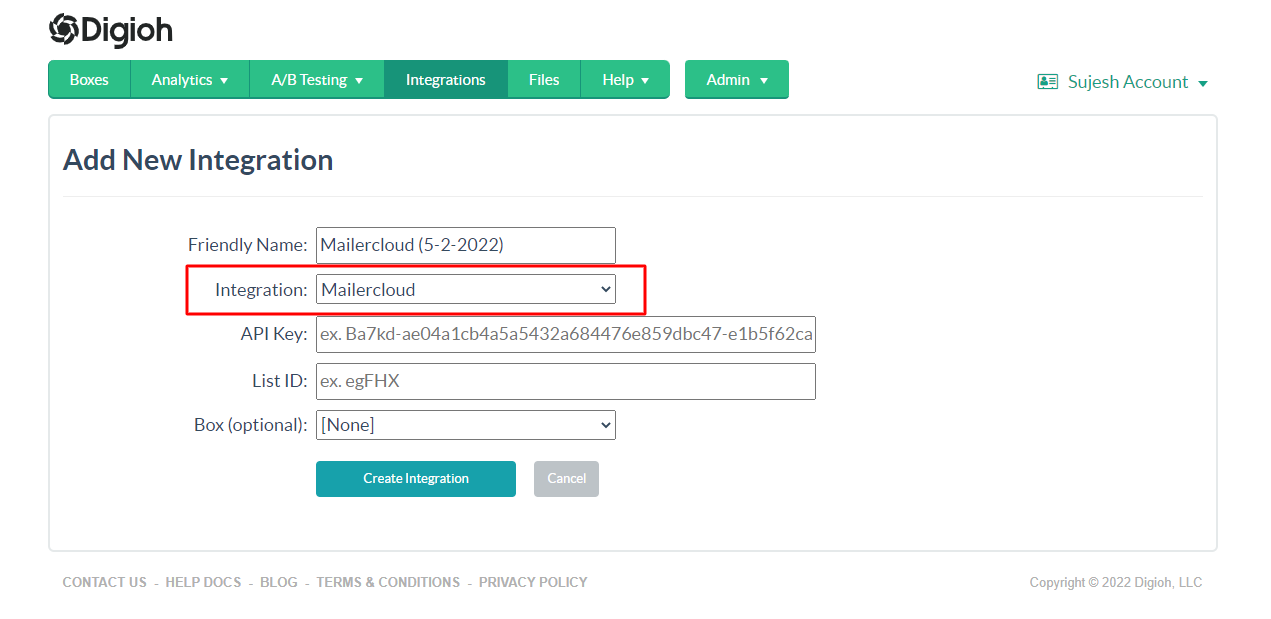
2: Add a New Integration

2: Select Mailercloud in Integration Dropdown
5: Enter Mailercloud API in API Key Field
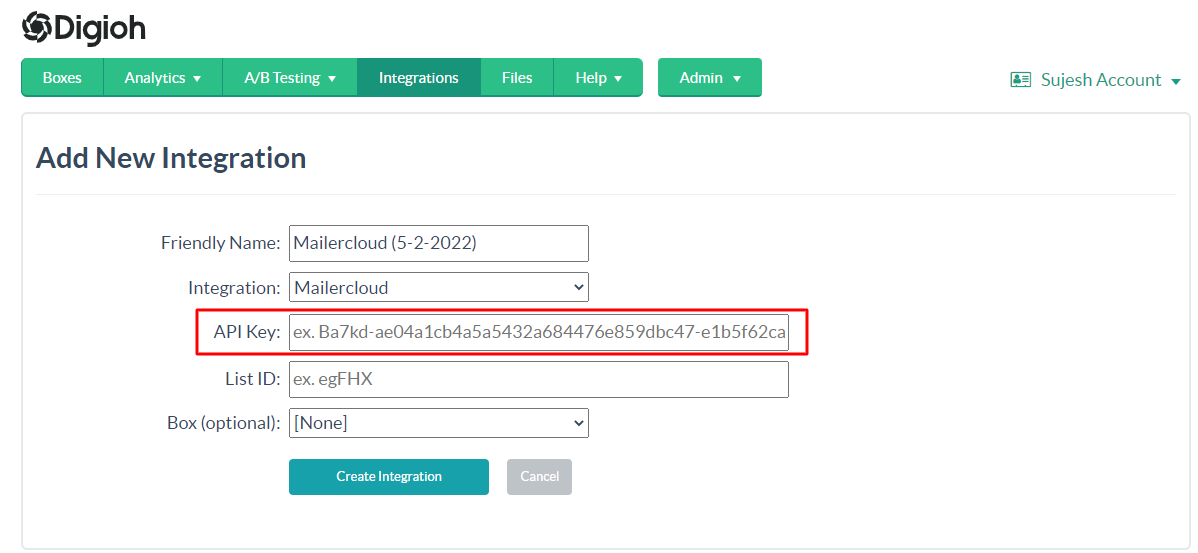
For Mailercloud API key.
1- Login to your Mailercloud account.
2- Click on the profile icon
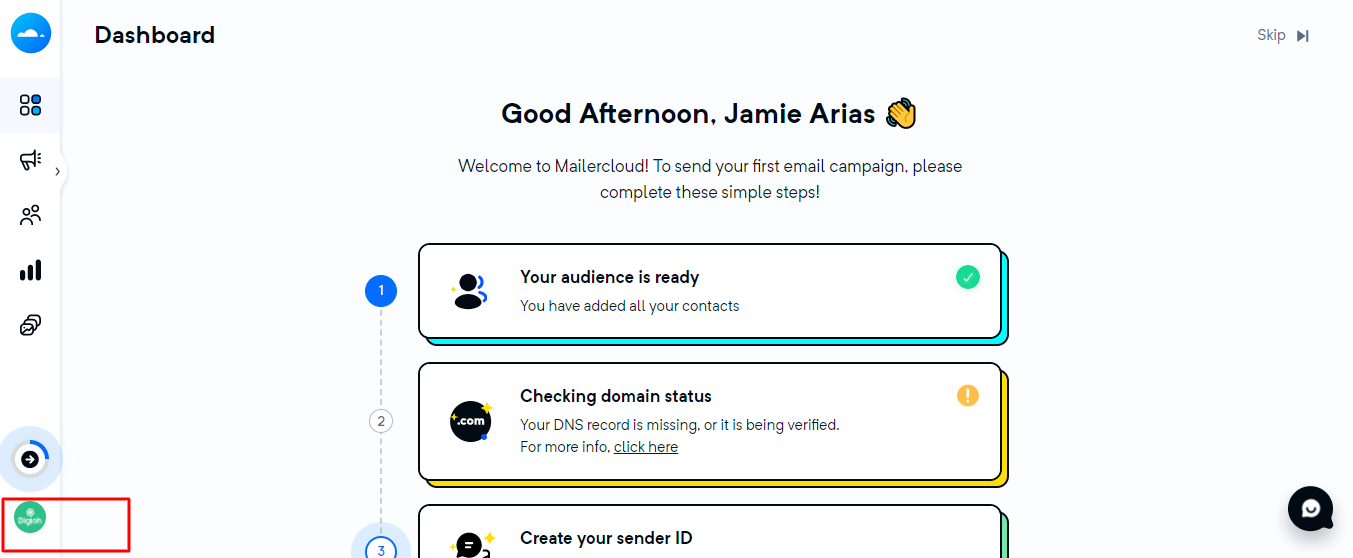
3- Then click on the Account menu link

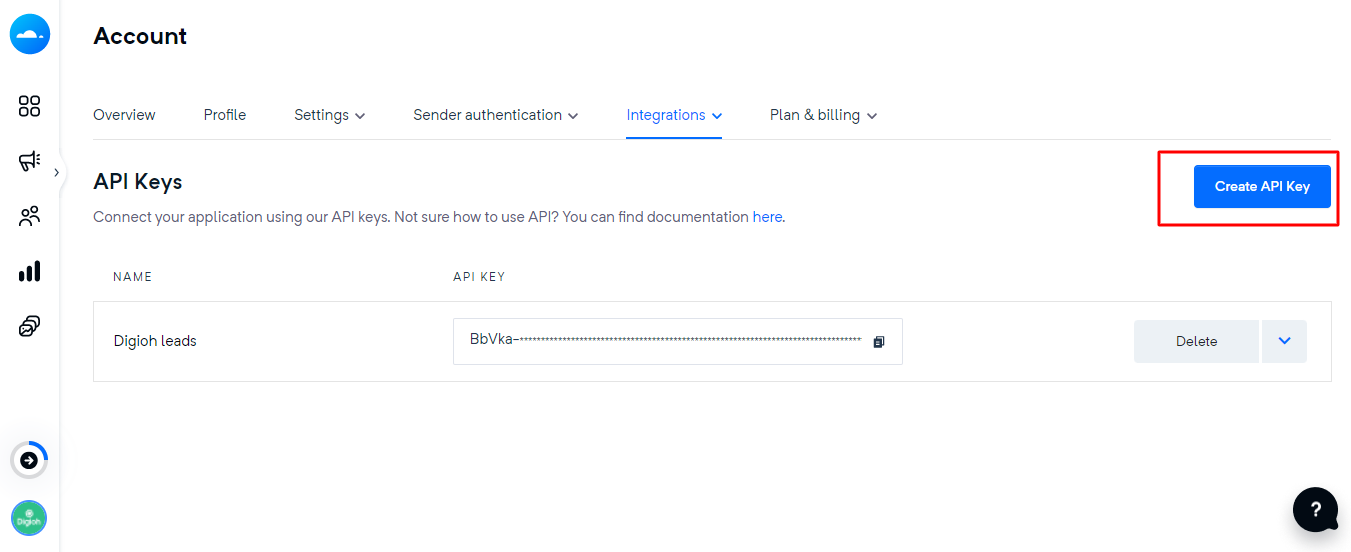
4- On the Account page hover on integrations and click on API integrations.
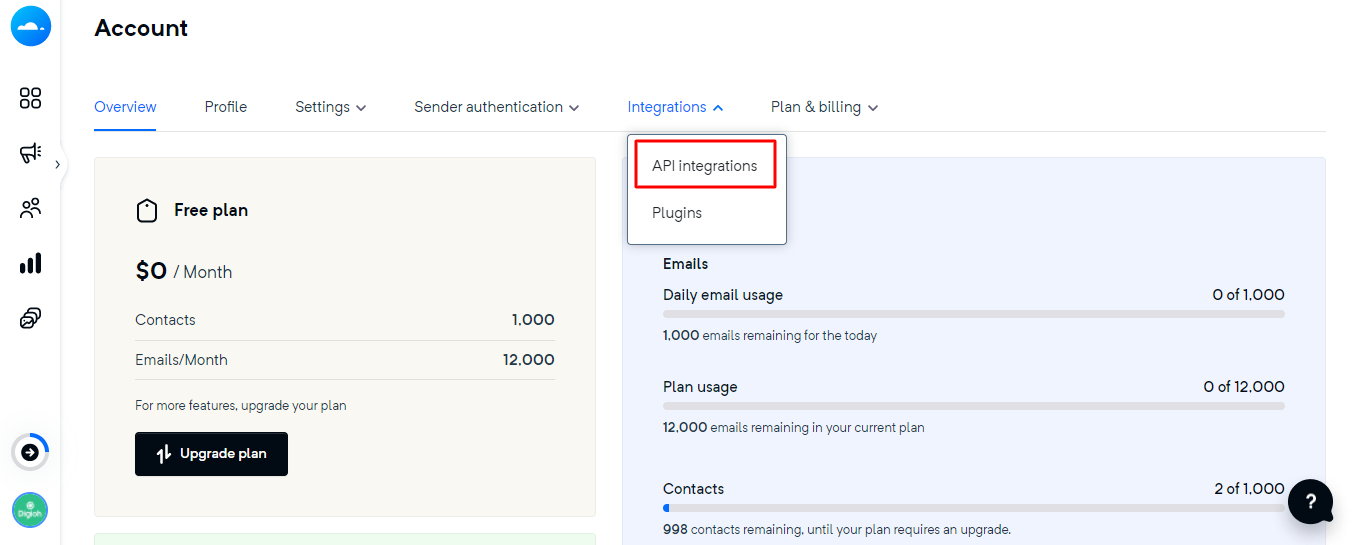
5- On the API integrations screen click on Create API Key button.
6- Enter the name of the API Key and Click on Generate Key button.
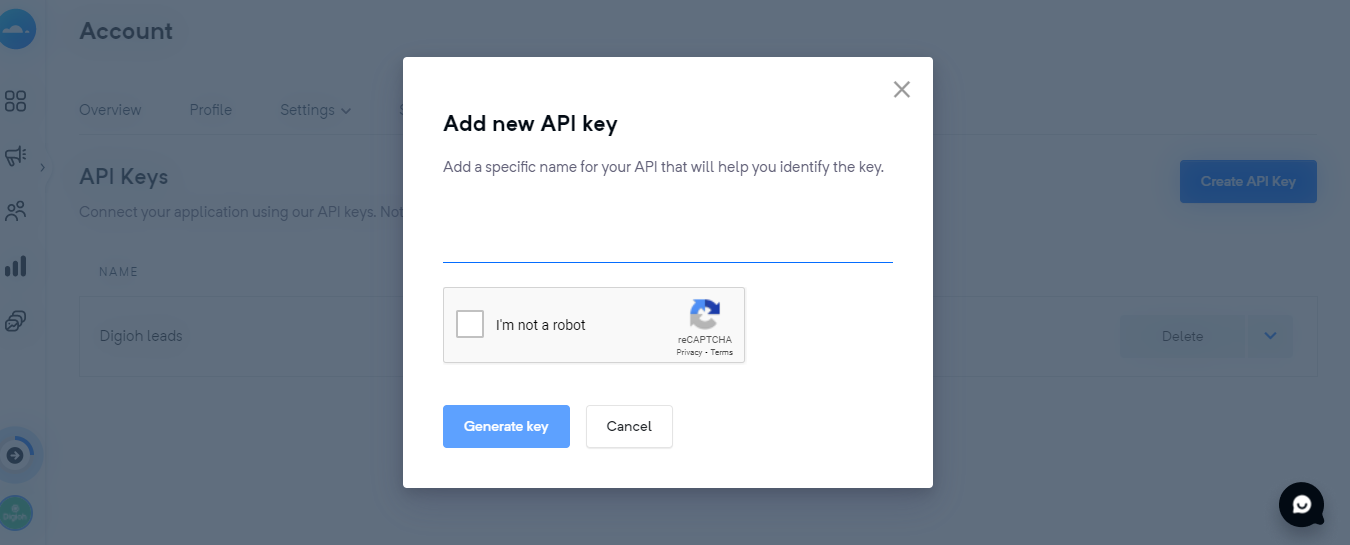
8- Copy the API key and place it in the API key Field.

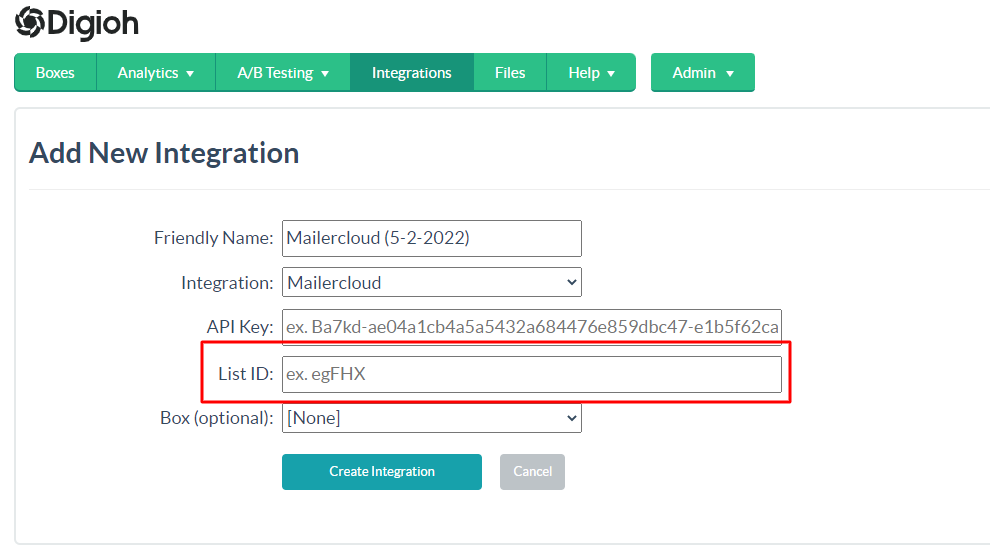
Step 5: Add Mailercloud List ID in List ID field
6: Select Campaign
Select the campaign and click Create Integration.
Note: We are passing the following JSON payload by default. If you want to add custom fields to Mailercloud Continue to step 7.
{
    "city": "[CITY]",
    "country": "[COUNTRY]",
    "email": "[EMAIL]",
    "last_name": "[LAST_NAME]",
    "list_id": "UjdZK",
    "name": "[FIRST_NAME] [LAST_NAME]",
    "contact_type": "active"
}
7: Configure Advanced Integration Settings
On Integrations Page click on the Advanced Link for Mailercloud integration.

In Set up your payload.
{
  "city": "[CITY]",
  "country": "[COUNTRY]",
  "department": "computer science",
  "email": "[EMAIL]",
  "industry": "IT",
  "job_title": "SE",
  "last_name": "[LAST_NAME]",
  "list_id": "egFHX",
  "name": "[FIRST_NAME] [LAST_NAME]",
  "contact_type": "active"
}
For creating a contact, email and list id are required. Modify the fields as needed.
You can also pass custom fields like custom_1, custom_2, custom_3, etc to Mailercloud. First, create the custom field in the Mailercloud (Visit Mailercloud custom properties documentation for creating the custom property in Mailercloud). Then, add the field name and its merge tag value to the RAW JSON section. Check the example payload below.
{
  "city": "string",
  "country": "string",
  "custom_fields": {
    "enc_id1": "string",
    "enc_id2": 0
  },
  "department": "string",
  "email": "string",
  "industry": "string",
  "job_title": "string",
  "last_name": "string",
  "lead_source": "string",
  "list_id": "string",
  "middle_name": "string",
  "name": "string",
  "organization": "string",
  "phone": "string",
  "salary": 0,
  "state": "string",
  "zip": "string",
  "contact_type": "active"
}'
Note: enc_id1 and enc_id2 are Mailercloud custom fields.
For additional Campaign metadata That Digioh can push, see this list
That’s all Your Mailercloud contact API integration is ready to go!
If you have any questions about setting up your Mailercloud integration, send us an email, and we’ll be glad to help!
Related Reading:
- How to integrate with hubspot create contact API
- How to Add an Integration to a Lightbox
- Digioh Editor Overview: Create any Form, Any Way
- Conditions Overview: Choose How, Where, and When Your Pop-Ups Display
