What you’ll learn:
- Prerequisites for integrating Facebook Pixel Events.
- How to install and configure Digioh’s FB Pixel Event extension.
- How to set up and test Facebook Pixel events on your website.
Introduction:
Welcome to our comprehensive guide on using the FB Pixel Event extension in Digioh’s Custom JavaScript Templates section. This extension allows you to seamlessly integrate Facebook Pixel Events into your website, enabling advanced tracking capabilities. By following these step-by-step instructions, you’ll be able to install the extension, configure the Pixel ID and event names, and send events to Facebook for enhanced tracking.
Prerequisites:
Before proceeding with the installation and configuration, please ensure that you have the following:
- Access to your Digioh account: Make sure you have login credentials to access your Digioh account.
- A Facebook Ads account: Create a Facebook Ads account if you don’t already have one.
- The Pixel ID: Obtain your Facebook Pixel ID from your Facebook Ads account.
Step 1: Installing the FB Pixel Event Extension
- Log into your Digioh account.
- Open the Custom JavaScript Templates section from the top right dropdown menu.
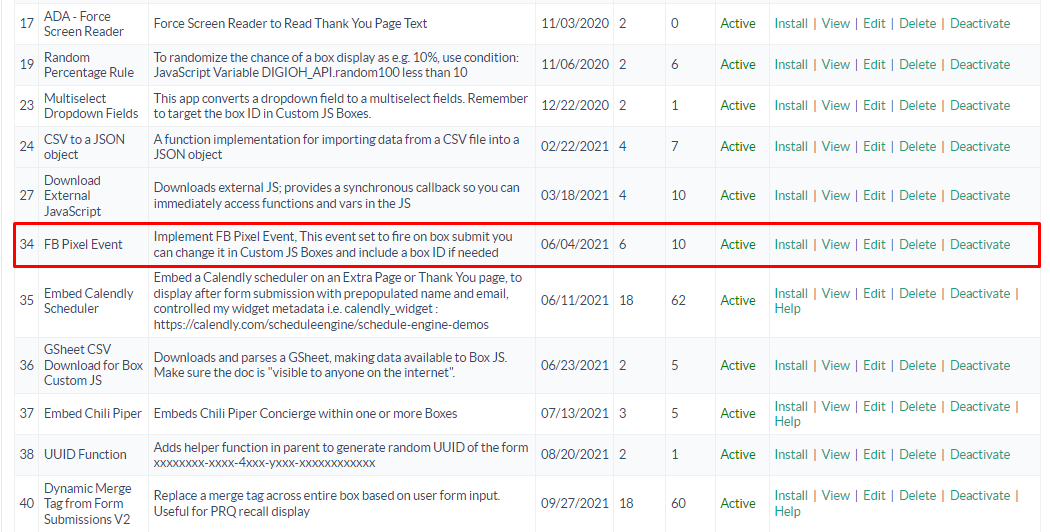
- Locate the “FB Pixel Event” extension from the templates list.
- Click on the “Install” button to initiate the installation process.
Step 2: Configuring the FB Pixel Event Extension
- After installing the extension, you’ll see a page asking for Pixel ID and Event name.
- In the provided field, enter your Facebook Pixel ID obtained in the prerequisites section.
- Specify the event name relevant to the action or interaction you want to track.
- Save the configuration settings by clicking “Install”.
![]()
Step 3: Checking the configuration.
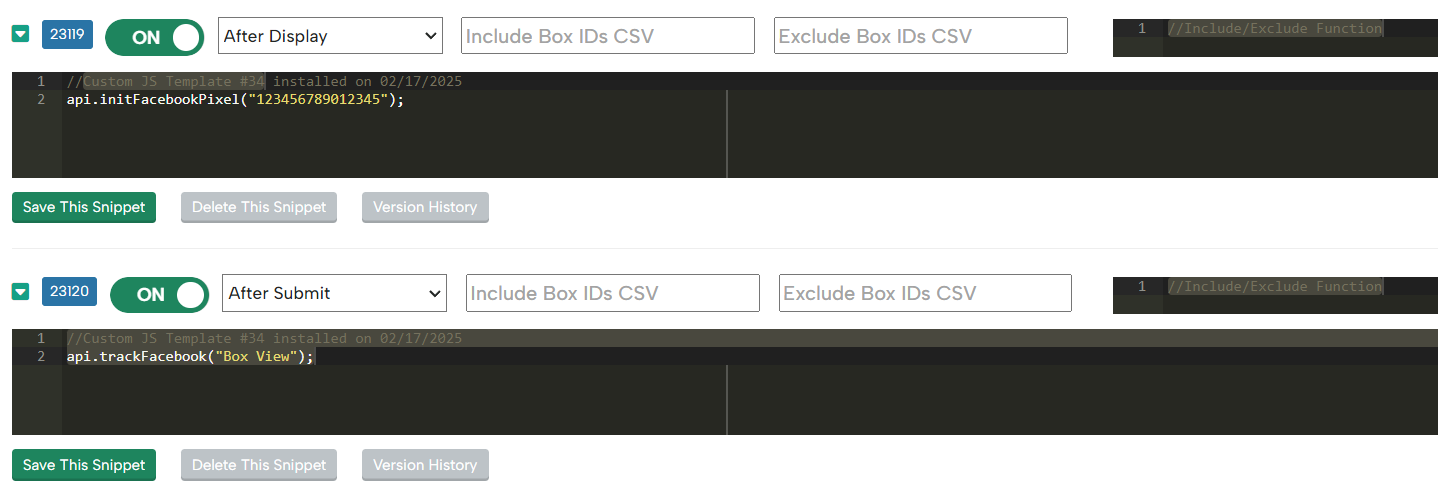
- Navigate to the Custom JavaScript page from the top right dropdown menu.
- Locate the section of code related to the event you configured in Step 2. You can easily find it by searching for “Custom JS Template #34”.
- Ensure that the code snippet provided by the FB Pixel Event extension is present in the template.
- Click Save and Publish LIVE to ensure your changes go live.
Step 4: Testing and Verifying the Integration
- Visit the relevant page on your website where the Digioh box is deployed.
- Perform the action or interaction that triggers the event you set up.
- Access the Events Manager within your Facebook Ads account.
- Verify that the event is being tracked by checking for activity related to the event name you specified.
- If the event appears in the Events Manager, the integration is successful.
Alternatively, the Meta Pixel Helper Chrome extension can help you verify the events that are firing.
You have successfully installed and configured the FB Pixel Event extension in Digioh’s Custom JavaScript Templates section. By sending events to Facebook, you can effectively track specific actions or interactions on your website, enabling enhanced tracking and SEO optimization. Remember to test the integration and consult Digioh’s support documentation, or contact our support team for further assistance if needed.