What you’ll learn:
-
How to use display rules to control when, where, and how often a campaign fires.
-
Key targeting options like device type, page URL, referral source, and user behavior.
-
How to build and combine AND/OR logic blocks for precise audience targeting.
-
Tips for using advanced targeting, like cookies, site storage, and HTML tags, to personalize the on-site experience.
Digioh Display Rules
What are Display Rules?
In Digioh, display rules determine when, where, and how often a campaign appears. These rules help you tailor on-site experiences for the right visitors at the right time.
Targeting rules allow you to display a campaign to users based on device, referral source, geolocation, login status, and more! This guide covers a few commonly-used display rules.
How do Display Rules work?
Digioh evaluates a campaign’s display rules using logical groups.
Rules inside a group = AND Logic
Within a single group, all rules must be true for the campaign to display.
If even one rule in the group is false, the campaign will not show.
An example group of rules – Every rule must pass for the campaign to fire:

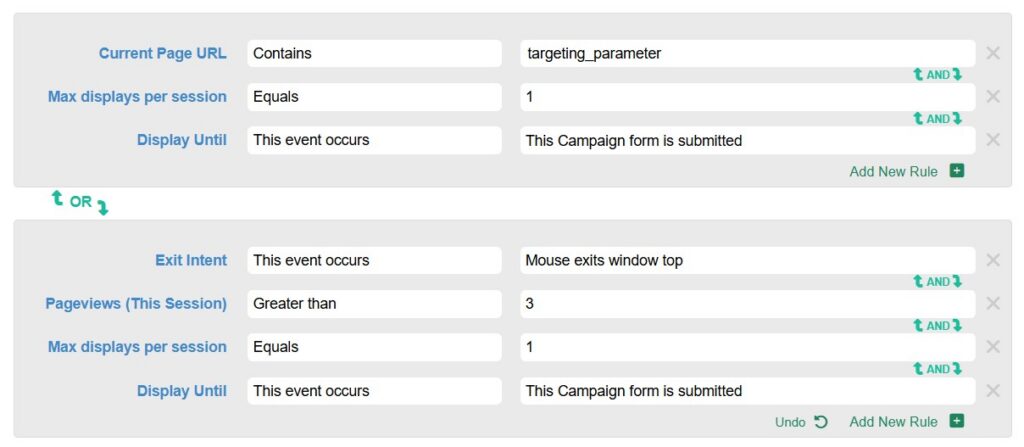
Multiple Groups = OR Logic
Additional groups of rules can be configured for a campaign. If any one group evaluates to true, the campaign will display.
An example of two groups of rules – If either group evaluates to true, the campaign will fire:
Adding a Display Rule
You can access the display rules from two places:
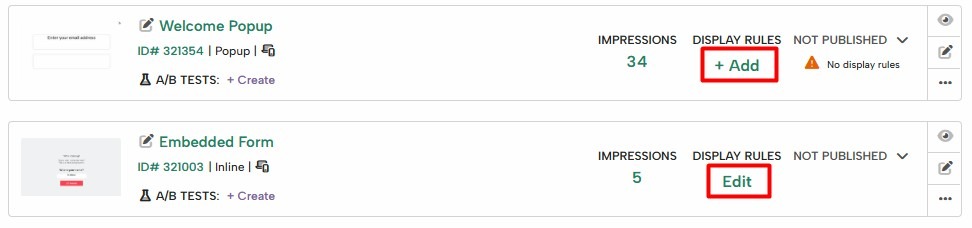
- From the campaigns list, click on “+Add” (when the campaign doesn’t have any rules yet) or “Edit” (when the campaign already has rules added):
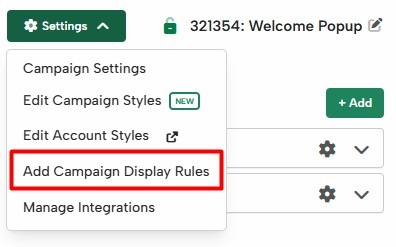
- From the campaign editor, go to Settings > Edit Campaign Display Rules:
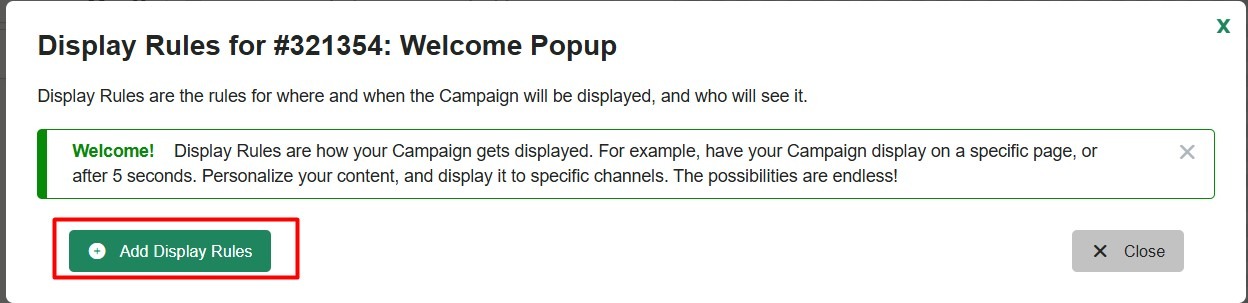
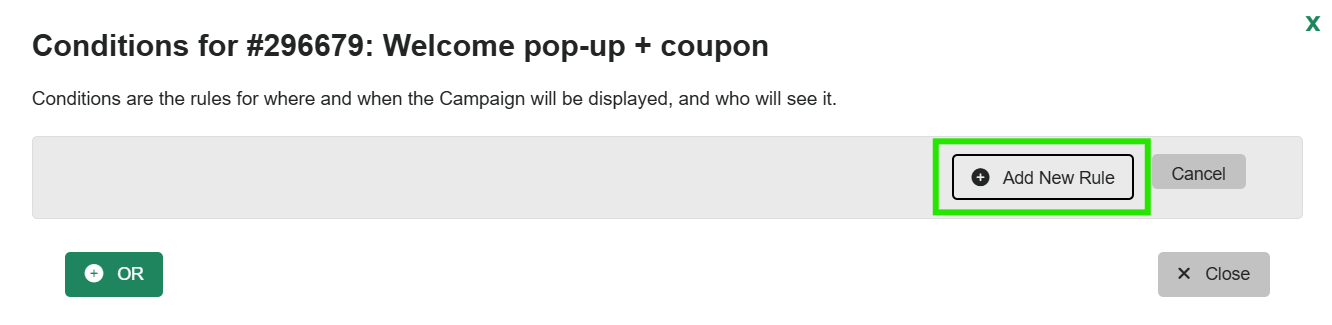
- Once in the rules editor, click “Add Display Rules”:
- Then select “Add New Rule” to start adding your rules:
- Then, choose the desired rule from the drop-down.
- If needed, click the ‘OR’ button to add a new grouping of rules.
Available Rules Breakdown
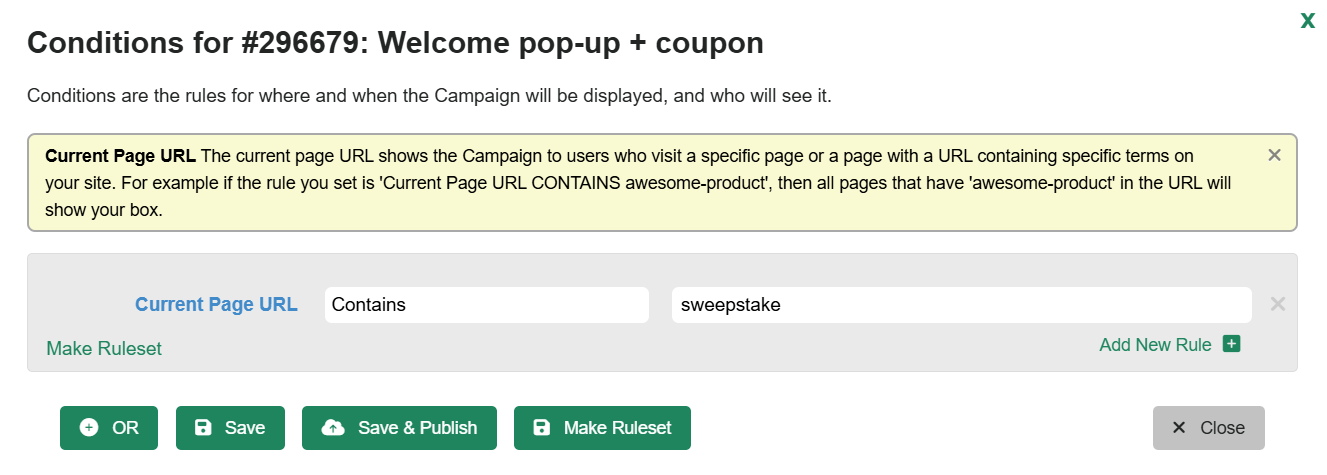
Current Page URL Rule
This is the most common URL-based rule. The Current Page URL rule lets you show or hide a campaign on any URL containing a specific string. For example, you can have a pop-up that you only want to show on the sweepstake page:
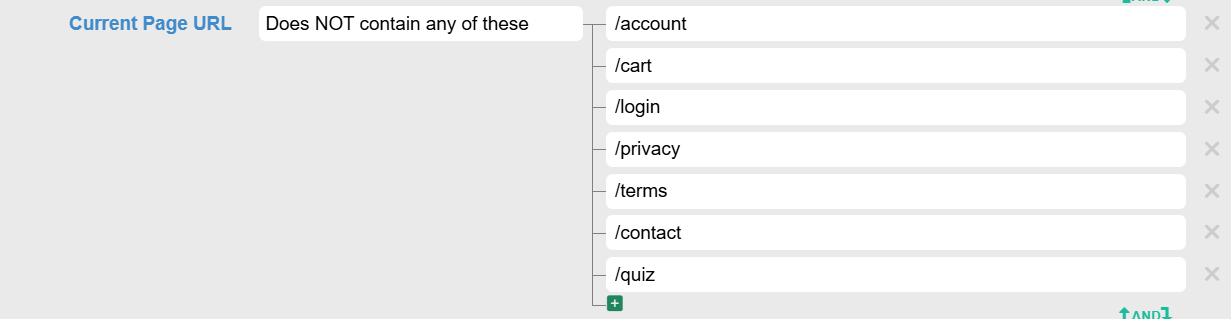
You can also use this rule to anti-target specific URLs, for example, you might not want the campaign to show on URLs containing any of these:
This rule evaluates against the full URL; therefore, it’ll be true if any part of the URL contains or doesn’t contain this specific string, regardless of what is before or after the string in the URL.
In addition to contains, you can also do:
- Starts with: which will only evaluate the beginning of the URL.
- Ends with: which will only check the ending of the URL.
- Equals: Will look for the full URL to match, be very careful when using this rule as small variations of the URL would cause it to evaluate as false.
There are also a few variations of this URL rule if you want to be more specific:
- Current URL protocol: This is typically either http: or https: (make sure to include the colon).
- Current URL Host: The URL Host is only the domain portion of the URL. For example, if the current URL was https://www.mysite.com/awesome-product, then the URL Host would be: www.mysite.com
- Current URL Path: The URL Path is the ending part of the domain after the 3rd backslash and before the “?”. For example, if the current URL was https://www.mysite.com/awesome-product/sku8732984?qs=abcxyz, then the URL Path would be: /awesome-product/sku8732984.
-
Current URL Query String: The URL Query String is the part of the URL that comes after the “?” character.
- Current URL Hash: The URL Hash is the part of the URL that comes after the “#” character.
-
Referring Website URL: The referring website rule shows a Campaign based on the full or partial referring URL that brought the visitor to your site. You can show a targeted Campaign for traffic that comes from Yelp or Facebook.
-
Landing Page URL: This rule shows the Campaign to visitors depending on the URL they landed on when first entering your site.
-
Pages Navigated URLs: This rule allows you to show or hide the Campaign based on whether the visitor has or has not navigated to a specific URL in the past. For example, if you create a rule that does NOT Contain “Thank-You”, it won’t show your Campaign to anyone who has gone to your thank-you page. This is a good way of blocking existing customers from seeing your campaign.
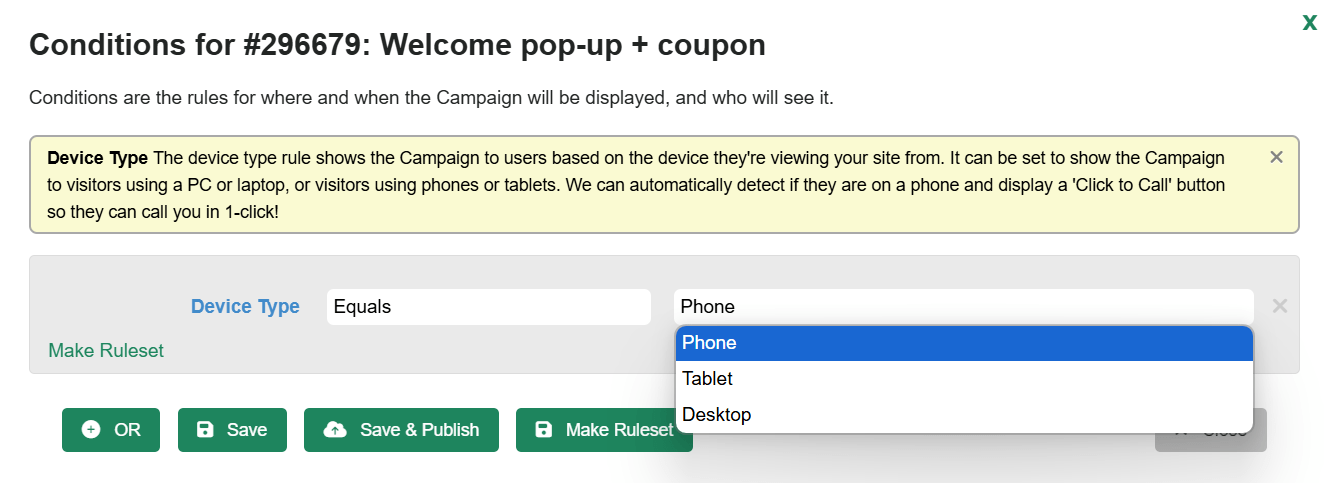
Device Type Rule
The device type rule lets you display a campaign depending on whether your visitor is using a desktop, phone, or tablet.
If you want to be more specific on this targeting, you can also use the following variations of this rule:
-
Browser Type: You can show or hide the campaign to visitors using a specific browser (like Chrome, Firefox, Safari, etc).
- Operating System: You can promote a campaign only to visitors in an specified operating system (like Windows, Mac, Linux, etc).
Time on Site
Sometimes it’s a good idea to let your users browse your site for a bit before hitting them with a campaign. Control exactly when you want the user to see a campaign with these rules.
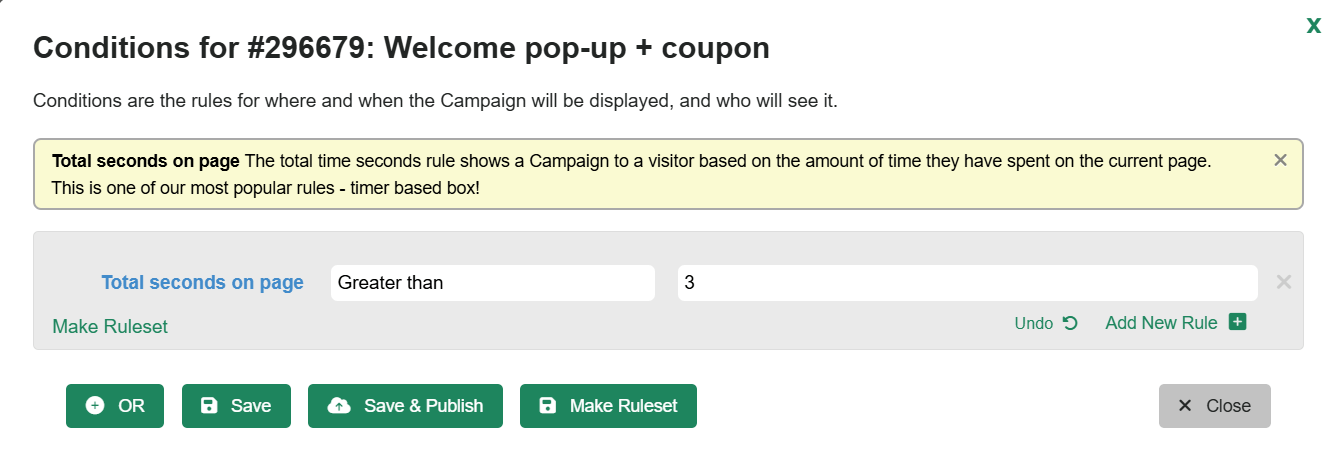
Total Seconds on Page:
You can use the total seconds on page rule to show the campaign after the user has been on the site for a specific number of seconds, for example, you can have a 3-second delay:
The two variations of this rule are:
- Active Seconds on Page: This refers to the time the visitor has been active on the current page.
- Idle Seconds on Page: This counts towards the time the visitor has been on the site without performing any action.
Display Frequency
Display frequency rules control how many times a campaign is allowed to show during a visitor’s journey. This is key to preventing overexposure and improving user experience.
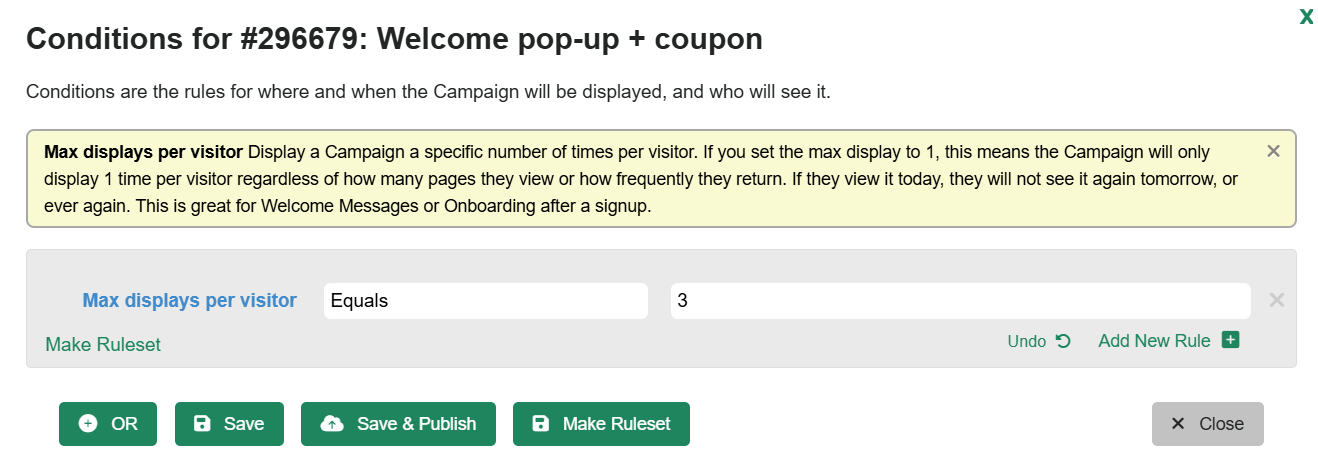
Max displays per visitor
This limits the total number of times a visitor will ever see a campaign, regardless of how many times they come back to your site.
Example: If you set this to 3, the campaign will only display a maximum of 3 times for that visitor, whether that’s today or a month from now.
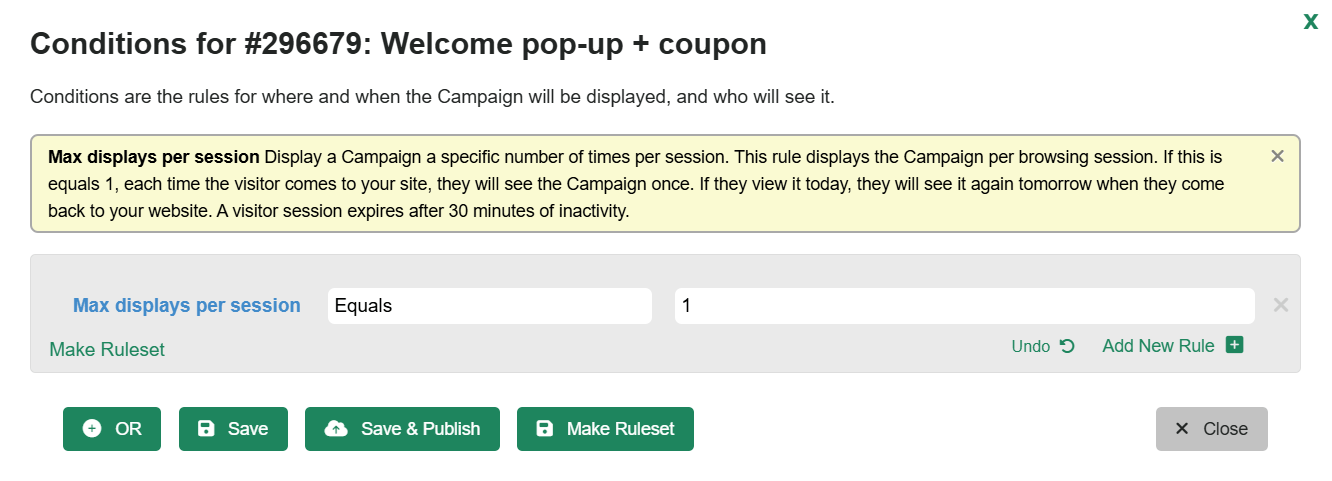
Max displays per session
This controls how many times the campaign shows within a single browsing session (from when the visitor lands on your site until they close the tab or are inactive for 30 minutes).
Example: If this is set to 1, the user will only see the campaign once per session, but they could see it again if they come back tomorrow.
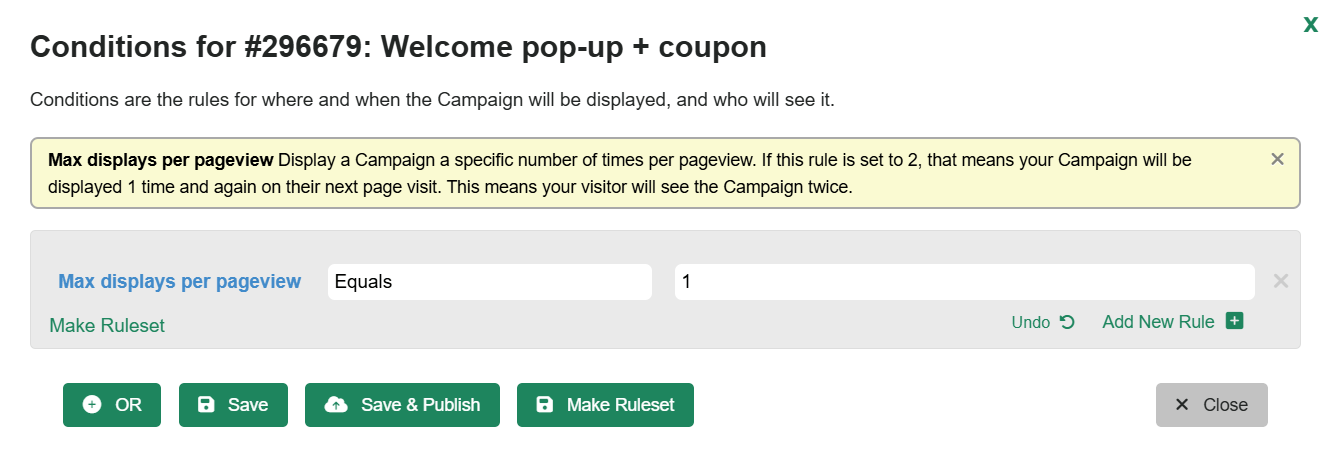
Max displays per pageview
This limits the number of times a campaign can appear on a single page load.
Example: If a visitor reloads the page or navigates back and forth, the count resets. Setting this to 1 prevents the campaign from popping up multiple times on the same pageview.
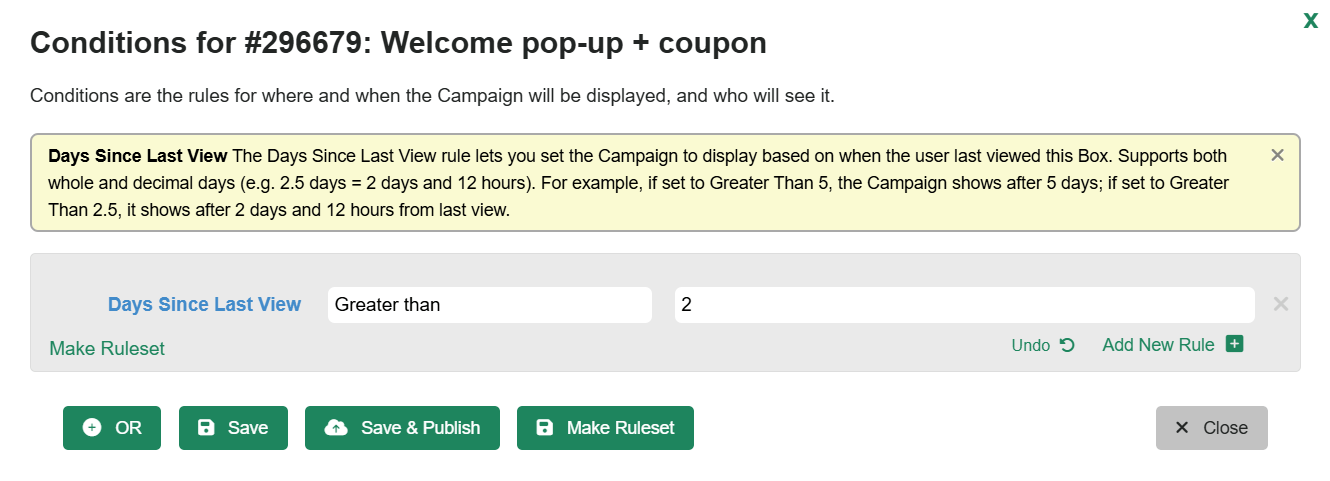
Days Since Last View
The Days Since Last View rule lets you control how often a returning visitor will see the same campaign. This is helpful if you want to avoid showing the same message every time someone visits your site.
Example: If you set the rule to be greater than 2 days, the visitor will see the campaign the first time they qualify. If they return within the next two days, the campaign will not show again. But if they come back on day three or later, the campaign will display again.
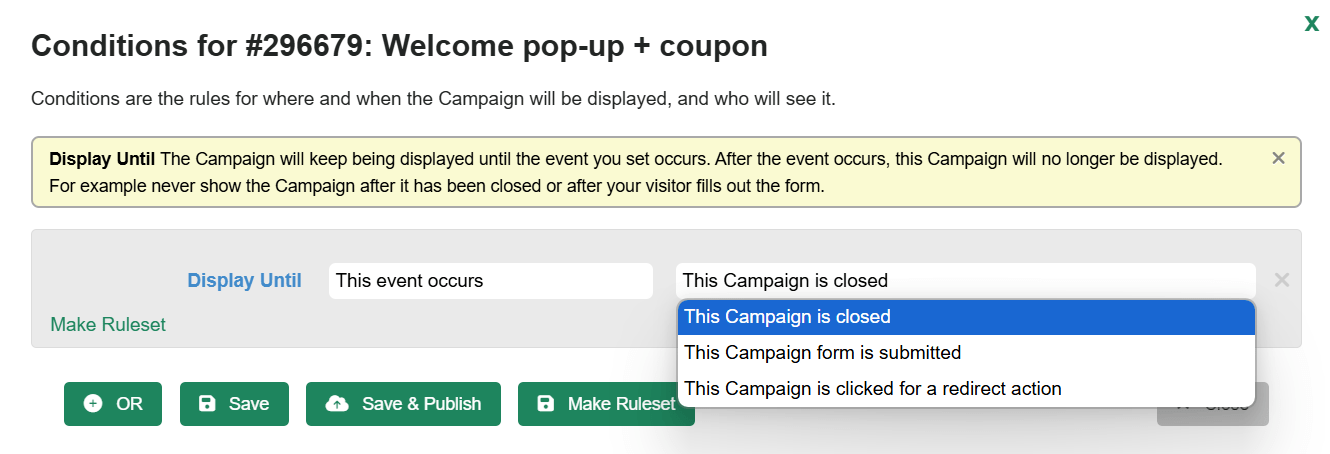
Display Until
The Display Until rule controls how long the campaign will continue showing until a specific user action occurs. Once this event happens, the campaign will stop displaying for that visitor.
You can select one of these options:
- This campaign is closed: Stop showing the campaign if the visitor closes it. Use this carefully to avoid hiding it forever after one accidental close.
- This campaign form is submitted: Stop showing the campaign once the visitor submits the form. Perfect for lead-gen forms, welcome offers, etc.
- This Campaign is clicked for a redirect action: Stop showing the campaign when the visitor clicks a button or link that redirects them to another page.
Note: You can also leverage this targeting for other campaigns, for example, don’t show if another Digioh campaign has been submitted. To find the list of your other campaigns, scroll to the bottom of the rules list.
User Behavior Rules
Campaigns can be configured to display based on a user’s behavior on site. The most popular examples are Scroll Percent and Exit-Intent.
Scroll Percent Rule
The Scroll Percent rule allows you to trigger a campaign after a visitor has scrolled down a certain percentage of the page’s length. This is especially helpful for:
-
Showing offers after a user is engaged with your content.
-
Triggering pop-ups or banners when someone reaches product details or key sections of a landing page.
-
Preventing campaigns from showing too early.

Note: As an alternative, you can also use a Scroll Pixels to specify the number of pixels someone has scrolled rather than the percentage.
Exit-Intent Rule
The Exit-Intent rule detects when a user moves their mouse away from your site, allowing you to trigger a campaign. Using Exit-Intent, you can offer visitors a deal before they exit your site.
Read more about how to set up an exit intent here.
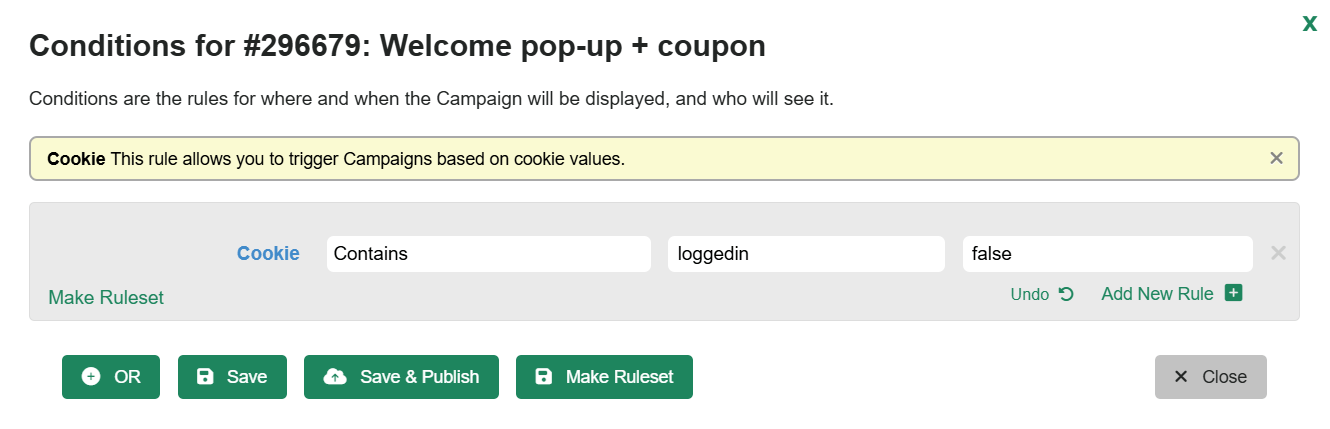
Site Storage Rules (advanced)
If you want to set up more advanced targeting, you can also configure a campaign to show based on more specific browser information, using these rules:
- Cookies: To set up a Cookie rule, you need to know how your cookies are set up. In this example, we’ll assume the Cookie Name is “loggedin” and the Cookie Value is true or false. To target users who are not currently logged in, choose “false” as the value.
- Local or Session Storage: You can target any element available in your local storage; you’ll also need to know the name and value.
Display Based on Tags (advanced)
Displaying campaigns on pages that contain the same tags is a great way to display content on related pages.
HTML Exists jQuery Rule
With the HTML jQuery rule, we can choose a tag and display content on any page that contains the same tag.
To do this, copy the selector of the tag you want to reference. To do that, right-click the tag on the page, and click “Inspect” to open your dev tools.
Then, right-click on the tag in the HTML code, go to “Copy,” and choose “copy selector.”
Paste that into the rule and test it out:

This rule is more advanced, so if you need help, don’t hesitate to contact support.
In fact, for our example, we had to adjust the selector a bit to get it to work.
The selector we copied was:
body > div.section.cc-product-detail > div.product-details-wrap > div.w-dyn-list > div > div > a
However, to get it to work we had to be a bit more specific:
body > div.section.cc-product-detail > div.product-details-wrap > div.w-dyn-list > div > div a:contains(‘Camici’)
How did we know how to do that? Years of web development experience! So if you get stuck on this one, just let us know!
You can do many other things using rules, but this is a brief overview of some of the most common uses. If you are not sure how to setup an specific use case, feel free to reach out to us and we’ll be happy to help you further.