![]()
What You’ll Learn in This Article
-
Locate the key Zaius credentials needed for integration
-
Set up and authenticate a Zaius integration in Digioh
-
Customize your integration to push additional data fields
-
Start sending data directly into Zaius to fuel your marketing campaigns
Zaius combines a single customer view, multi-channel marketing automation, and cross-channel attribution into one B2C marketing platform, empowering marketers to drive repeat purchases and maximize customer lifetime revenue. By integrating Digioh with Zaius, you can pass data from forms, pop-ups, surveys, and landing pages to Zaius in real-time.
If you are setting up a Digioh integration by yourself, we first recommend reading about Digioh Integration Basics.
Follow these steps to set up your integration.
Step 1: Get Zaius Tracker and List IDs
- Zaius Tracker ID
- Zaius List ID (usually the name of your list, for example: “master” or “list1”)
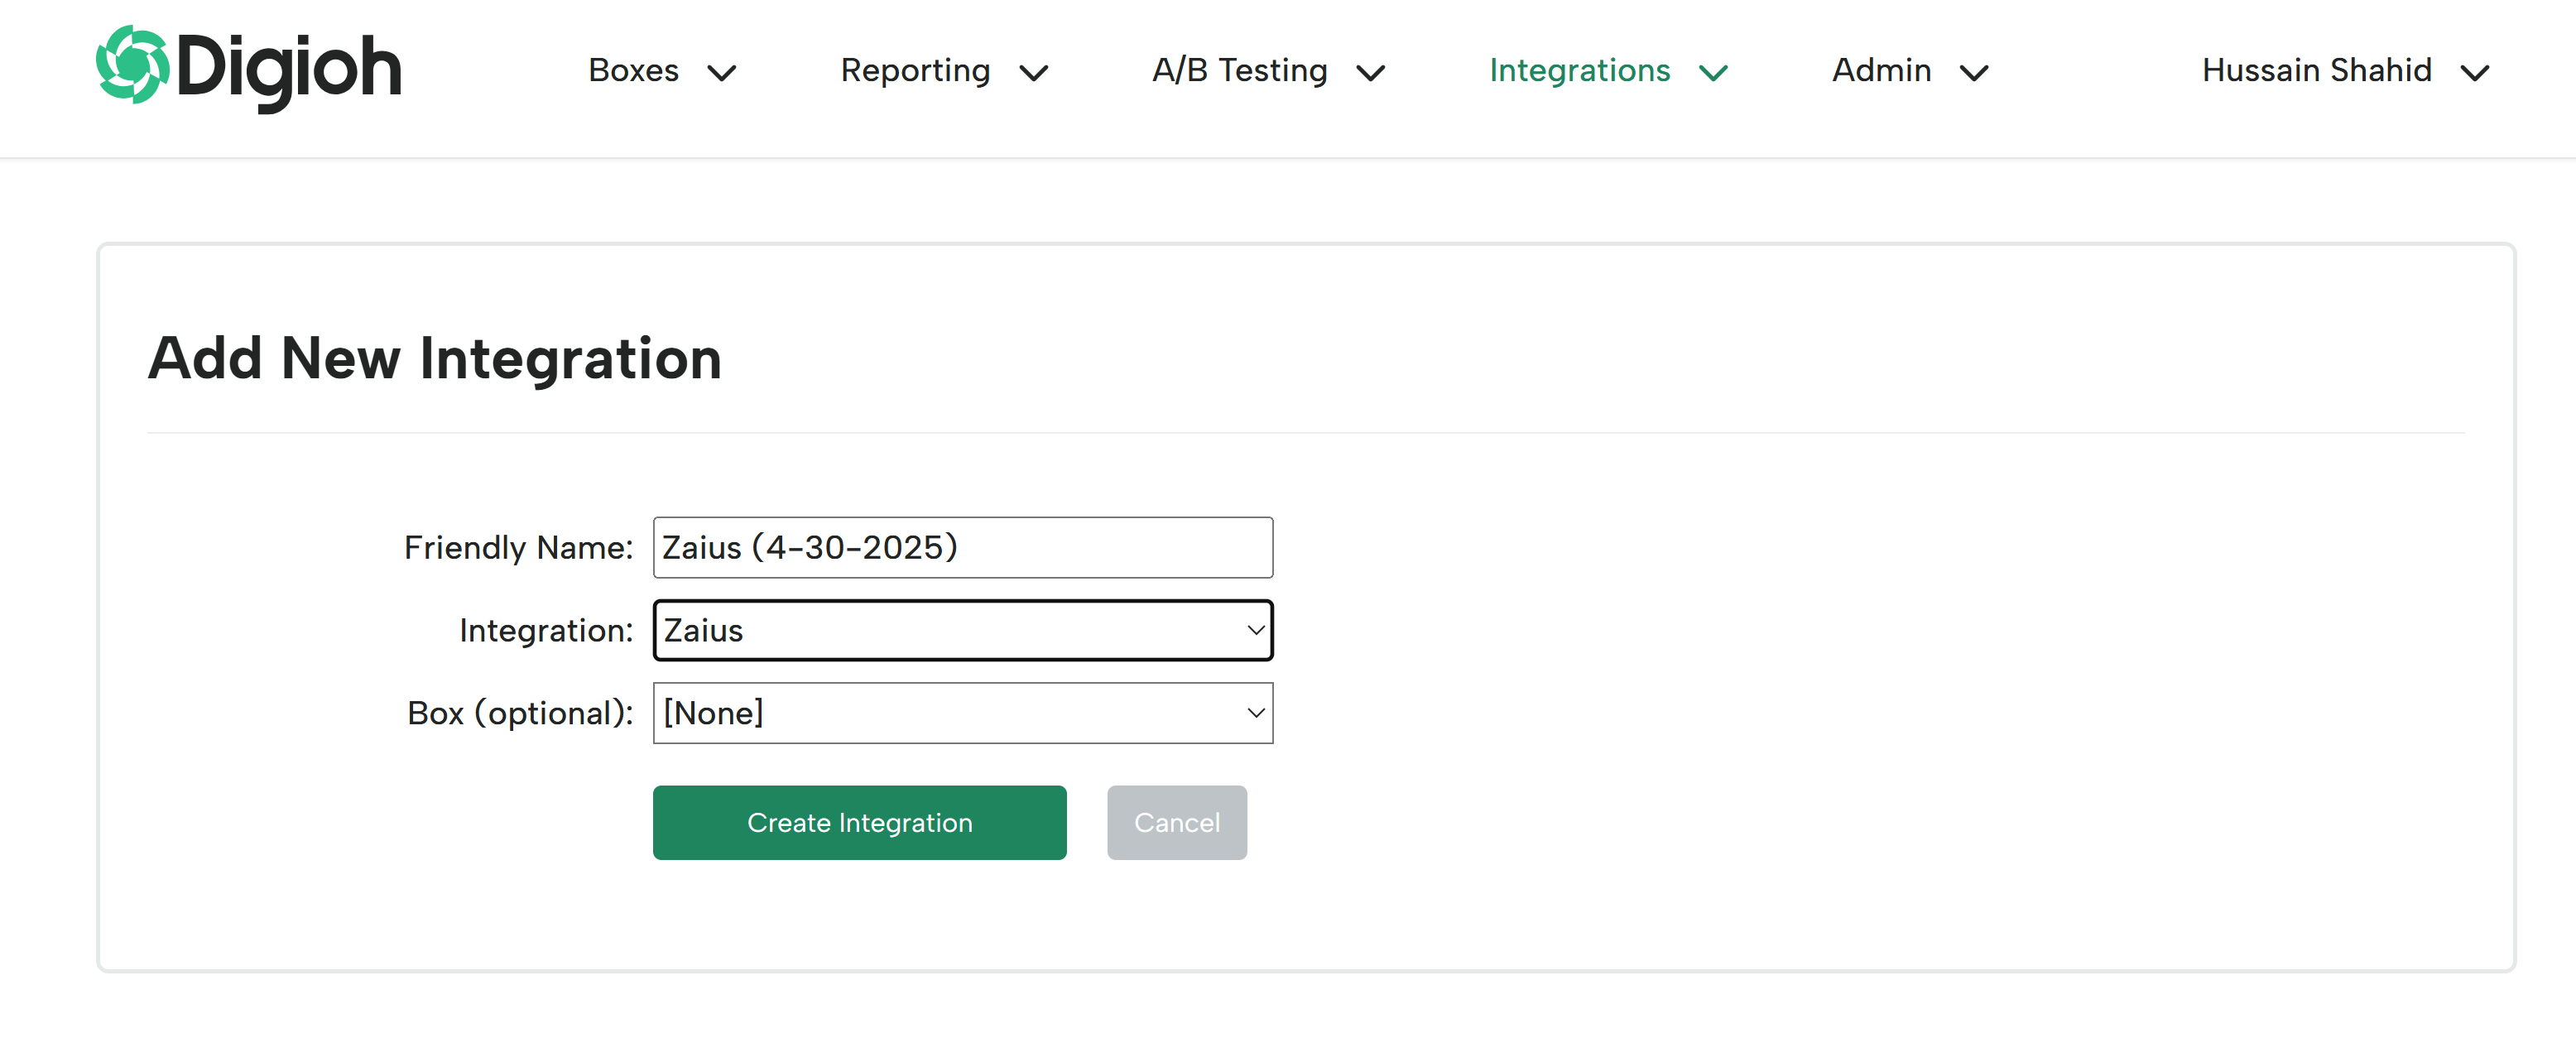
Step 2: Create New Digioh Integration
Head back to your Digioh account, and click Integrations at the top. From the dropdown, click the New Integration button.

On the next page, select Zaius from the integration dropdown, and give the integration a name. Click the Create Integration button.
Step 3: Authenticate Your Zaius Integration
Enter your Zaius information and save your integration.
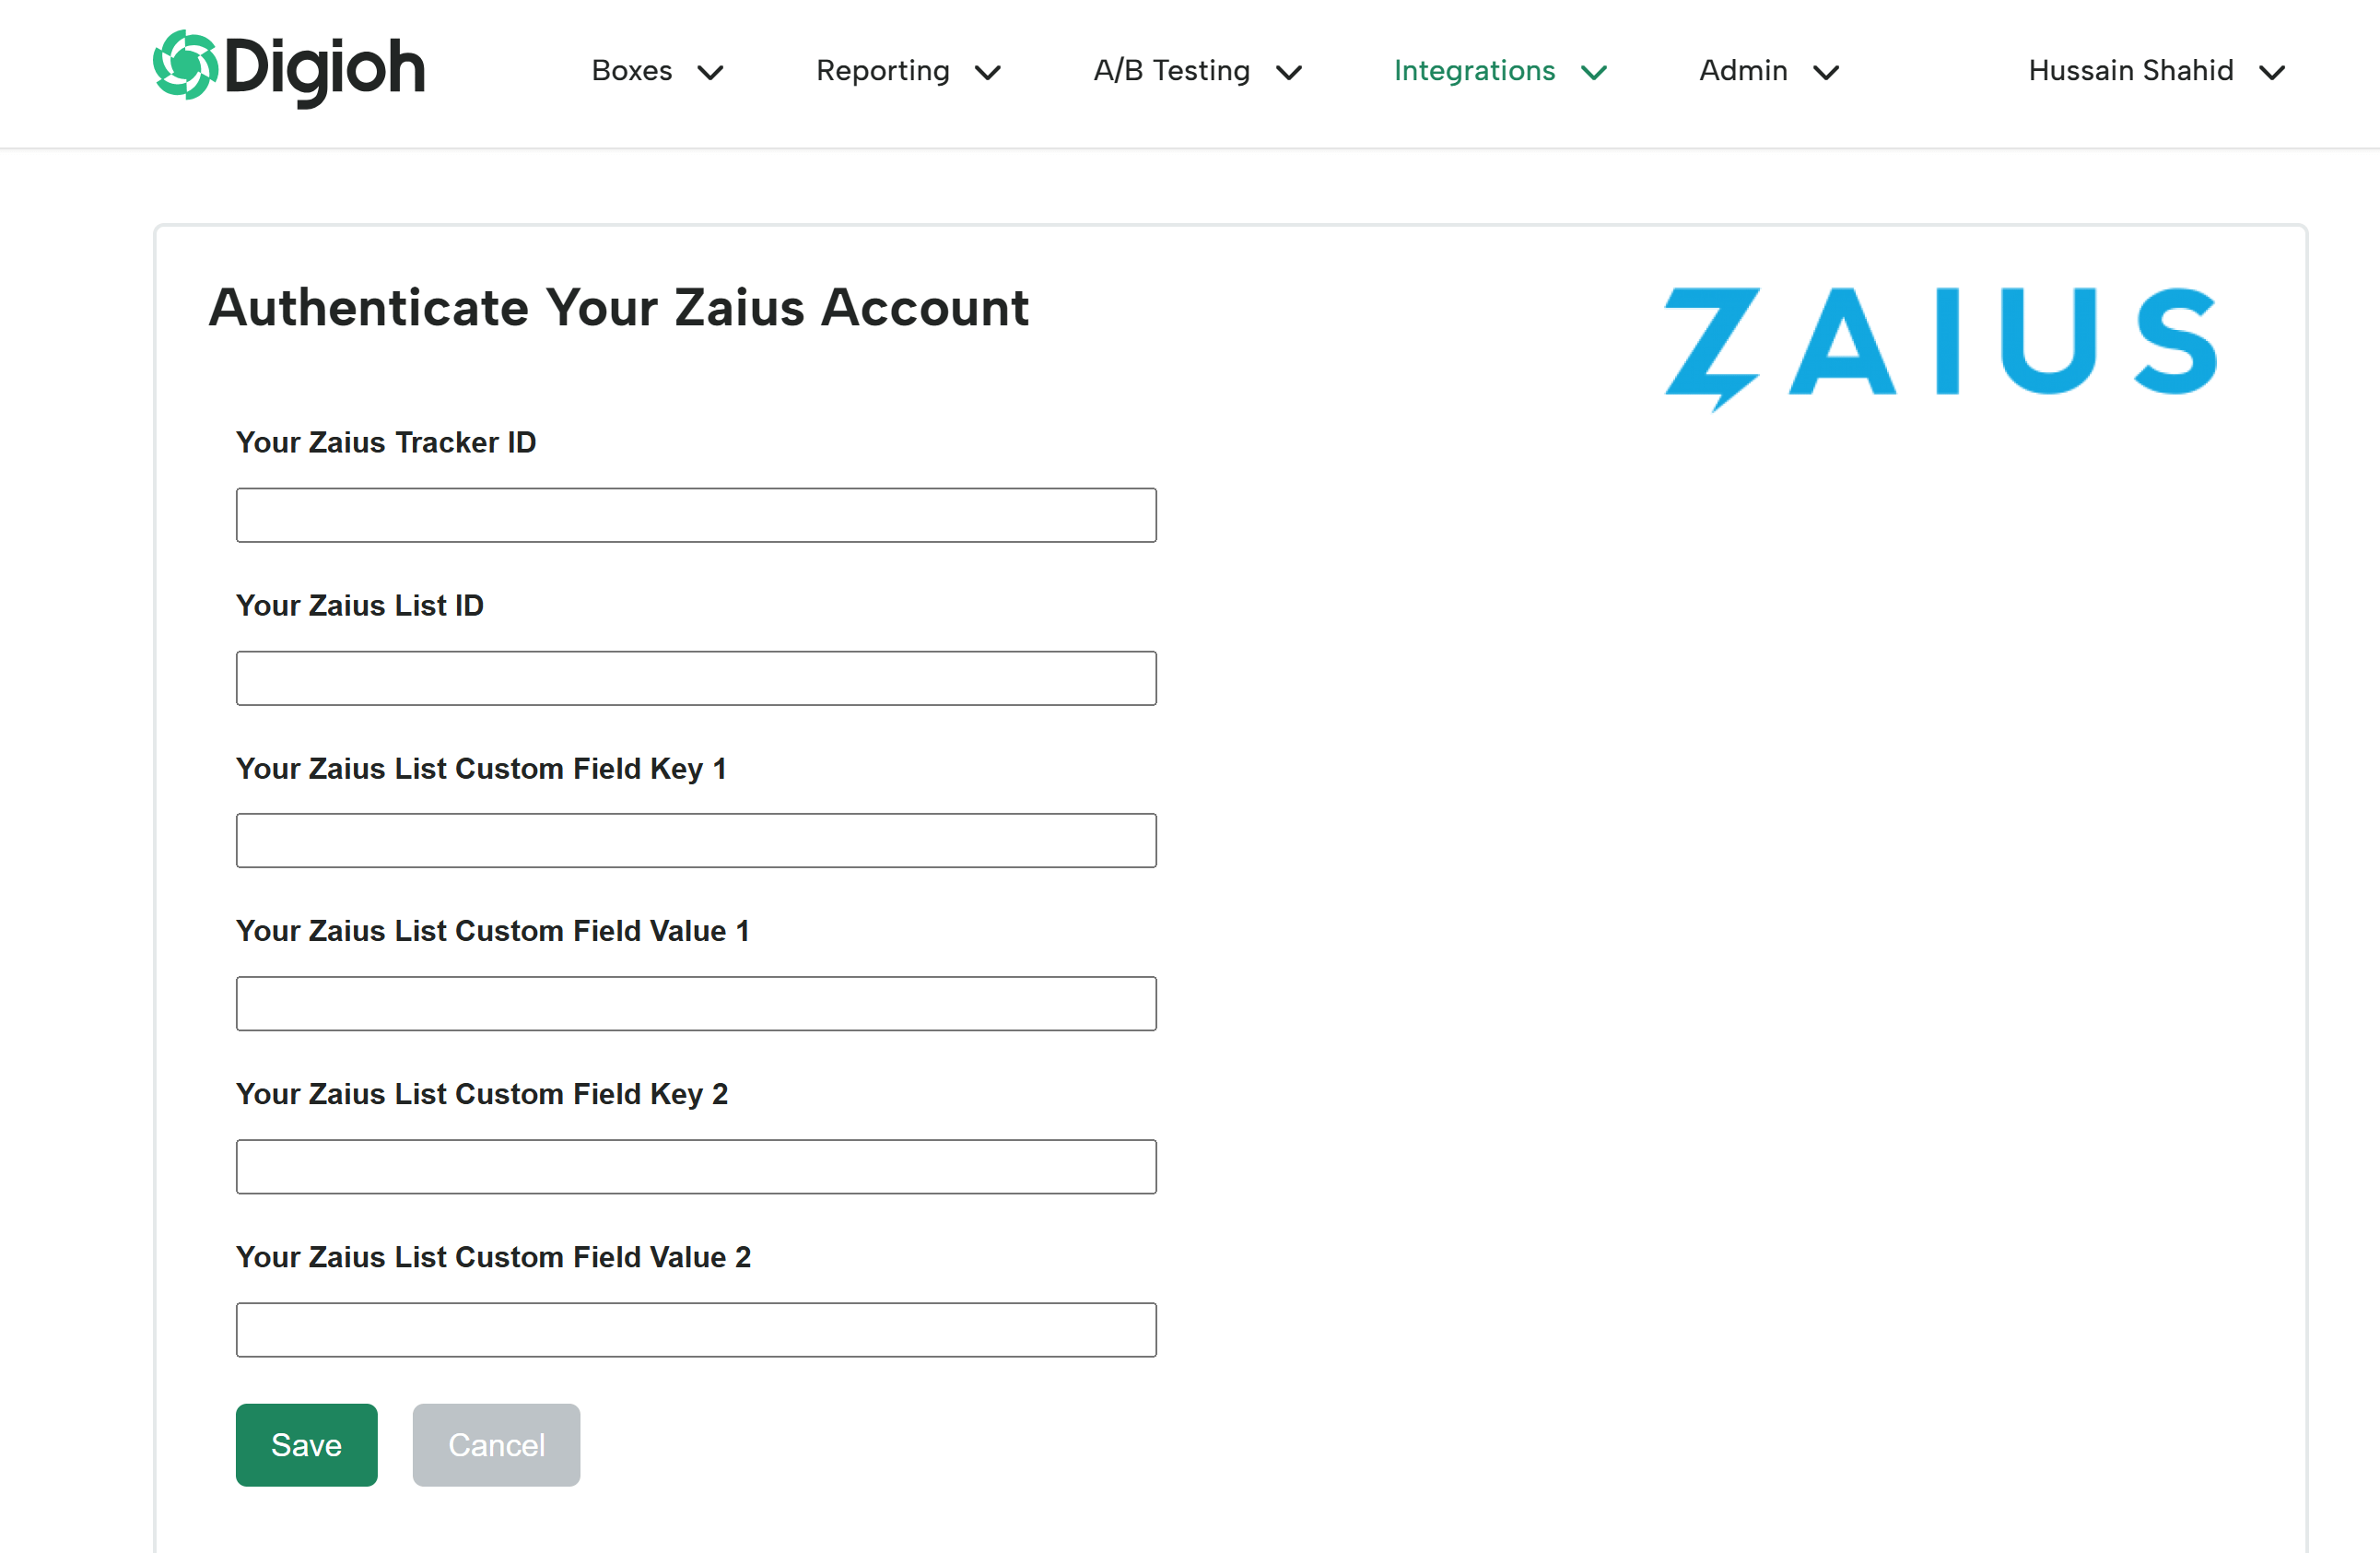
By default, Digioh only pushes the email field. But we can also push all our data fields (like web source, referring URL, etc) and custom fields. Just create those custom fields in Zaius, let us know what you named them, and we can help you pass this data to Zaius.