What You’ll Learn in This Article
-
Locate your Maropost Account ID, List ID, and API Key
-
Set up and authenticate your Maropost integration in Digioh
-
Add your integration to forms, pop-ups, or landing pages
-
Customize and update payloads to pass additional custom fields to Maropost
With Digioh, you can create web forms, pop-ups, landing pages, and email preference centers integrated with Maropost‘s marketing automation platform. Digioh sends captured emails to Maropost in real-time. The integration is fully configurable and supports custom and hidden fields.
If you are setting up a Digioh integration by yourself, we first recommend reading about Digioh Integration Basics.
To set up your integration, follow these steps.
1. From Digioh, go to the “Integrations” page, click “New Integrations,”.

2- Select “Maropost” from the drop-down.
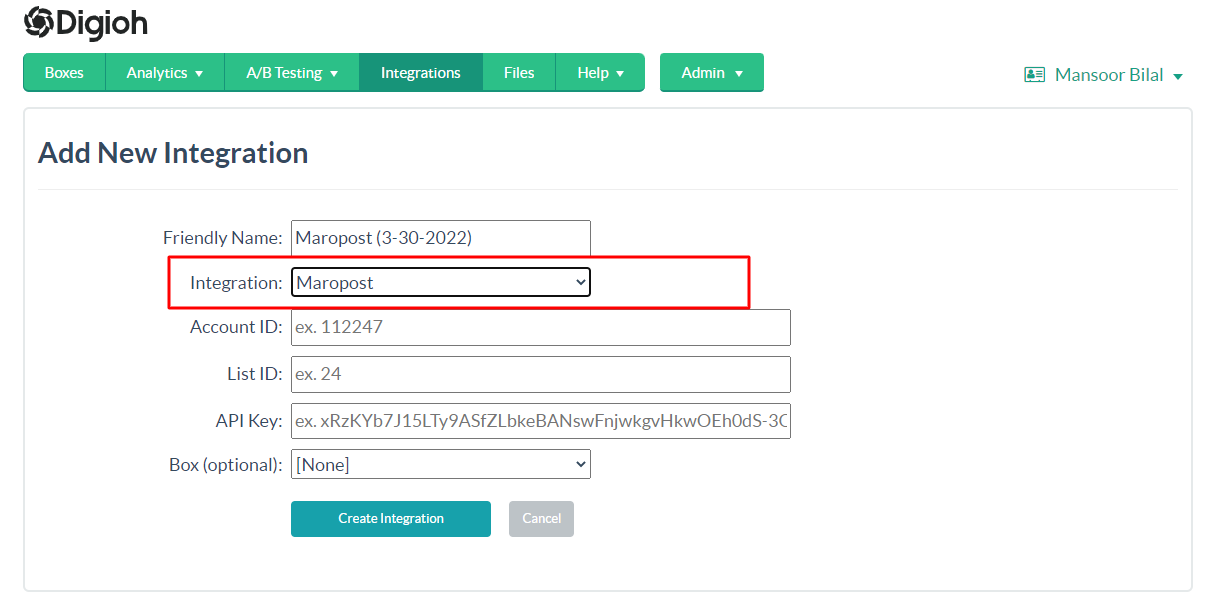
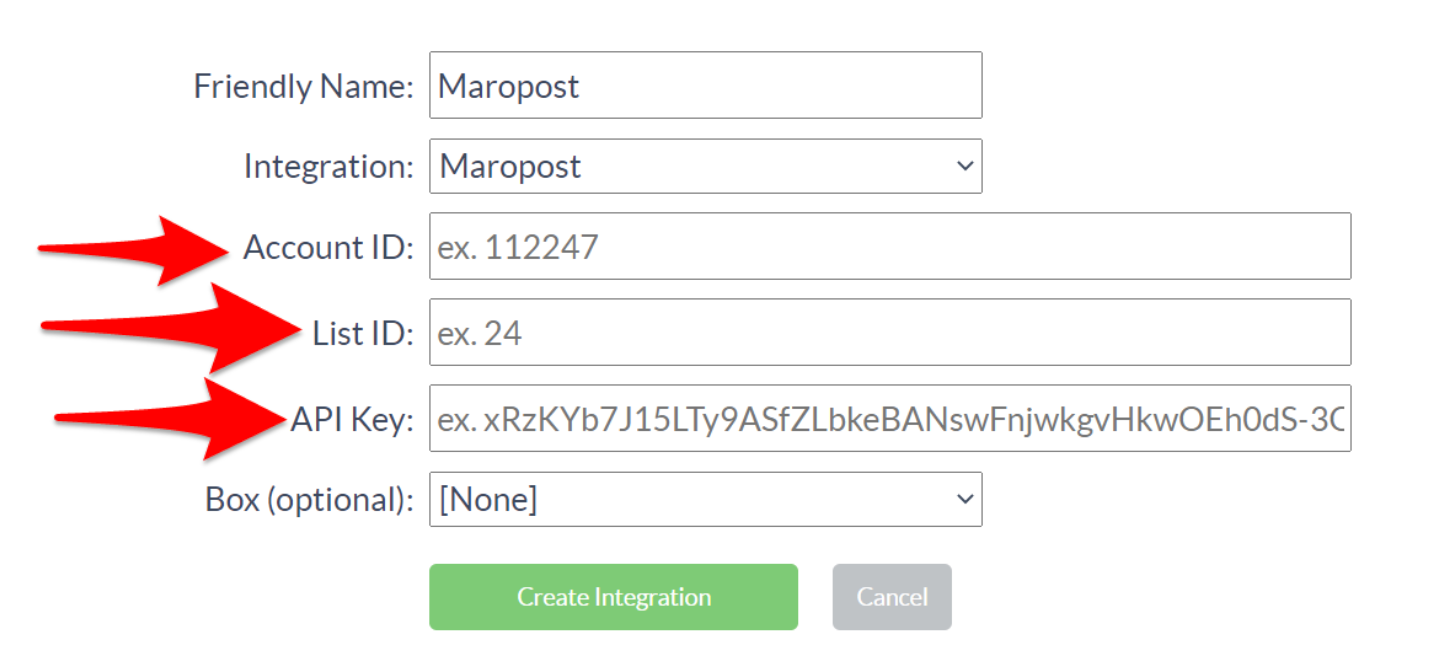
3. Enter your Account ID, List ID, and API Key.
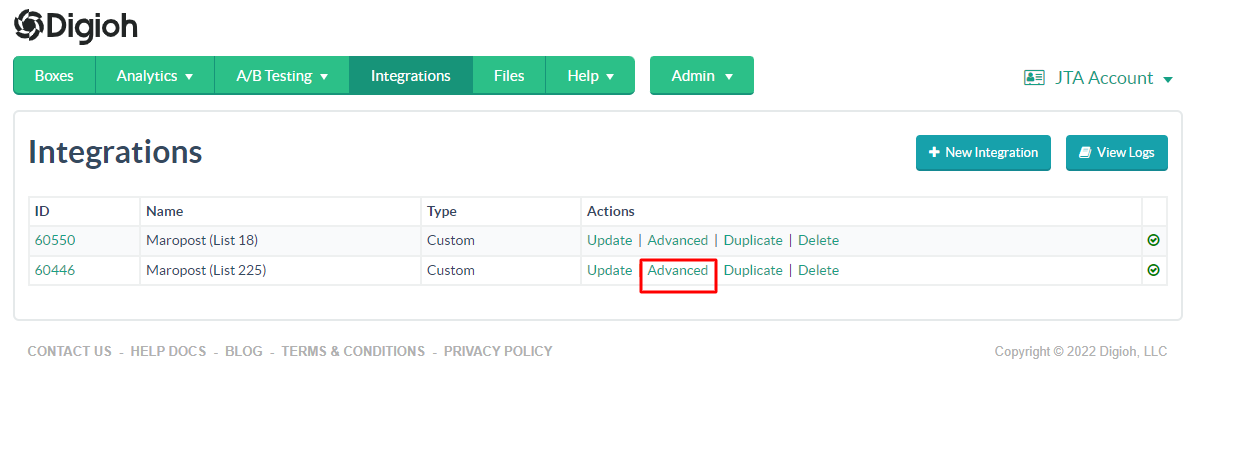
4. Add this Maropost integration to any campaign or landing page you want to pass emails to Maropost.
By Default, we are passing a basic Payload, see below.
{
  "contact":
   {
      "email":"[EMAIL]",
      "first_name":"[FIRST_NAME]",
      "last_name":"[LAST_NAME]",
      "subscribe":true,
      "remove_from_dnm":true
   }
}
We can also pass custom fields To Maropost as well See below example payload. For Updating the Payload Open the integration advanced setting page.
Replace the Raw Data to Send Fields value with the below one.
Note: First, create the custom fields in Maropost before adding to the Digioh integration. To create the custom fields in Maropost, check the Maropost Documentation
{
  "contact": {
    "first_name": "[FIRST_NAME]",
    "email": "[EMAIL]",
    "phone": "[PHONE]",
    "last_name": "[LAST_NAME]",
    "uid": "abcd",
    "custom_field": {
      "custom_field_1": "[CUSTOM_1]",
      "custom_field_2": "[CUSTOM_2]",
      "custom_field_3": "[CUSTOM_3]",
    },
    "subscribe": true,
    "remove_from_dnm": true
  }
}
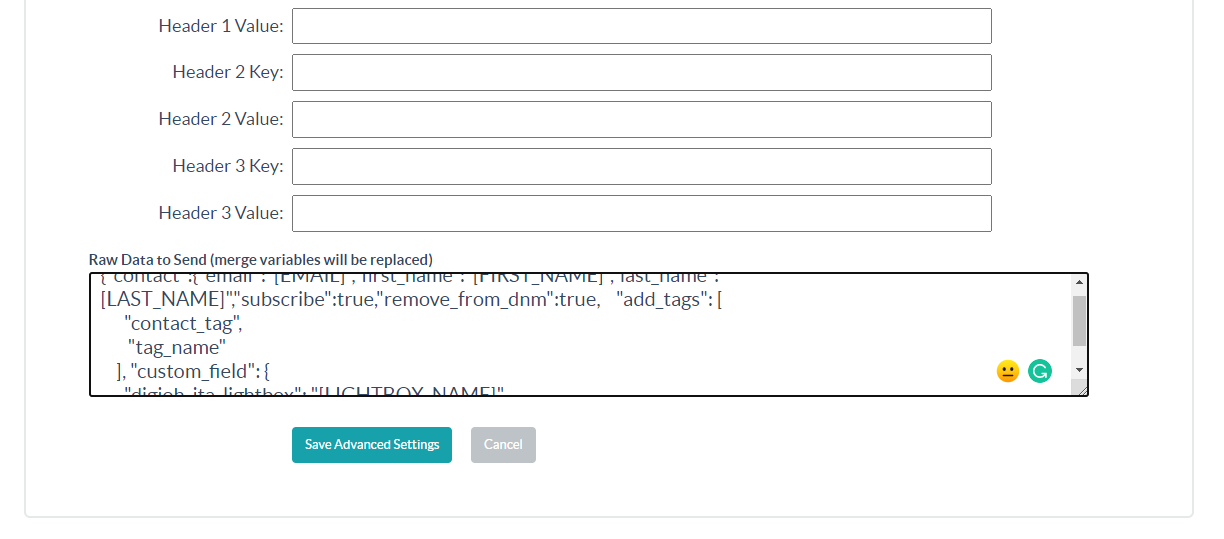
After replacing the payload, click on the Save Advanced Settings button.
If necessary, repeat these steps to set up multiple Maropost integrations, so different forms and landing pages go to different Maropost lists.
That’s all. Your Maropost integration is ready to go!