Digioh supports a turnkey integration with mParticle. With this integration, you can:
- Track named events with form data as event properties
- Support progressive forms for cumulative data collection
- Set attributes on mParticle user profiles from form submissions
- Send user identifiers (such as email) via the mParticle Identity API to enable proper user identification and profile merging
- Pass MPID to your email platform or CRM via a Digioh integration
Before you configure the Digioh mParticle app, you must install the mParticle JavaScript tag (SDK) on your site. The app uses the existing mParticle JS Source configured for your website.
If you need to use the mParticle Server-to-Server API instead of the mParticle JavaScript tag, contact Digioh Support at support@digioh.com.
Step-by-Step Instructions
1. Install the mParticle App
Go to your profile menu in the top-right corner and select Digioh Custom JS (Apps). Find and install the mParticle Track Events and Set/Target Attributes app.
2. Configure Campaign-Level Metadata for Tracking and Traits
Once you install the app, add metadata commands at the campaign level to define what data to send to mParticle. The available commands are:
- mp_track = eventName: A page-level or button-level command that fires a track event when the campaign page displays or the user clicks the button.
- mp_attrs = true: A page-level command that fires an mParticle identify call to set attributes via the user’s MPID after the form submits.
- mp_prop = propName: A field-level attribute that marks a form field for inclusion in the payload for track and traits operations.
- mp_pageprop = propName=propVal: A page-level metadata command for advanced use cases. It initializes properties to send via mp_track and mp_attrs operations on the page.
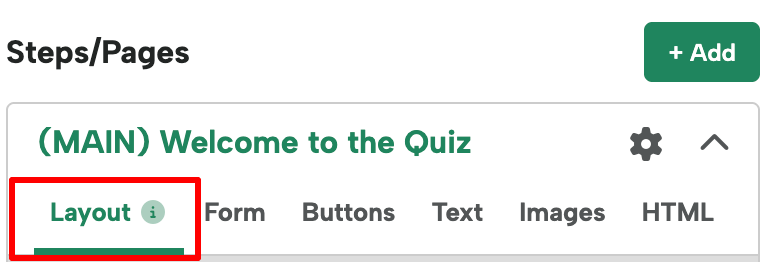
To configure page-level metadata, open the Campaign Editor and go to the Layout sub-menu for each page:
Scroll to the bottom of the Layout section:
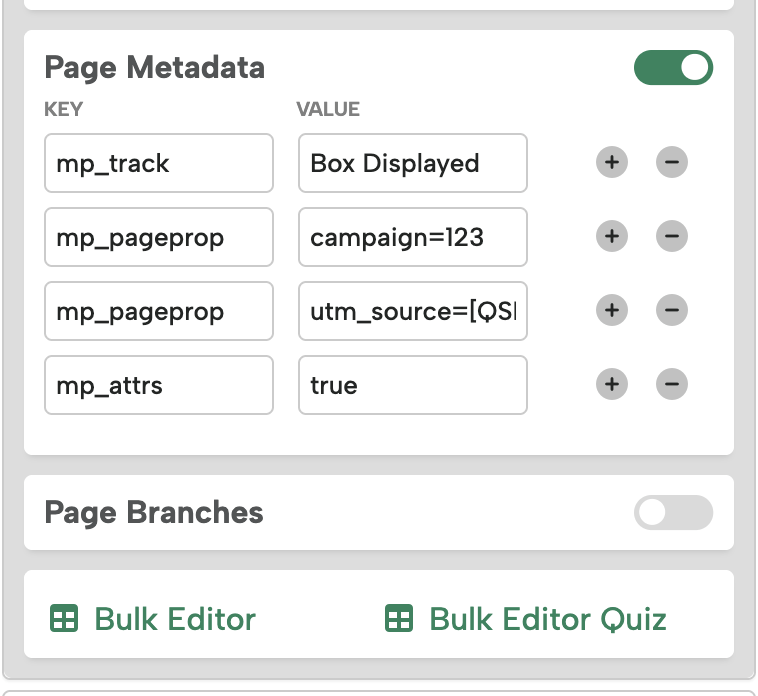
This example shows:
- A track event on the Main page, which fires immediately on campaign display since the Main page always displays first.
- A traits operation that identifies (sets attributes on) the user when the Main page form submits.
- Two pageprops that carry with the track and traits operations.
3. Pass Form Field Values to mParticle
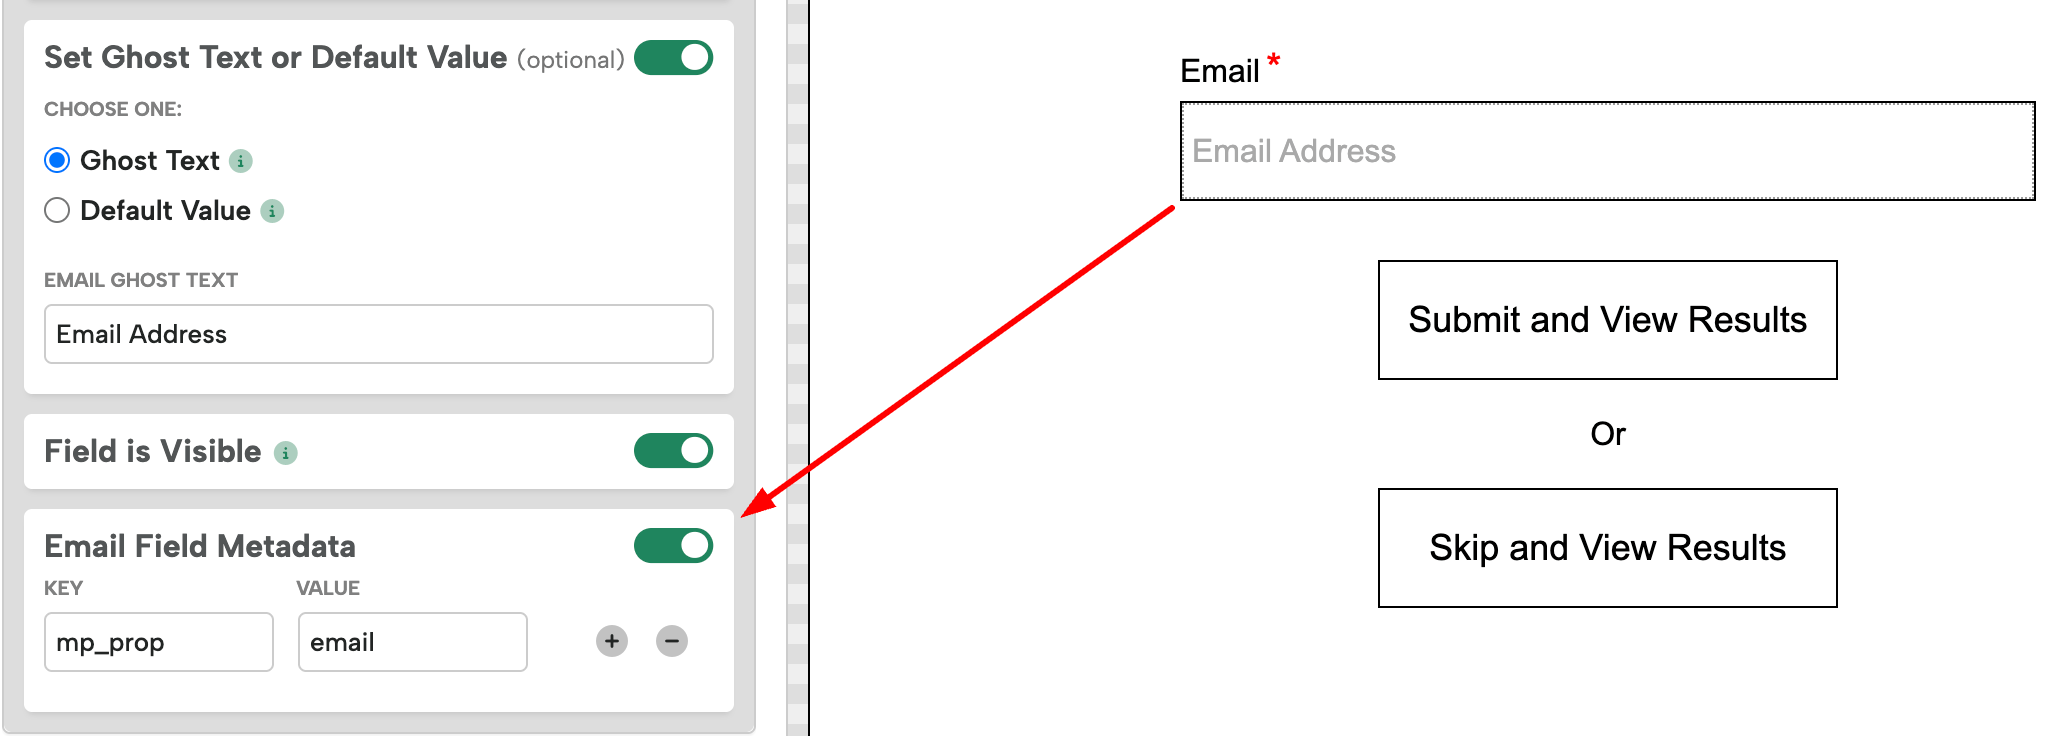
Open the form field you want to pass to mParticle. At the bottom of the field configuration section, set mp_prop to name it as an attribute in mParticle. When the form submits, Digioh includes the property name and field value in the payload.
Configure field-level metadata from Campaign page > Form > Fields:
Note: Digioh only sends mp_prop values to mParticle at form submission, and only when the form page has mp_attrs configured.
4. Track Button Clicks
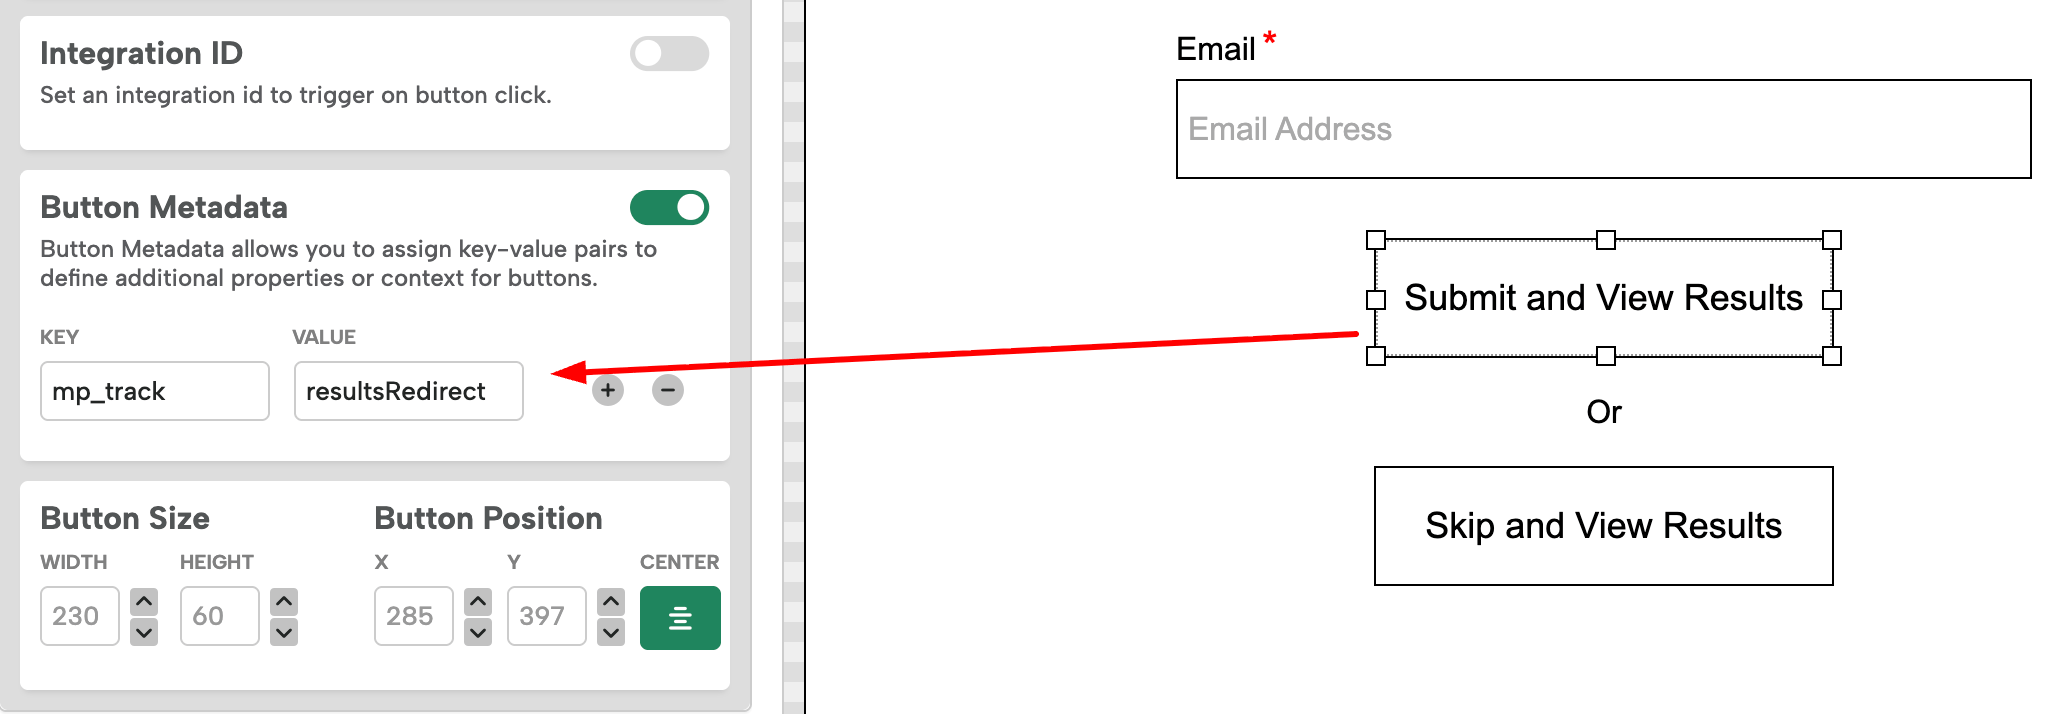
To track a button click, configure mp_track on the button itself. This includes any mp_pageprop values and any mp_prop values from prior form submissions on the same campaign.
Important: Attaching mp_track to a submit button does not carry mp_prop values from that page’s form. To capture form data with a track event, use mp_track on the page that follows the form submission.
5. Configure the mParticle Identity API
The mParticle app supports sending user identifiers such as email using the mParticle Identity API. This enables proper user identification and profile merging in mParticle, which downstream integrations such as Braze require to process events.
To enable this feature, add the following metadata at the campaign (box/widget) level:
mp_identity = fieldName*
*Defines which form fields to treat as identity values. Accepts a comma-separated list of field names.
Examples:
mp_identity = email
mp_identity = email,customerid
mp_identity_method = login or identify (optional)*
*Specifies the mParticle identity method to use. Supported values are login (default) and identify. If you do not specify a value, the extension defaults to login.
Example:
mp_identity_method = login
When you configure mp_identity and the form submits, Digioh does the following:
- Sends the specified fields via an mParticle Identity call.
- Identifies the user or merges them with an existing profile in mParticle.
- Continues to send all fields, including identity fields, as profile attributes.
Note on Network Requests: When you configure the Identity API, mParticle sends two separate network requests on form submission. The first request (user_identity_change) contains the user identity. The second request (user_attribute_change) contains all profile attributes, including field-level and page-level properties. This is expected behavior and does not indicate a configuration issue.
6. Use MPID in Digioh Integrations
By default, the mParticle app stores the MPID (if available) in [CUSTOM_49] for all form submissions. You can reference [CUSTOM_49] in your integration templates to pass the MPID to your email platform or CRM.
When the app is installed, do not use Custom 49 for form input or any other purpose.
7. Test in Campaign Preview Mode First
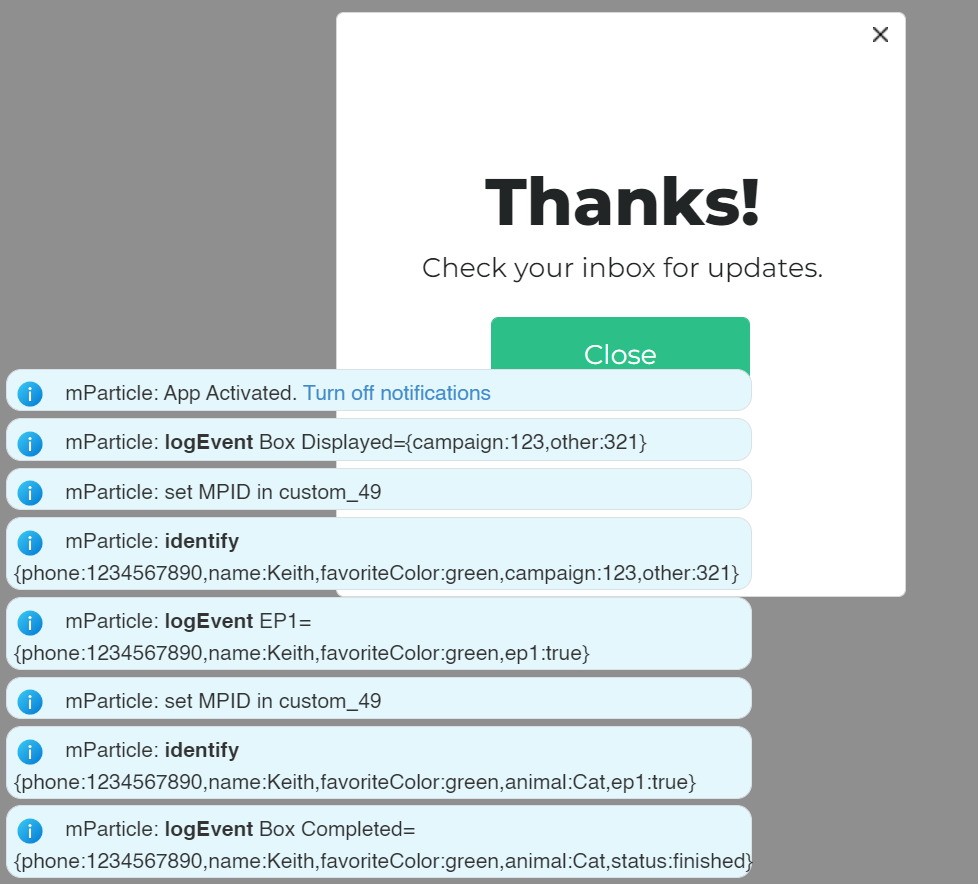
Before going live, use Digioh Campaign Preview Mode to test your configuration. In Preview Mode, the app notifies you of any configuration problems and shows what it would track to mParticle without sending real data.
Note: Targeting based on mParticle user attributes requires a live site with the mParticle JS SDK. You cannot test this in Preview Mode.
Targeting mParticle User Attributes
The Digioh mParticle app automatically collects all user traits and makes them available in a special JS object:
DIGIOH_API.mpattr
You can then use a “JS Variable” condition to target campaign display to users with specific traits:
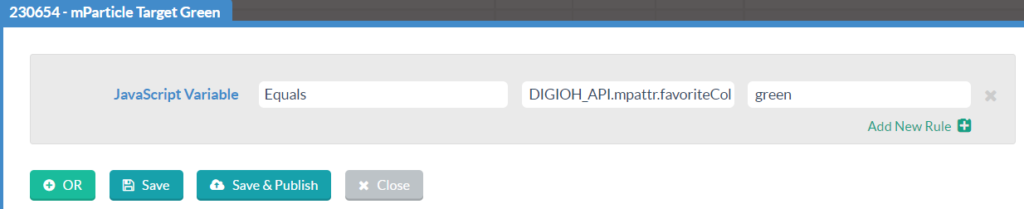
In this example, the campaign targets users with the attribute “favoriteColor” set to green. We recommend wrapping attribute conditions in a Ruleset for easier maintenance. See Ruleset Best Practices for more detail.
Tips and Best Practices
- In Campaign Preview, the app shows what would track to mParticle without actually sending data.
- mp_attrs and mp_track collect mp_prop data from forms on all pages of your campaign, not just the page where you configured the metadata.
- Digioh ignores mp_prop values that are blank at the time of submission and does not include them in the payload.
- You can invoke mp_attrs on every page. Setting traits is cumulative on the user profile.
- mp_attrs and mp_track carry the same payload. Use mp_track for tracking engagement events and mp_attrs for setting profile data.
Frequently Asked Questions
Q: Why are my attributes not appearing in the network request after using the Identity API?
A: When you configure the Identity API, mParticle sends two separate network requests on form submission. Your attributes appear in the second request (user_attribute_change), not in the first identity request (user_identity_change). This is expected behavior and does not indicate a configuration issue.
Q: Why is the Identity API call not firing?
A: Confirm that mp_identity is set at the campaign level, not the page or field level. Also make sure the field name matches exactly. For example, use email, not Email.
Q: Can I send multiple identity fields at once?
A: Yes. mp_identity accepts a comma-separated list of field names, for example: mp_identity = email,customerid. Digioh sends all listed fields via the mParticle Identity API and also continues to send them as standard profile attributes.
Q: Can I use the mParticle app in Campaign Preview Mode to test identity calls?
A: You can use Preview Mode to test attribute configuration and see what Digioh would send. However, the Identity API targeting features require a live site with the mParticle JS SDK. Preview Mode does not execute actual identity calls.
Running into an issue or have a question? Reach out to our support team at support@digioh.com and we will be happy to help.