What You’ll Learn in This Article
-
Capture form field values and push them to the dataLayer upon form submission
-
Configure button actions to assign values to custom fields for non-form interactions
-
Use custom fields across multiple pages without overwriting previous values
-
Persist captured data across sessions or reset it using Digioh’s optional app
Option 1: Standard Form Data Collection
The easiest way to capture data is to use a standard form:

Any fields used in the form will be pushed to the datalayer once the form is submitted. If your box has multiple pages with multiple forms, make sure each page uses unique custom fields; otherwise, the previous data will be overwritten.
Note: You must have a button on the page that performs a ‘Submit Form’ click action. The form can still be configured to skip the submission, but the form itself has to be submitted for the entered data to be captured.

Option 2: Button Data Capture
You may also have pages in your box where you want users to select answers via a button click:

To capture the user input, configure the Button Data Action for each button:
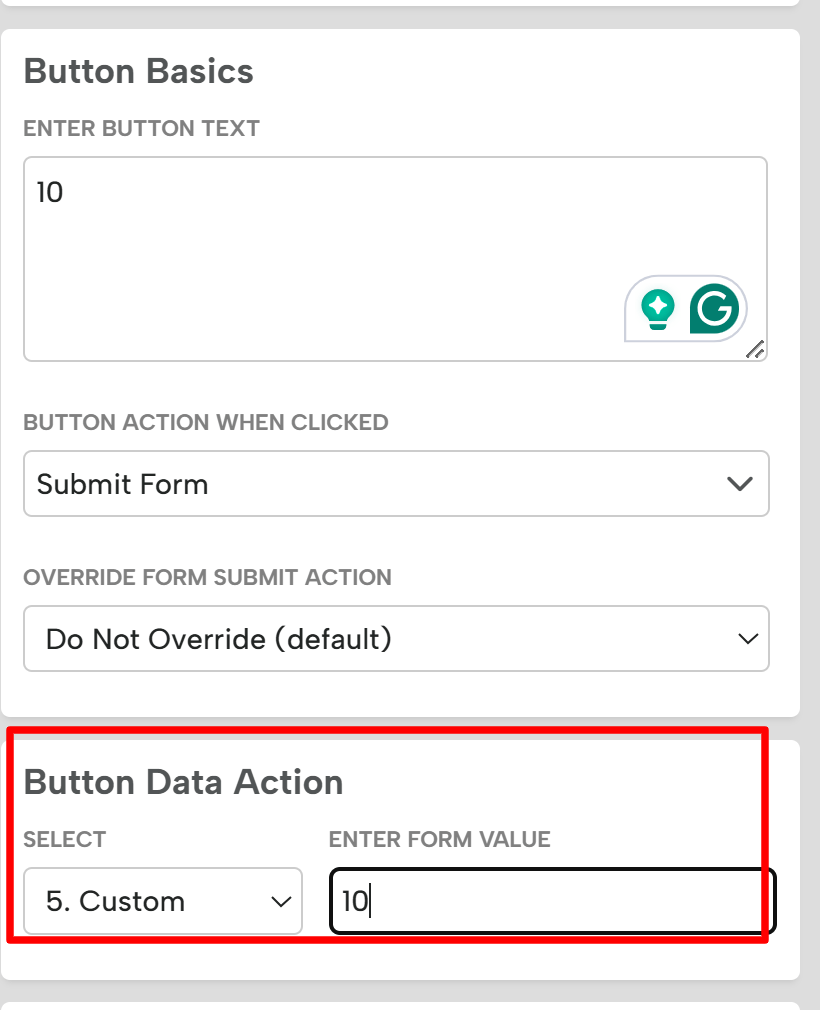
In the dropdown on the left, select which custom field you’d like to assign a value to, and then enter the desired value in the field on the right. In the example above, each button might be configured to assign a value of 0 through 10 to Custom 5
When selecting the custom field for a button, make sure you don’t select any custom fields that are already used on other pages by a form or other buttons. If you use multi-select buttons, the custom field will be populated with a comma-delimited list of the selected answers.
Using the Data
Now that you have all of the data captured in the datalayer, it will automatically be included in the final submission the user makes on this box. If you want to send the data back to your ESP via an integration, you can map the custom fields as needed in the integration.
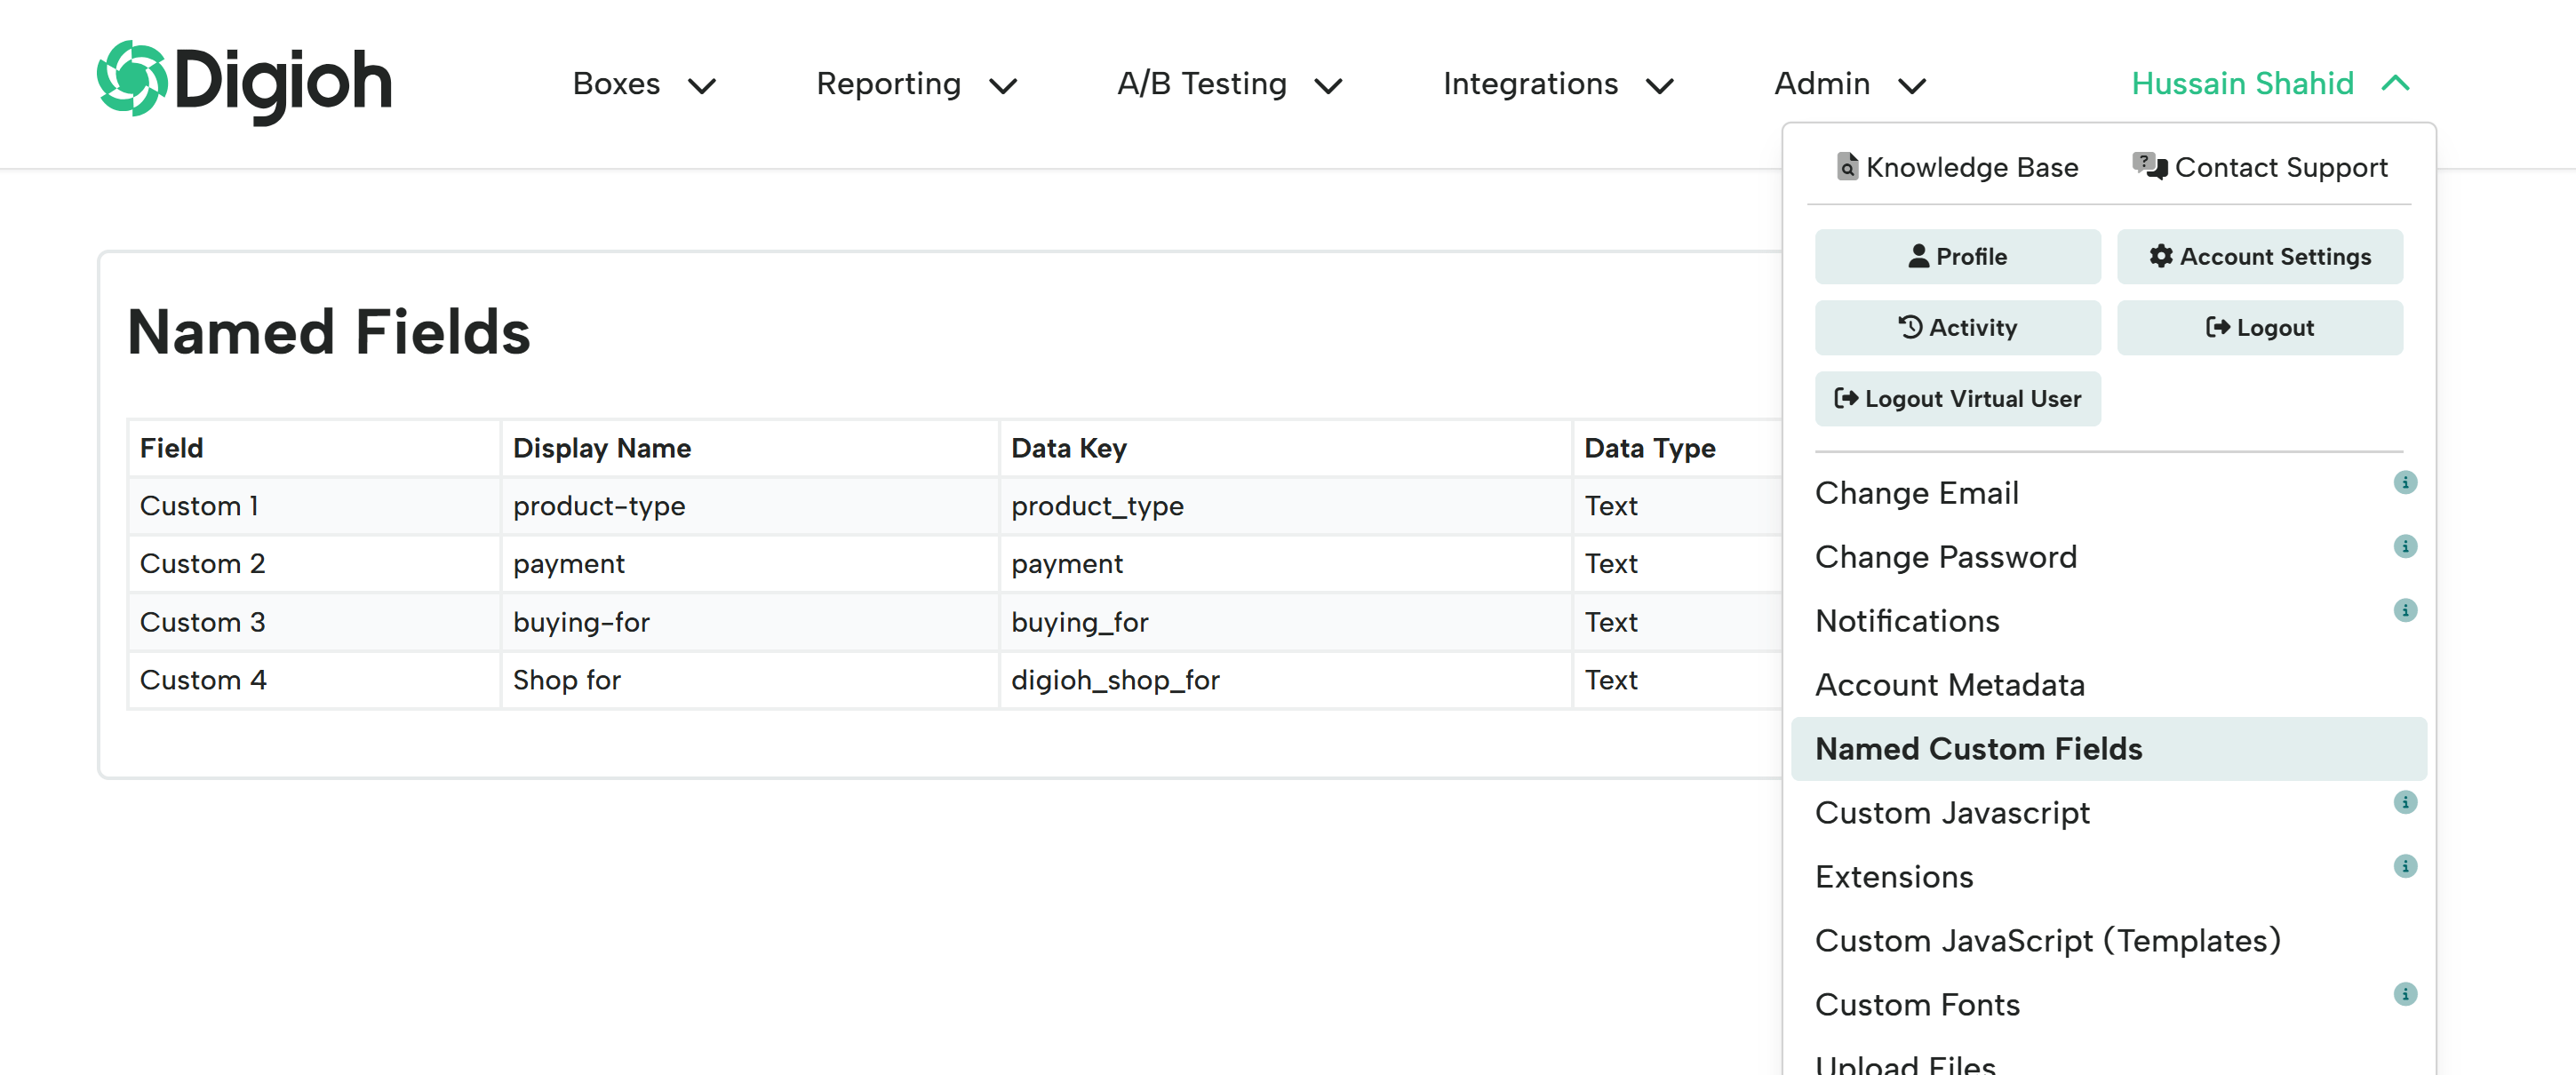
Click on your name on the top-right of the page-> Named Custom Fields. You can see custom fields here and can also create new ones.
Please note: Once data is in the datalayer, it will persist and be present as the user navigates your site. If they submit another box, the submission can include previously submitted custom fields, even if the second box didn’t contain those fields. If you want to prevent this from occurring, we have an app for that!