What You’ll Learn in This Article
In this guide, you’ll learn how to use Digioh’s QA Mode to test changes on your live website without affecting visitors. By the end of this article, you’ll know how to:
- Publish changes to QA Mode using two different methods.
- Enable QA Mode on your site and navigate its debugging tools.
- Understand how QA Mode works behind the scenes.
- Exit QA Mode when you’re done testing.
How to Publish Changes to QA Mode
There are three ways to publish changes to QA Mode:
Method 1: Publish QA Mode from Campaign List
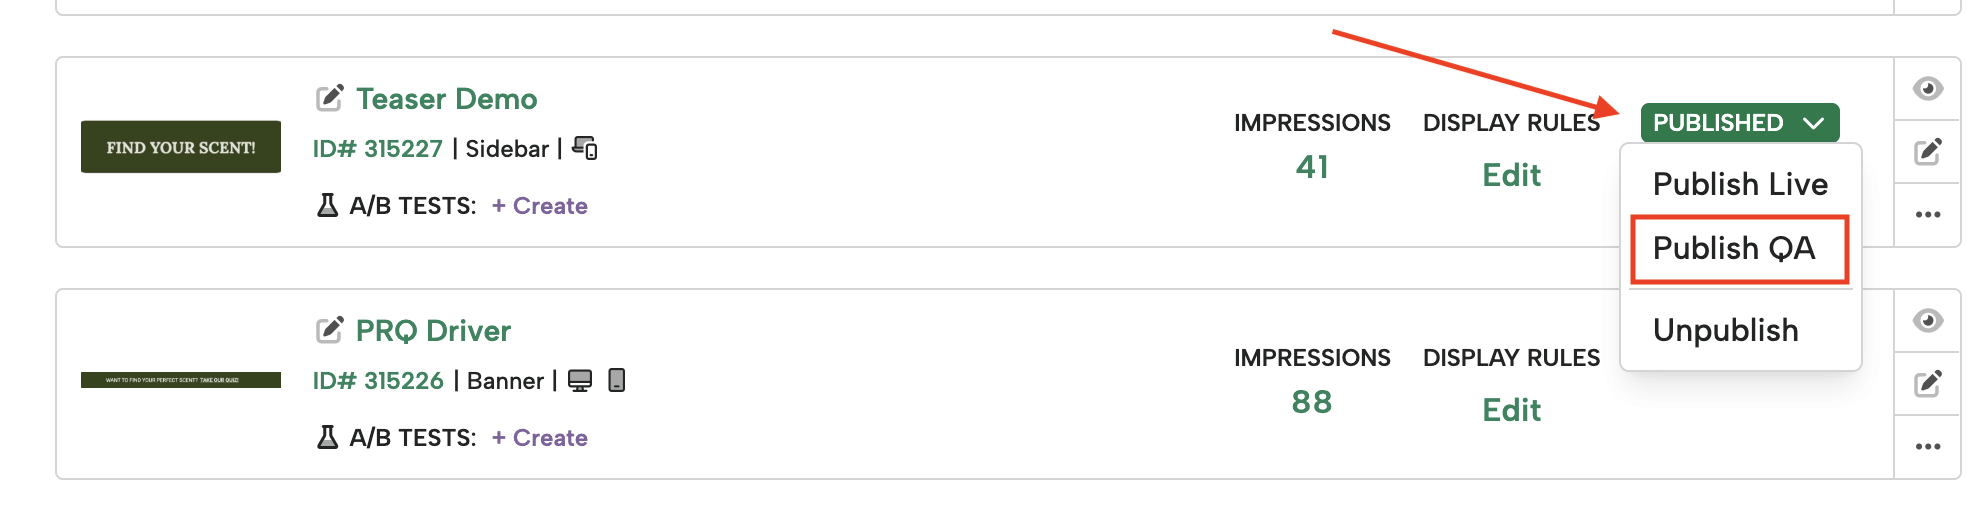
If you are on our new Single Campaign Publishing experience, you can publish to QA by:
- Hover over one of your green “Published” boxes
- Select “Publish QA”
Method 2: Publish QA Mode from ‘More’
If you are not utilizing our Single Campaign Publishing experience, you can publish to QA by:
- Click on “More”
- Click on “Publish QA”
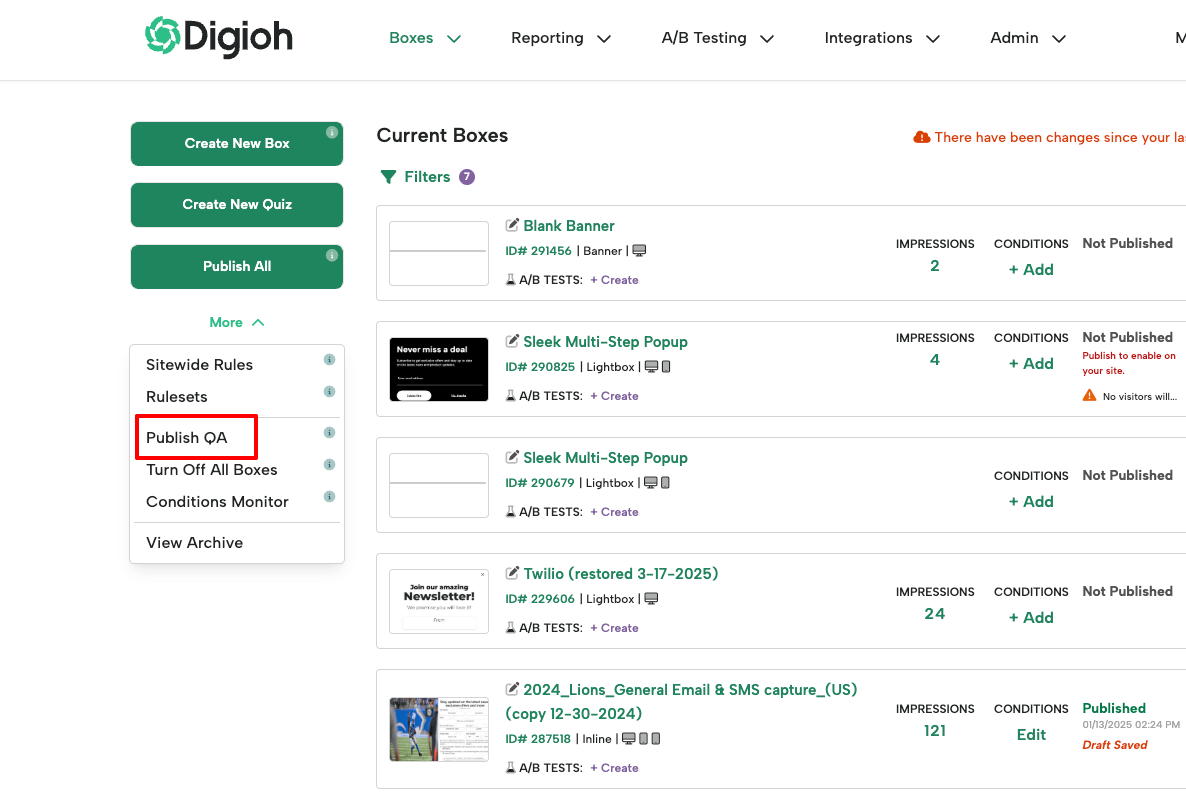
Note: Feel free to reach out to our Support Team if you are interested in moving over to our new Single Campaign Publishing experience!
Method 3: Publish QA from Custom JavaScript
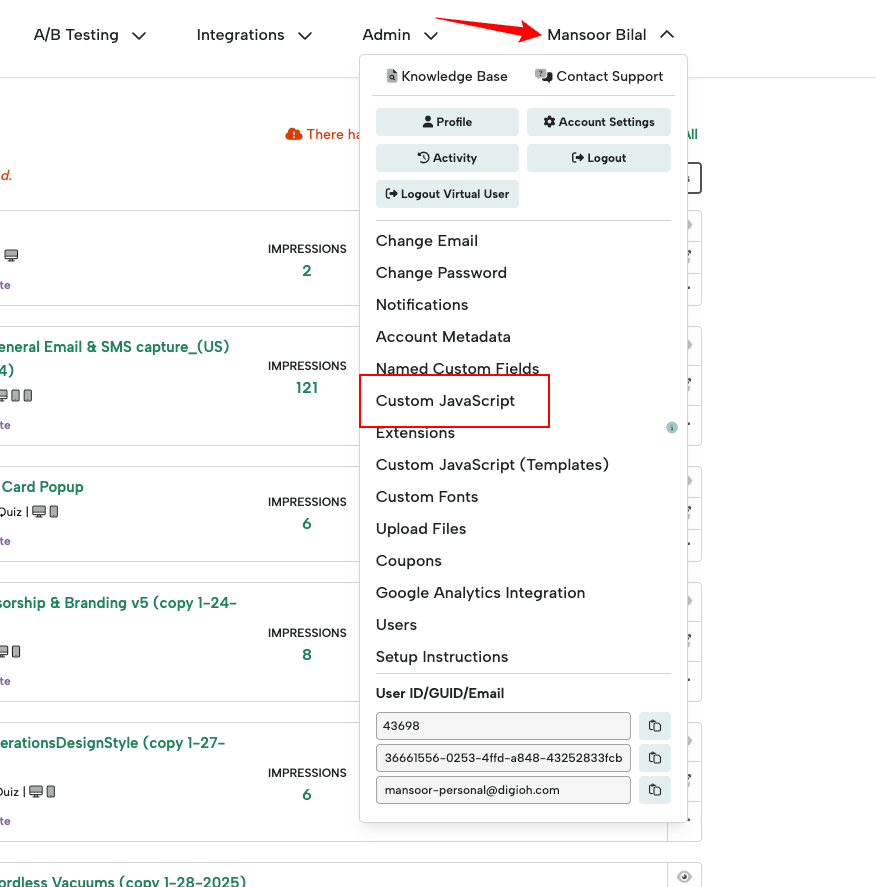
- Click on the account dropdown in the upper right
- Select Custom Javascript
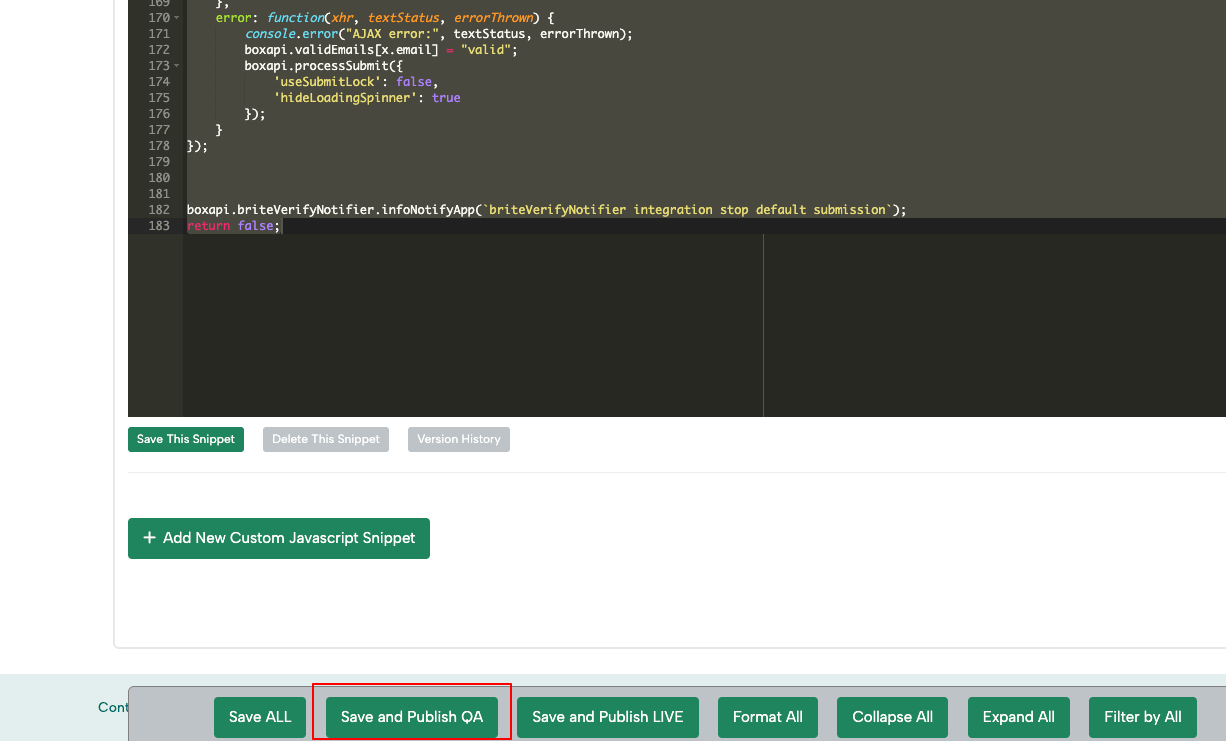
- Click on “Save and Publish QA”
Using QA Mode
To actually make use of Digioh’s QA mode, you just need to add ?boxqamode to your site’s URL. QA mode itself is sticky, so once you’ve entered QA mode, the parameter does not need to be in the URL.
Once the QA mode is loaded there will be a Digioh Logo in the Bottom Left.
Once you click on the logo it will open QA mode Notification Tool.
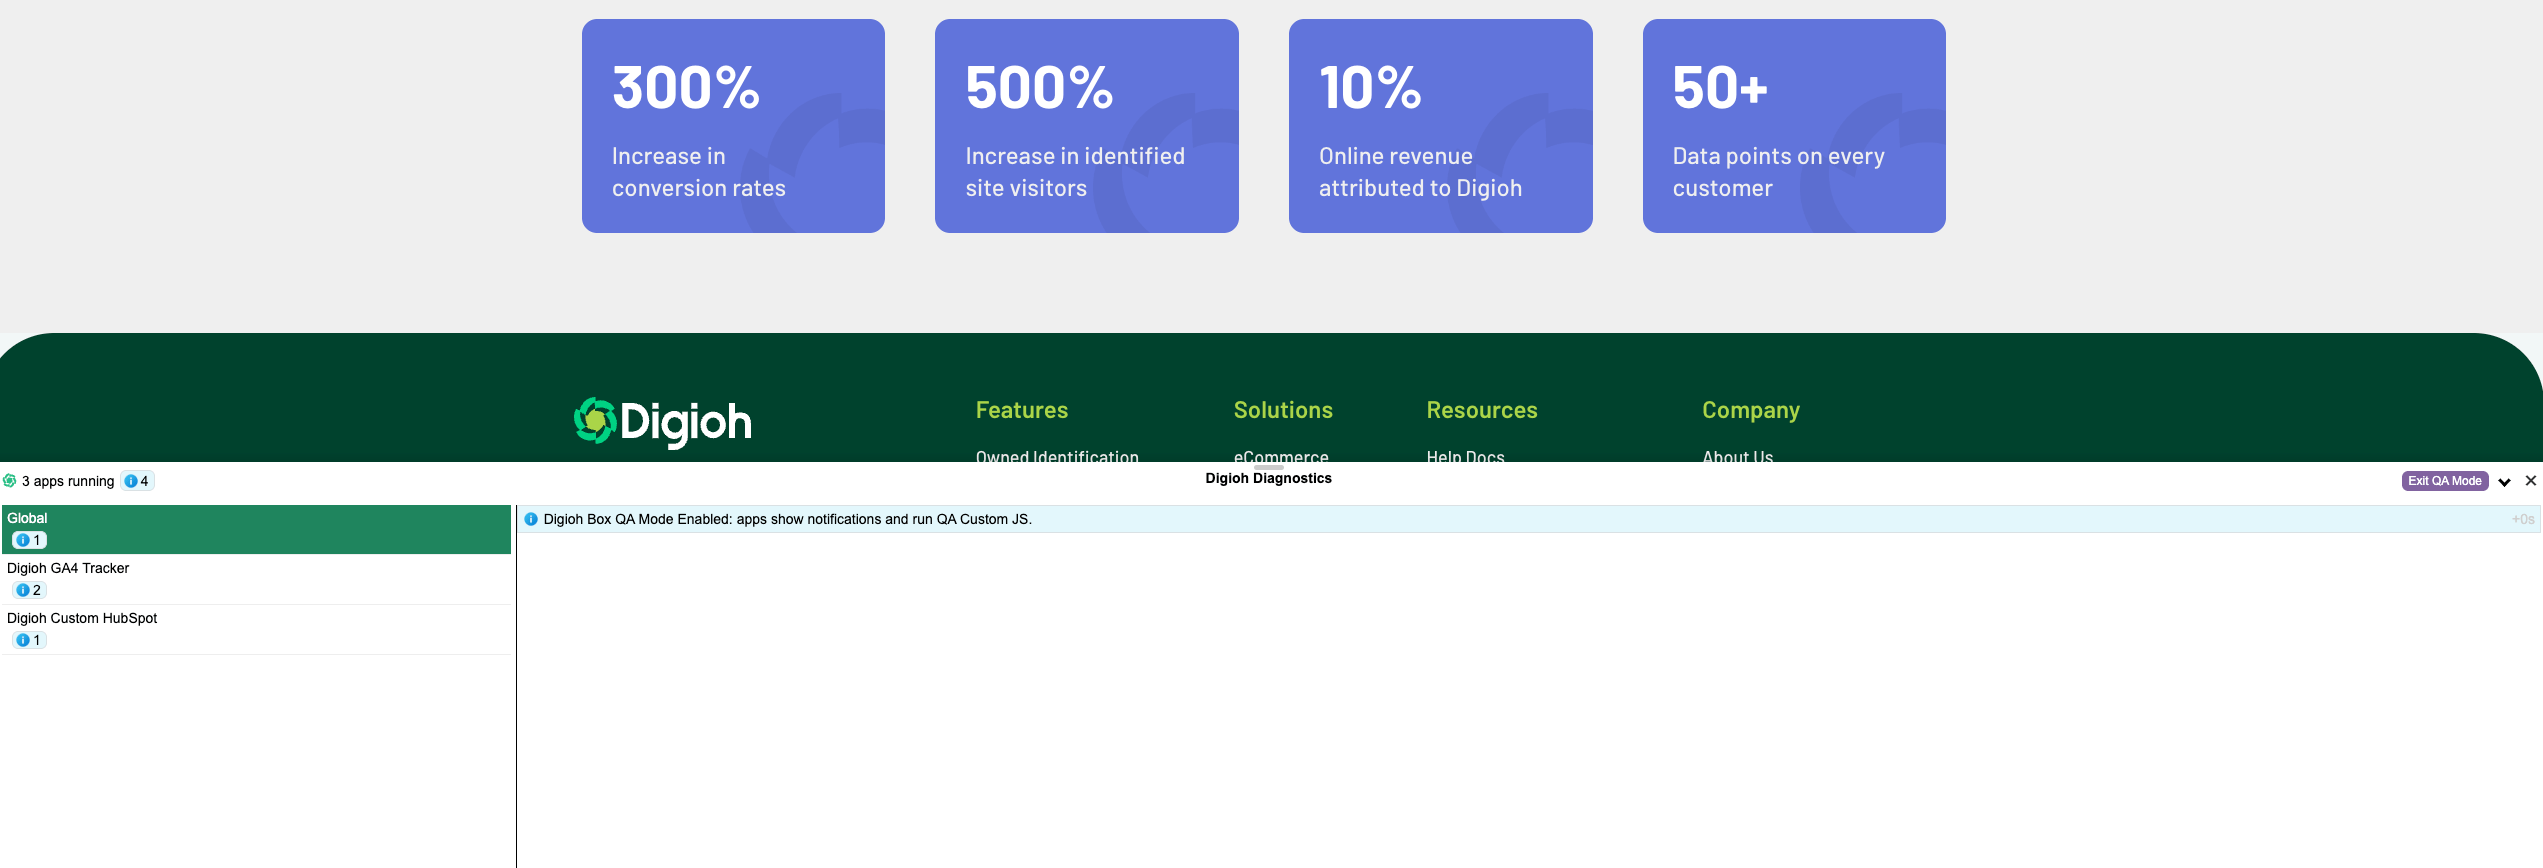
The Notifications Tool shows messages from Digioh Extensions and serves as a debugging tool.
To leave QA Mode, either end the session or click the “Exit QA Mode” button in the top right corner of the screen.

Technical Notes:
To ensure complete isolation, Digioh creates and references a completely different JavaScript file. If the URL contains ?boxqamode, the QA Mode JavaScript file is called instead of the production JavaScript file.
Related Reading: