What You’ll Learn
In this guide, you’ll discover how to effectively display labels for radio buttons and checkboxes in your Digioh forms. By following these steps, you’ll be able to:
- Assign descriptive labels to individual groups of radio buttons and checkboxes.
- Style your radio button and checkbox labels
For most field types, you can enter text in the Label field in the editor, and set the labels to show in the Labels section of the editor. However, radio buttons and checkboxes work differently.
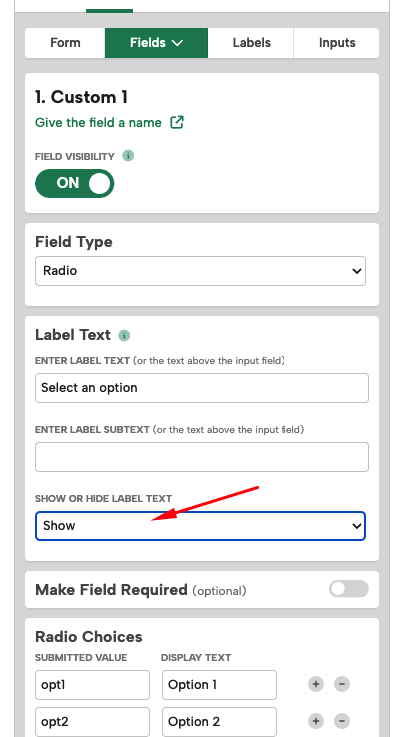
For those field types, first set the label text. Then, select “show” from the Show Or Hide Label dropdown.
This allows you to set labels for individual groups of checkboxes or radio buttons without turning them on for the whole form.
To style the Label text, go to the Labels Tab in the Form section.
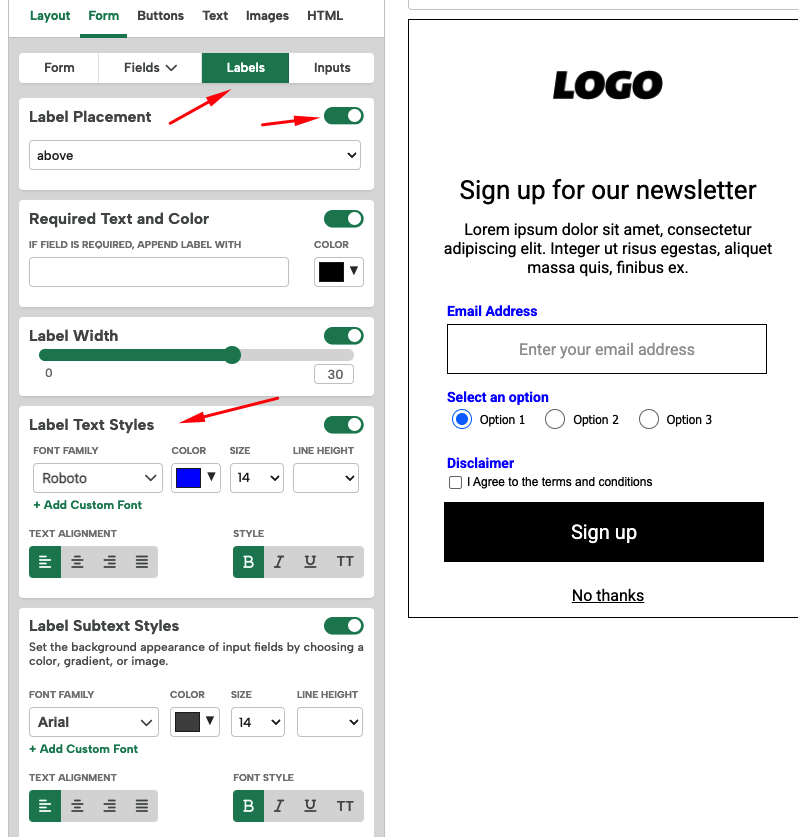
Note: to see the Label styling editor, you will need Label Placement toggled ON, and the placement dropdown set to above or left. This will turn labels on for your form fields as well, so if that is not desired; make your styling changes and then switch the placement back to Hide (but leave Label Placement toggled on). That will turn labels off form forms but keep any radio or checkbox label you’ve enabled in the previous step will stay on, with the styling updates you have made.
If you have any questions about creating labels for checkboxes or radio buttons, send us an email, and we’ll be glad to help!