iPost is a dynamic email marketing platform. Use Digioh to build iPost-integrated pop-ups, web forms, landing pages, and email preference centers.
If you are setting up a Digioh integration by yourself, we first recommend reading about Digioh Integration Basics.
Digioh supports 4 types of iPost data integration:
- Add or Update Contact (Upsert) – iPost API Reference
- Add Contacts to List – iPost API Reference
- Add or Update Records in a DataTable – iPost API Reference
- Add Contacts to Journey Automation – iPost API Reference
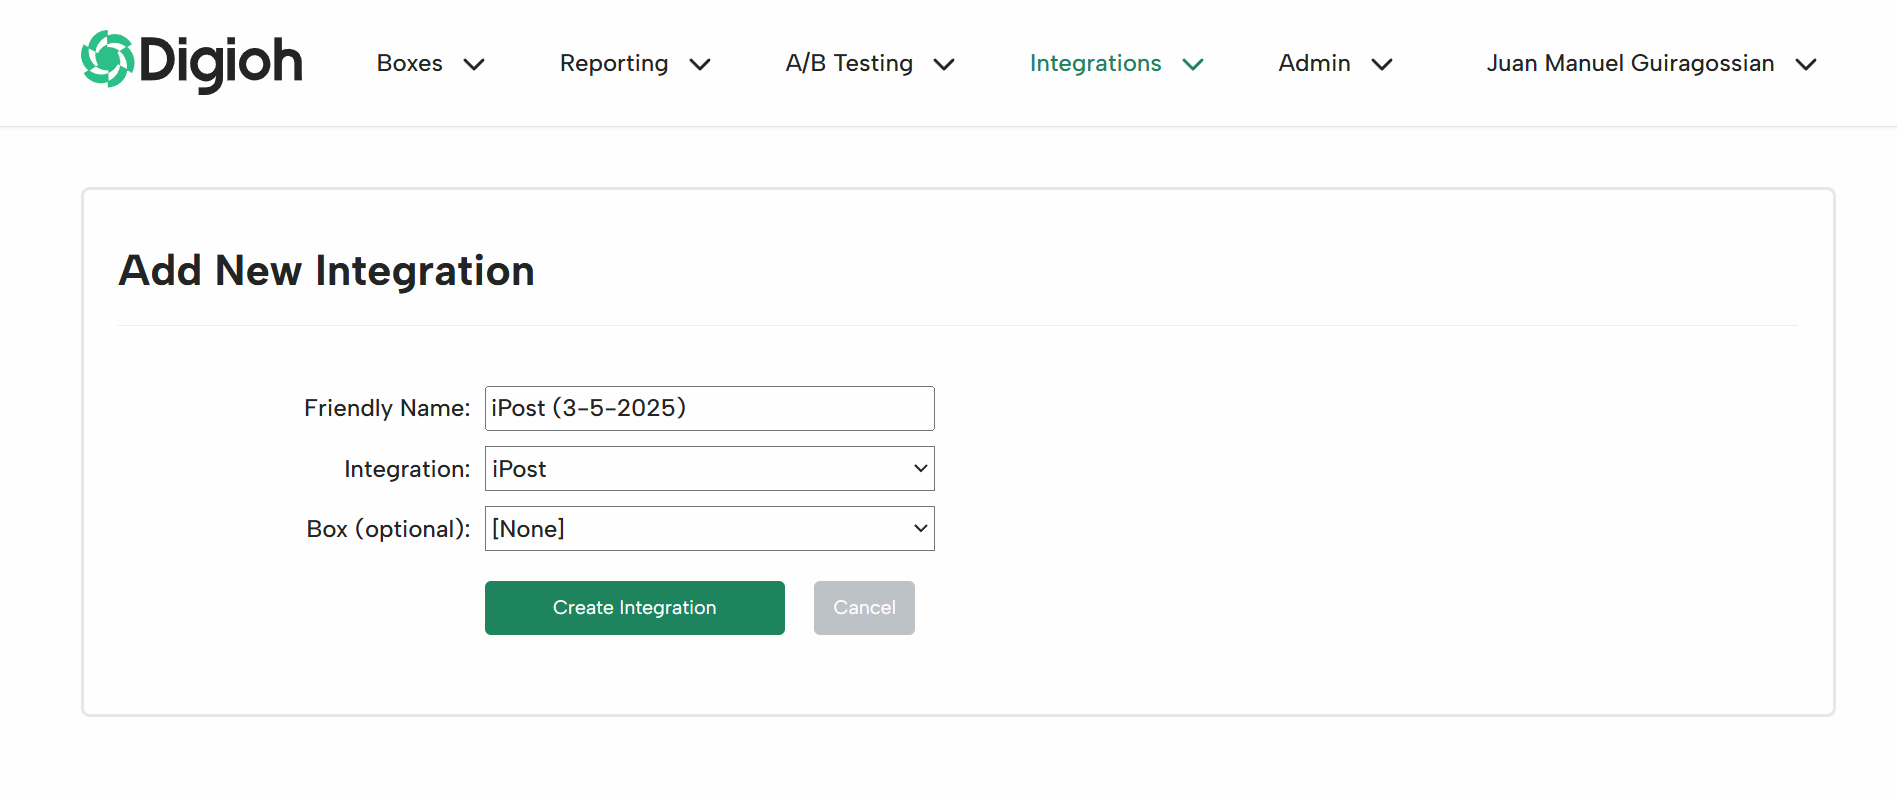
From Digioh, click on “Integrations,” then “Add New Integration.” Select “iPost” from the drop-down.
You may need multiple integrations depending on your use cases. For example, if you have two main lists, you will need two separate but similar integrations.
Be sure to give your integration a meaningful name, like “iPost – Add Contact to Daily Newsletter List”.
Click “Create Integration”, then enter your iPost information:
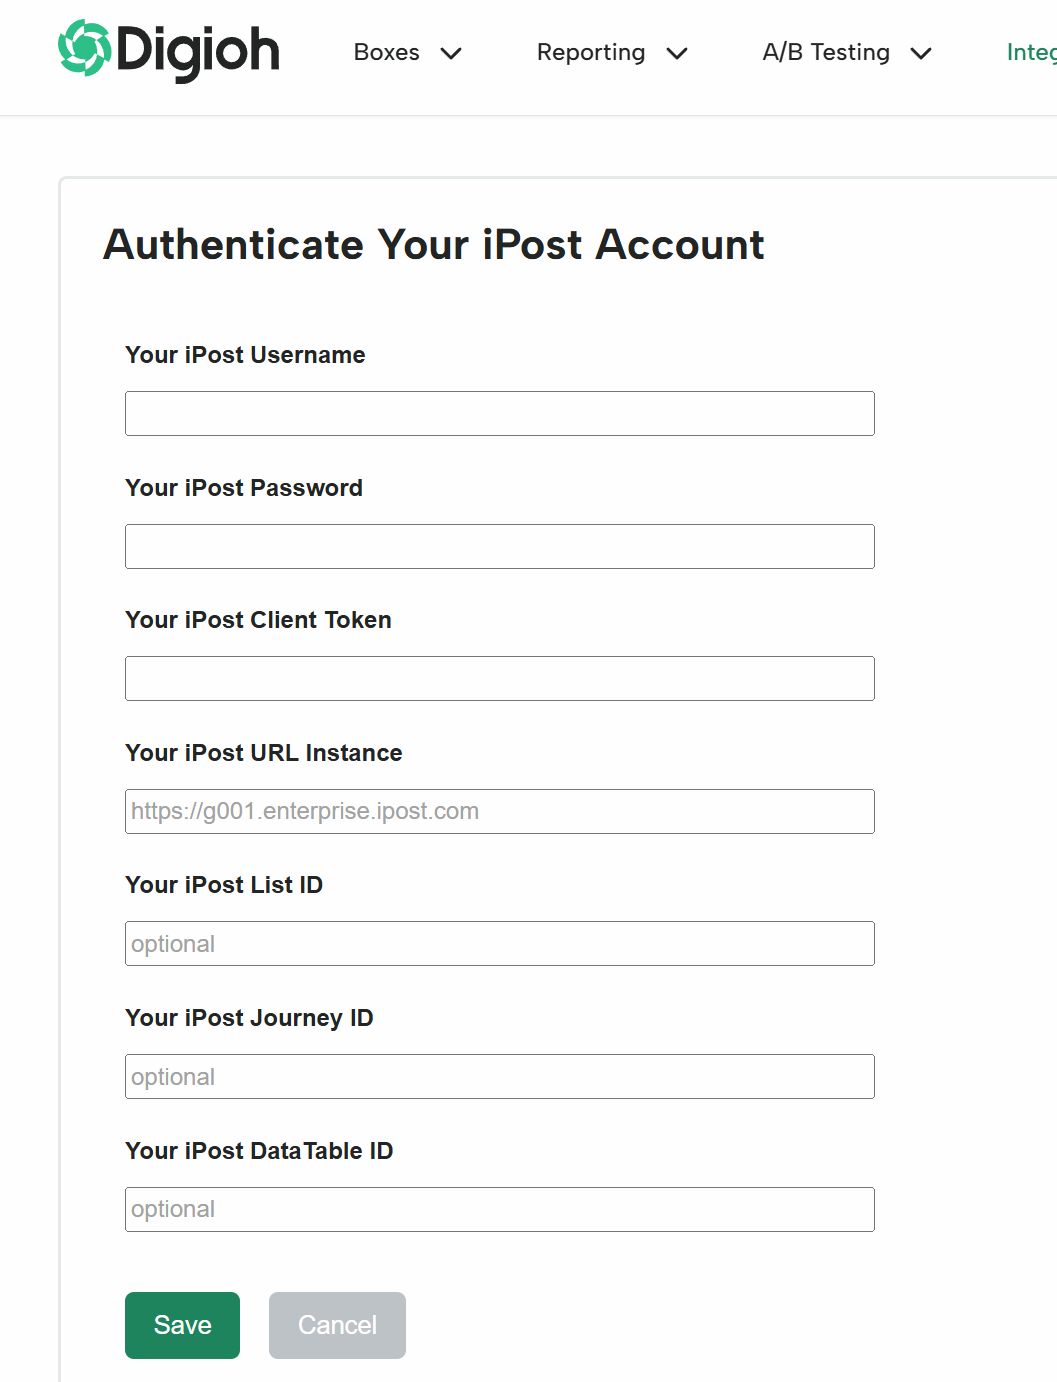
- Username & password are the credentials for a user in your iPost account. We recommend creating a new user, specifically for Digioh.
- Client Token can be found in iPost on the Client page in Settings. This is the unique identifier for your specific iPost account.
- iPost instance is the instance you use when logging in to iPost, typically one of g001, g002, or g003.
The ID fields determine the integration operation.
- List ID: adds contact to list
- Journey ID: triggers a journey automation
- Data Table ID: upsert a table record
- None of the above: Add or update contact
Now configure the data payload, or “fields”.

This is JSON data, identical to that in the iPost API Reference links above. Start with one of the iPost examples that corresponds to your Digioh integration, modify it to your needs, and include Digioh dynamic fields. For example:
{
  "Email": "[EMAIL]",
  "Mobile": "[PHONE]",
  "GlobalEmailStatus": true,
  "GlobalMobileStatus": true,
  "Properties": {
    "first_name": "[FIRST_NAME]",
    "last_name": "[LAST_NAME]"
  },
  "Topics": [
      {
        "TopicID": 320,
        "TopicStatus": true
      }
  ]
}
Finally, assign your new integration to the relevant campaign(es). You can attach multiple integrations to a single campaign. Be sure to order them correctly, taking into account dependencies. So for example, if you are creating a new contact and then adding to a list, make sure that the create contact integration is first in the campaign integration list.
Remember that when testing integrations, you can look at server logs to help troubleshoot.