What You’ll Learn
- How to Set Up Digioh’s ActiveCampaign Integration – Learn how to connect your Digioh pop-up forms, surveys, and quizzes to ActiveCampaign in real-time.
- Where to Find Your ActiveCampaign API Credentials – Easily locate your Base URL and API key to enable seamless integration.
- How to Configure Your Integration in Digioh – Step-by-step guidance on creating a new integration, selecting API Form Post, and mapping data fields.
- How to Pass Custom Fields to ActiveCampaign – Discover how to send additional contact details and custom field values for a more personalized experience.
ActiveCampaign is a cloud software platform for small-to-mid-sized businesses. This software is used for customer experience automation, which combines email marketing, marketing automation, sales automation, and CRM categories.
Digioh’s ActiveCampaign integration allows you to capture contacts with pop-up forms, lightboxes, surveys, and quizzes, then pass that data to ActiveCampaign in real-time.
Integration Requirements:
For integrating digioh with the ActiveCampaign. We need the following data.
- Base URL from ActiveCampaign
- Api token from ActiveCampaign
Both Base URL and API key are placed on the ActiveCampaign Settings page
Please check the below steps for getting the Base URL and API token.
Steps to get ActiveCampaign URL and API KEY:
1- Login to ActiveCampaign.
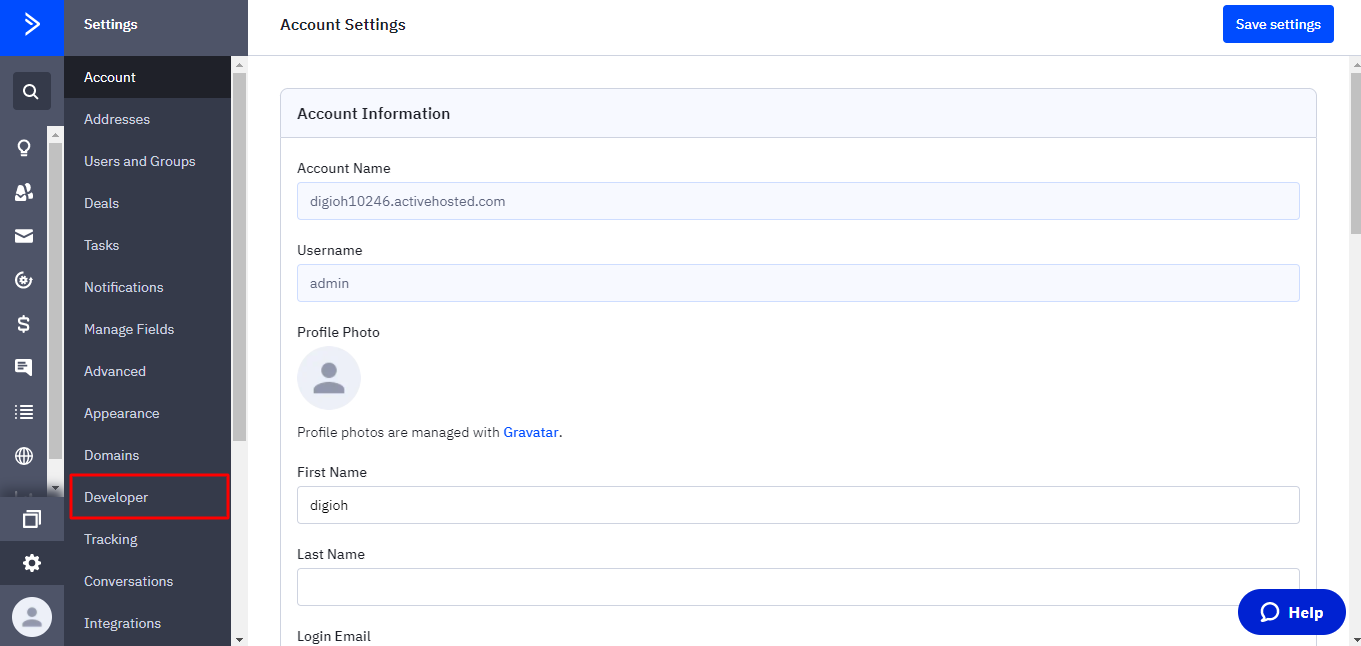
2- Open the settings page. Check the below screenshot.

3- On the settings page click one developer link. Check below screenshot
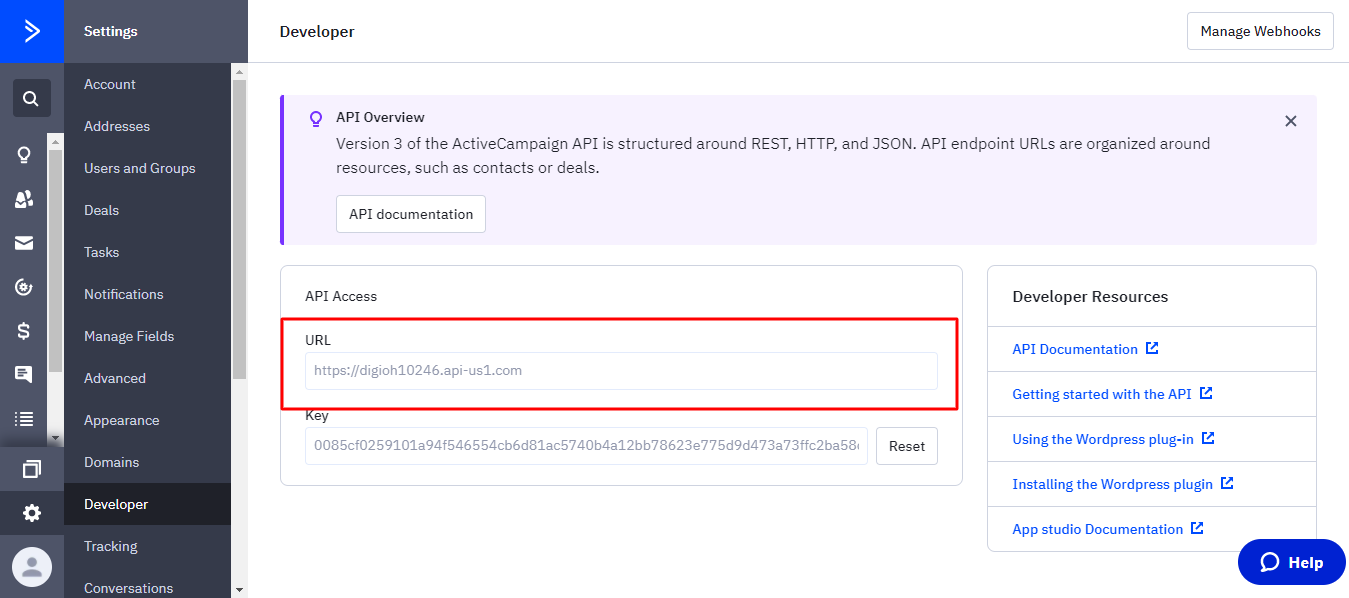
4- On the Developers page copy the URL
5- Also copy the API key
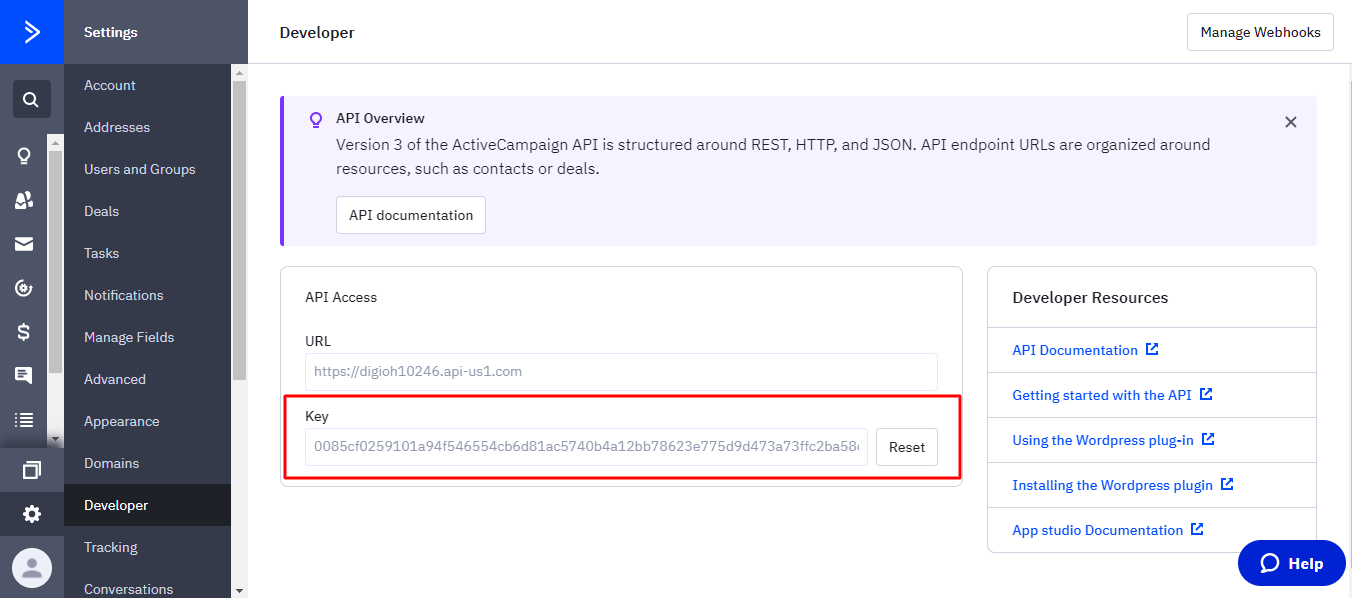
The URL and API key will be used in the digioh integration section.
Digioh
Create your box or edit an existing box, then navigate to your integrations.
Steps:
1: Add a New Integration

2: Set a friendly name in the Friendly Name field.

3: Form Post URL
Enter the ActiveCampaign API Key and Subdomain
https:// [youraccountname] .api-us1.com/

5: Select JSON Raw in Post Type.

6: Select Box
Select the box and click Create Integration.
In Integration Advanced Settings Page
Set Header 1 Key Input field to Api-Token

In Header 1 value: Place the API access token That we copied in step 4.
In Raw data to Send, Textarea put the raw JSON as given below.
{
    "contact": {
        "email": "johndoe1@example.com"
     }
 }
Note: Email attribute is required. We can also add the additional attributes that are given in the below table.
Raw JSON Parameters:
| ActiveCampaign Fields | Digioh Fields |
| firstName (Optional) | [FIRST_NAME] |
| lastName (Optional) | [LAST_NAME] |
| phone (Optional) | [PHONE] |
| email (Required) | [EMAIL] |
ActiveCampaign Custom fields.
We can pass custom fields to ActiveCampaign as well through the contact API.
Just pass the custom fields array along with the custom field ID and value.
In Raw data to Send, Textarea put the raw JSON as given below for passing the custom fields.
{
    "contact": {
        "email": "johndoe@example.com",
        "firstName": "John",
        "lastName": "Doe",
        "phone": "7223224241",
    "fieldValues":[
      {
        "field":"1",
        "value":"The Value for First Field"
      },
      {
        "field":"6",
        "value":"2008-01-20"
      }
    ]
    }
}
That’s all Your ActiveCampaign integration is ready to go!
Related Reading: