What You’ll Learn in This Article:
- Understand how exit intent works on both desktop and mobile
- Set up an exit intent pop-up using a Quick Start theme or from scratch
- Customize pop-up conditions to target the right users at the right time
Exit intent pop-ups help re-engage visitors before they leave your site, giving you one last chance to capture their interest. With Digioh, you can easily set up an exit intent pop-up to display targeted messaging when a visitor moves to exit your site.
How Exit Intents Work:
- On Desktop: The exit intent triggers when the user moves their mouse toward the edges of the page—top, bottom, left, or right—indicating they are about to leave.
- On Mobile & Tablet: Since there’s no mouse to track, the exit intent triggers based on inactivity. We detect when a user lifts their finger from the screen and remains idle for a few seconds.

Setting Up an Exit Intent Pop-Up in Digioh
Option 1: Use a Quick Start Theme
For a fast and simple setup, Digioh offers pre-configured exit intent pop-ups in our Quick Start themes. These include a fully built form with pre-set conditions applied. All you have to do is update the colors/fonts to match your branding and turn it on.


Depending on your specific goal for the exit intent, you may need to add additional conditions to refine when and where the pop-up appears.
For example, you may want to:
-
Exclude visitors who recently made a purchase
-
Prevent the pop-up from triggering for users who arrived via email marketing
-
Adjust timing based on user behavior (visited X amount of pages this session, total seconds on page greater than X, etc.)
We recommend reviewing and customizing the conditions to ensure they align with your desired user experience.
Option 2: Create an Exit Intent Pop-Up from Scratch
Video: Watch the video below to go over Exit Intent Pop Ups
From your main dashboard, click “Create New Campaign” or navigate to the Campaigns dropdown in the header and select “Create New Campaign”.

Select a theme for the base of your design and click “Create”. We recommend filtering by the “Exit Intent” use case, but any of our pop up themes can be leveraged for an exit intent. Once you’ve created the popup you can update the design in the editor to match your site.
Depending on the specific use case of the exit intent you will need to update the button action of the CTA. Common use cases include redirecting the user to their cart or taking them to your quiz.

Once your design is finalized, it’s time to configure when and how your exit intent pop-up appears on your site.
Configuring Exit Intent Conditions
Navigate to your campaign conditions: Open your pop-up in the Campaign Editor and in the left menu, go to Conditions > Edit. (Alternatively, you can get there from the main Campaign Dashboard, by clicking the Add button under Conditions.)

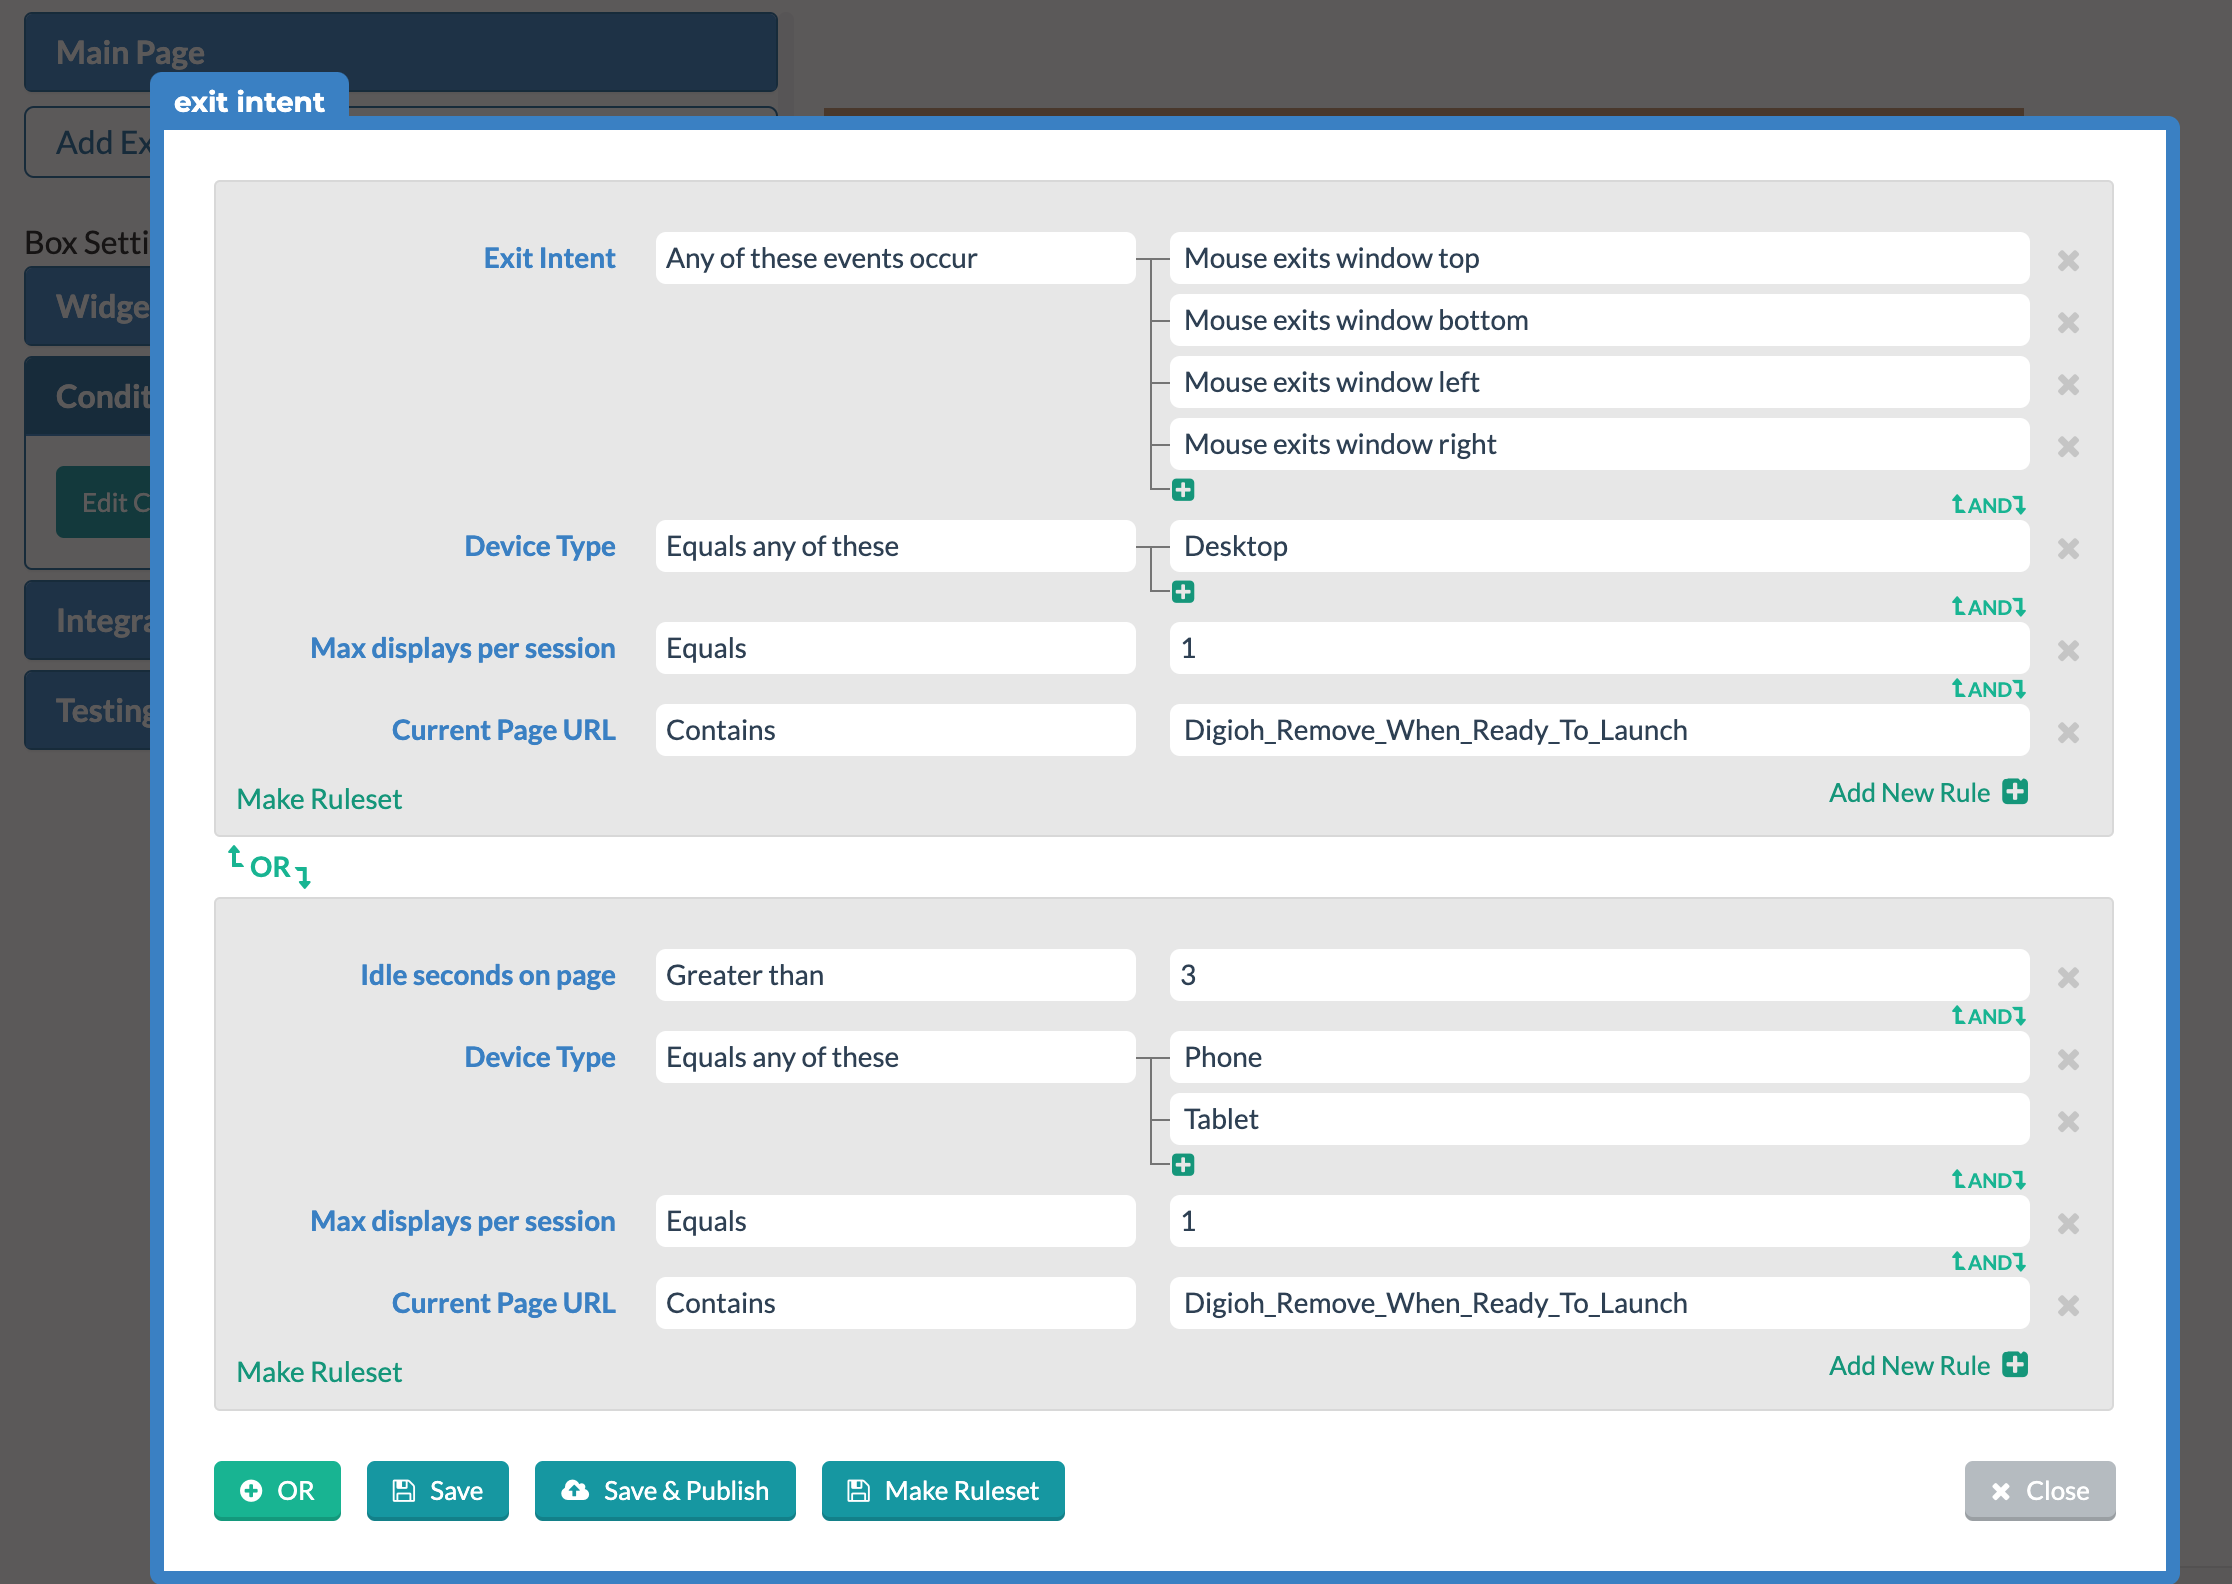
Begin adding rules for when this exit intent should trigger. We recommend starting with rules for desktop devices, such as:
- Device Type > Equals > Desktop
- Exit Intent > Any of these events occur (select all relevant mouse exit triggers)
- Max Displays Per Session > Equals > 1 (prevents repeated pop-ups in one session)
- Current Page URL > Does NOT contain (exclude specific pages if needed)
- Pages Navigated URLs > Does NOT contain > checkout or thankyou (excludes users who have completed a purchase)
Since mobile and tablet devices don’t use a mouse, the exit intent will be based on inactivity. Click the “+ OR” button at the bottom left of the conditions window to create an additional block of rules.

This set of rules will be evaluated for exit intent specifically on mobile and tablet devices.
- Device Type > Equals any of these > Mobile + Tablet
- Idle Seconds on Page > Greater Than > 3 (triggers the pop-up after inactivity)
- Include any other relevant rules from your desktop rule block

Once all conditions are set, click Save or Save and Publish Live to apply your changes. Now your exit intent pop-up is fully configured to re-engage visitors before they leave, helping you boost conversions!
