To set up Digioh GA4 Analytics follow the steps below:
1. Connect GA4 to Digioh
Digioh integration with GA4 is based on events and properties. To make the Digioh event data available to Digioh Reporting, you need to connect your GA4 account to Digioh. In the Digioh HQ, go to your profile menu top right, click “GA Integration”, and follow the instructions there.
2. Install the GA4 Tracking App
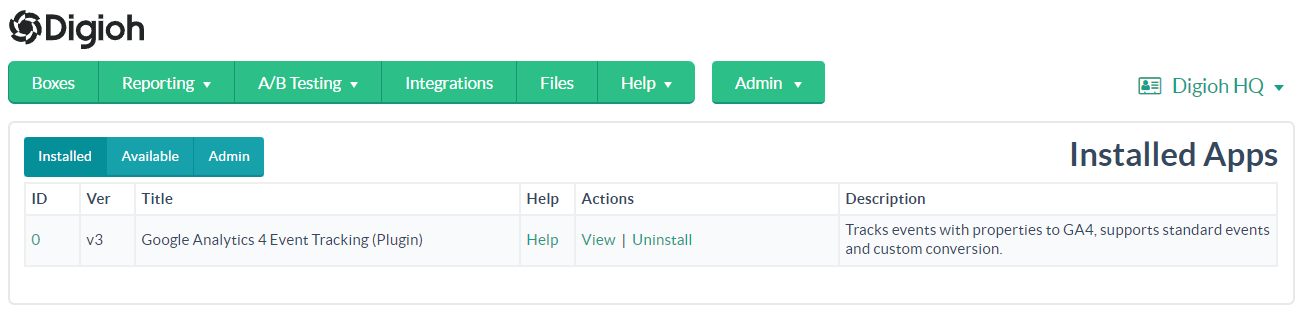
You may have already have the GA4 app installed, in which case proceed to step 3. In the Digioh HQ, profile menu top right, pick “Custom JS (Apps)”. Then find and install “Google Analytics 4 Event Tracking (Plugin)”. If you can’t find it, check the “Installed” tab to see if you already have it installed. If you are migrating from GA3 (Universal), uninstall the GA3 app at this time.
Once the app is installed in Digioh, and Digioh and GA4 are installed on your site, Digioh will track standard events to your GA4 instance. Note that if you have multiple GA4 Measurement IDs (trackers) configured for your site, then Digioh will track the same events to all of them.
Configuring the GA4 App
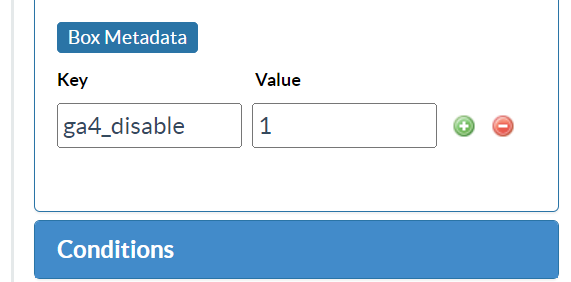
Suppression of GA4 App
The app, when installed, is on by default. If you want to suppress GA4 tracking for a particular box (e.g. test boxes, or an inline that displays in your footer for every pageview), configure box-level metadata ga4_disable=1:
Tracking Box Conversions
Another configurable aspect of the app is the ability to explicitly track Conversions. Digioh will automatically track submissions and redirects, but these may not correspond to what you would define as a Box Conversion. For example, you might have a box with 3 separate forms, and you consider the user as Converted only on submitting the last form. Or, you might have redirect buttons for “I Agree” and “No Thanks”, and you want to track a Conversion only on one of them. To track Conversion events (see Data Model below for event detail), add metadata conversion=label to either a Box page or button:
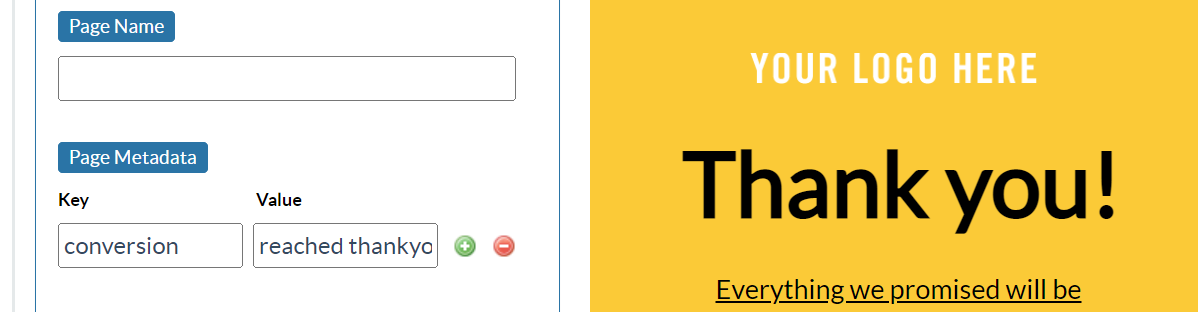
If you want to track a conversion after a form has submitted attach the metadata to the following page(s). Don’t attach it to the submit button, because that will track immediately, before the form input is validated, and will result in false positive conversions. The main use case for conversion tracking on button clicks is for redirect URLs.
Working with the GA4 App
For general troubleshooting and verification of Google Analytics on your site, we recommend the Google Analytics Debugger Chrome Extension.
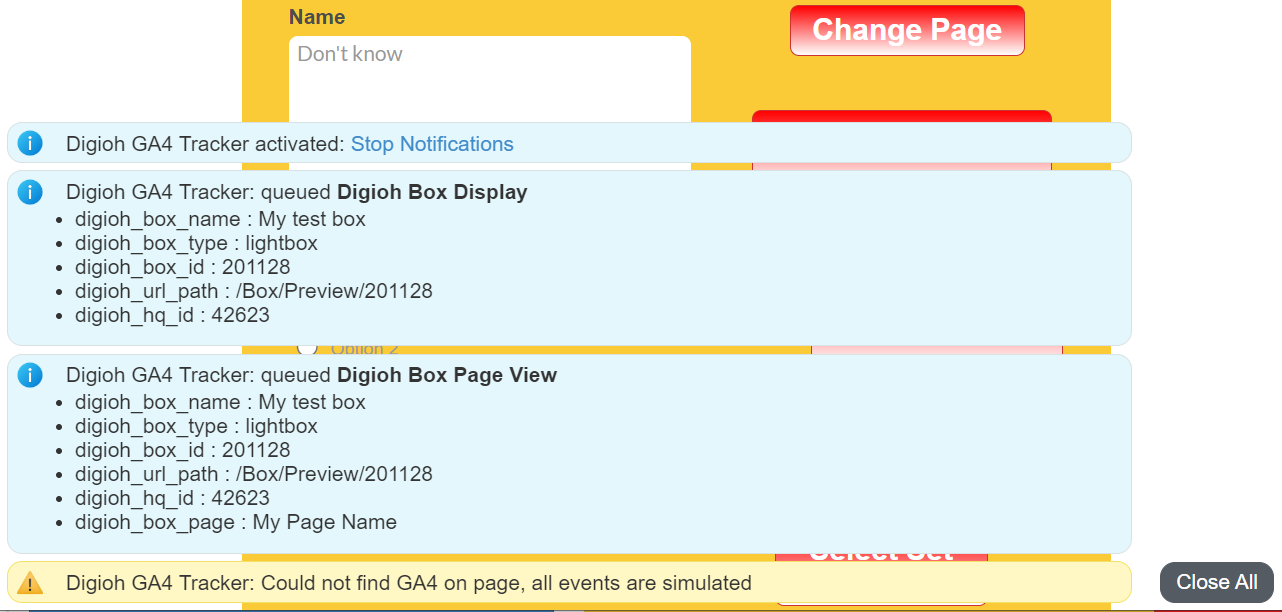
When Previewing Boxes in the Digioh HQ, and when using Digioh in boxqamode, the GA4 app also notifies you of what it is doing (or would do, if in Preview):
3. Create a Custom Audience and Custom Dimensions in GA4
Digioh integration with GA4 is based on events and properties, allowing the Digioh HQ to provide reporting using your GA4 data.
Part of this process is creating in GA4 a Custom Audience, and Custom Dimensions that “wrap” the event properties.
Digioh custom dimensions in GA4 are very important. Digioh sends a wide range of useful data to GA for boxes and quizzes, but without the dimensions, GA4 will simply throw that data away. Custom Dimensions are not retroactive in GA4, so the sooner you create them the better. The GA Integration screen can do this for you, but if for any reason you need to set this up manually in GA4, you can do so manually as follows below.
Setting Up the Roles in GA4
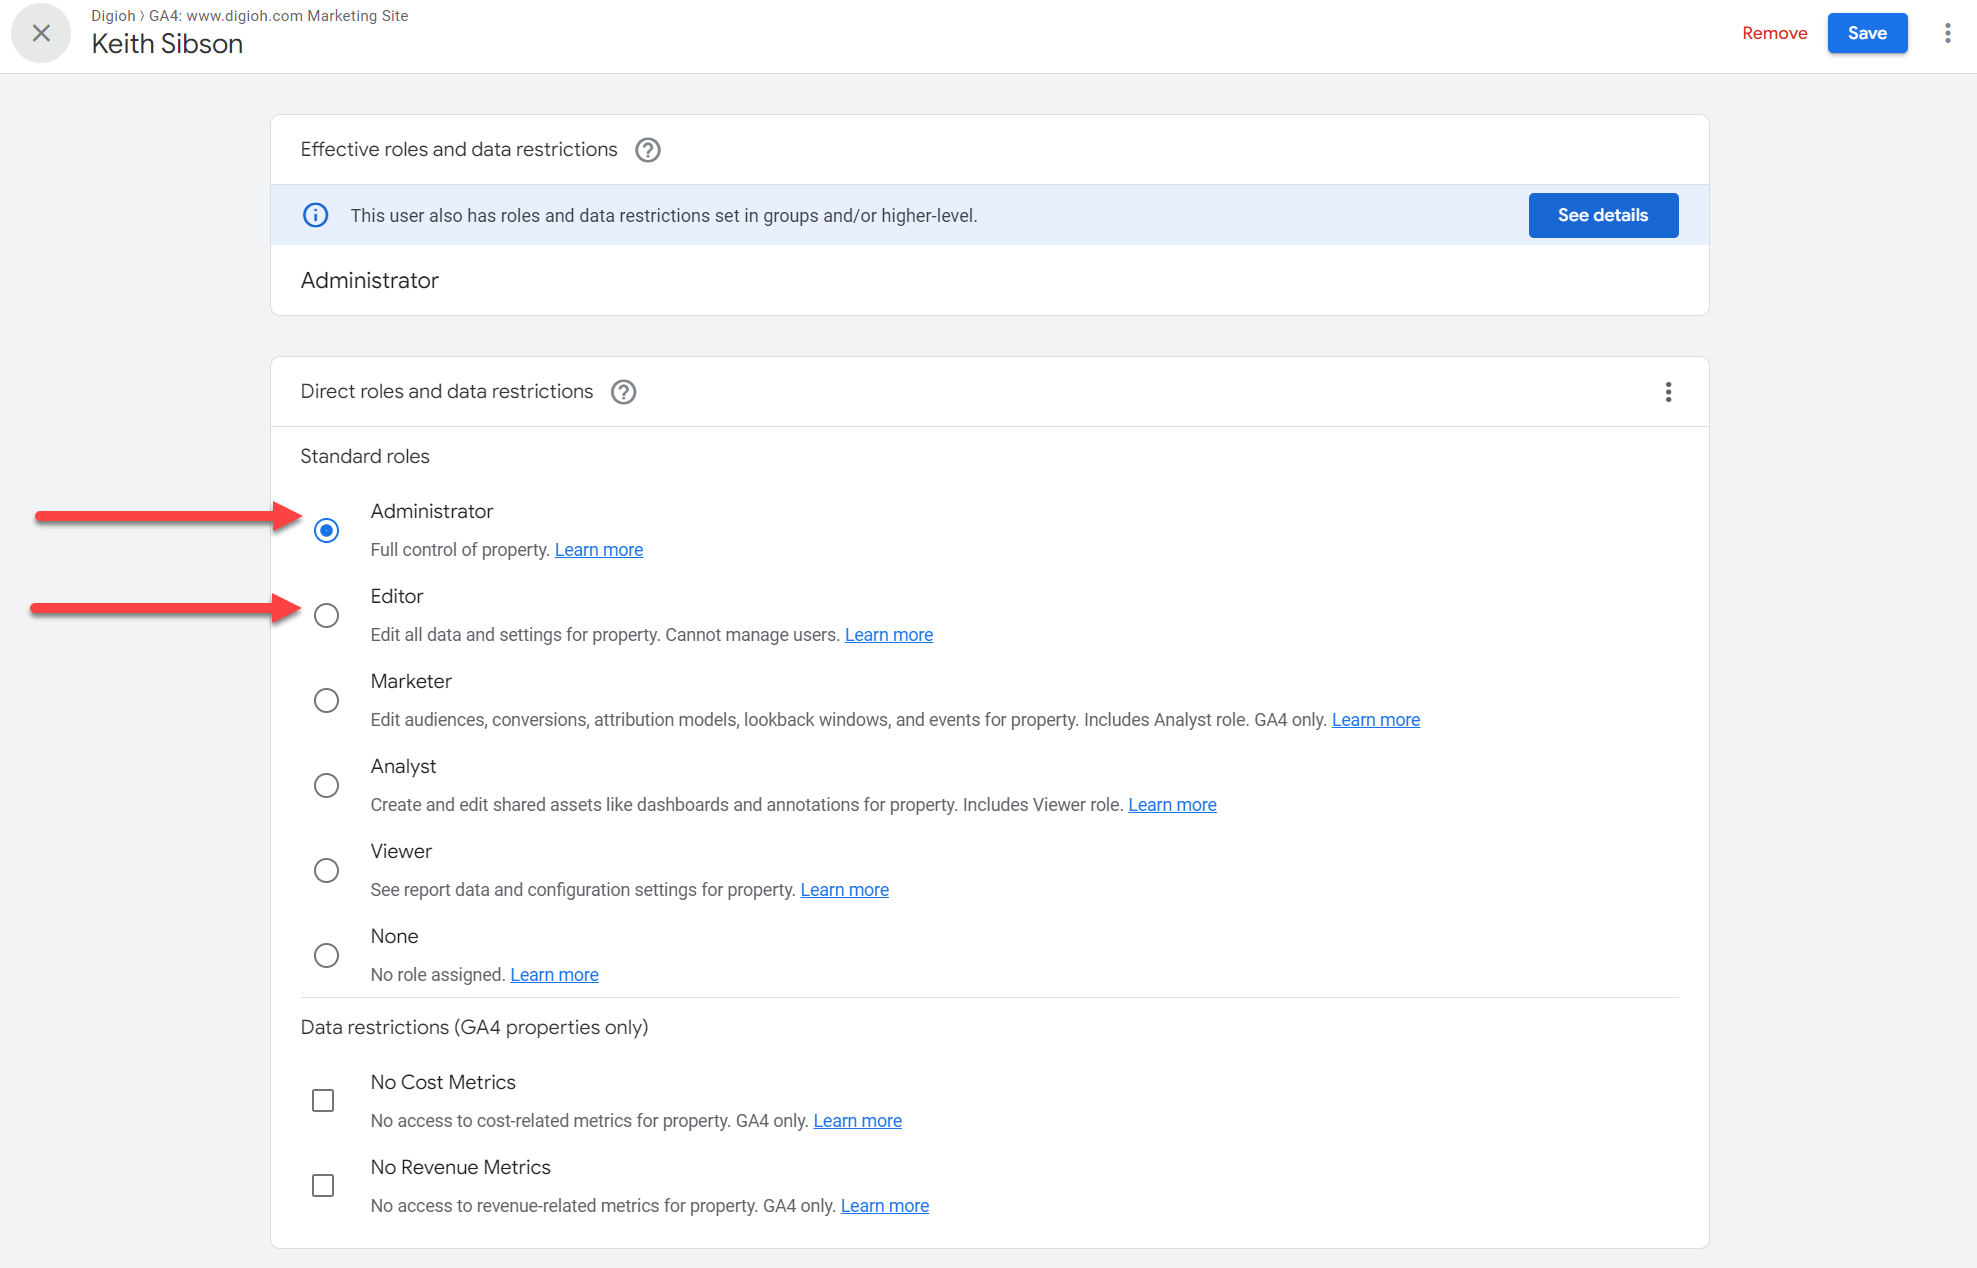
In order to create these Custom Dimensions, your GA user needs at least the Editor role. If you do not have this role, you will need to have someone who does connect to Digioh, or have them create the dimensions manually in GA4.
To create GA4 Audiences from Digioh, you need at least the Marketer role.
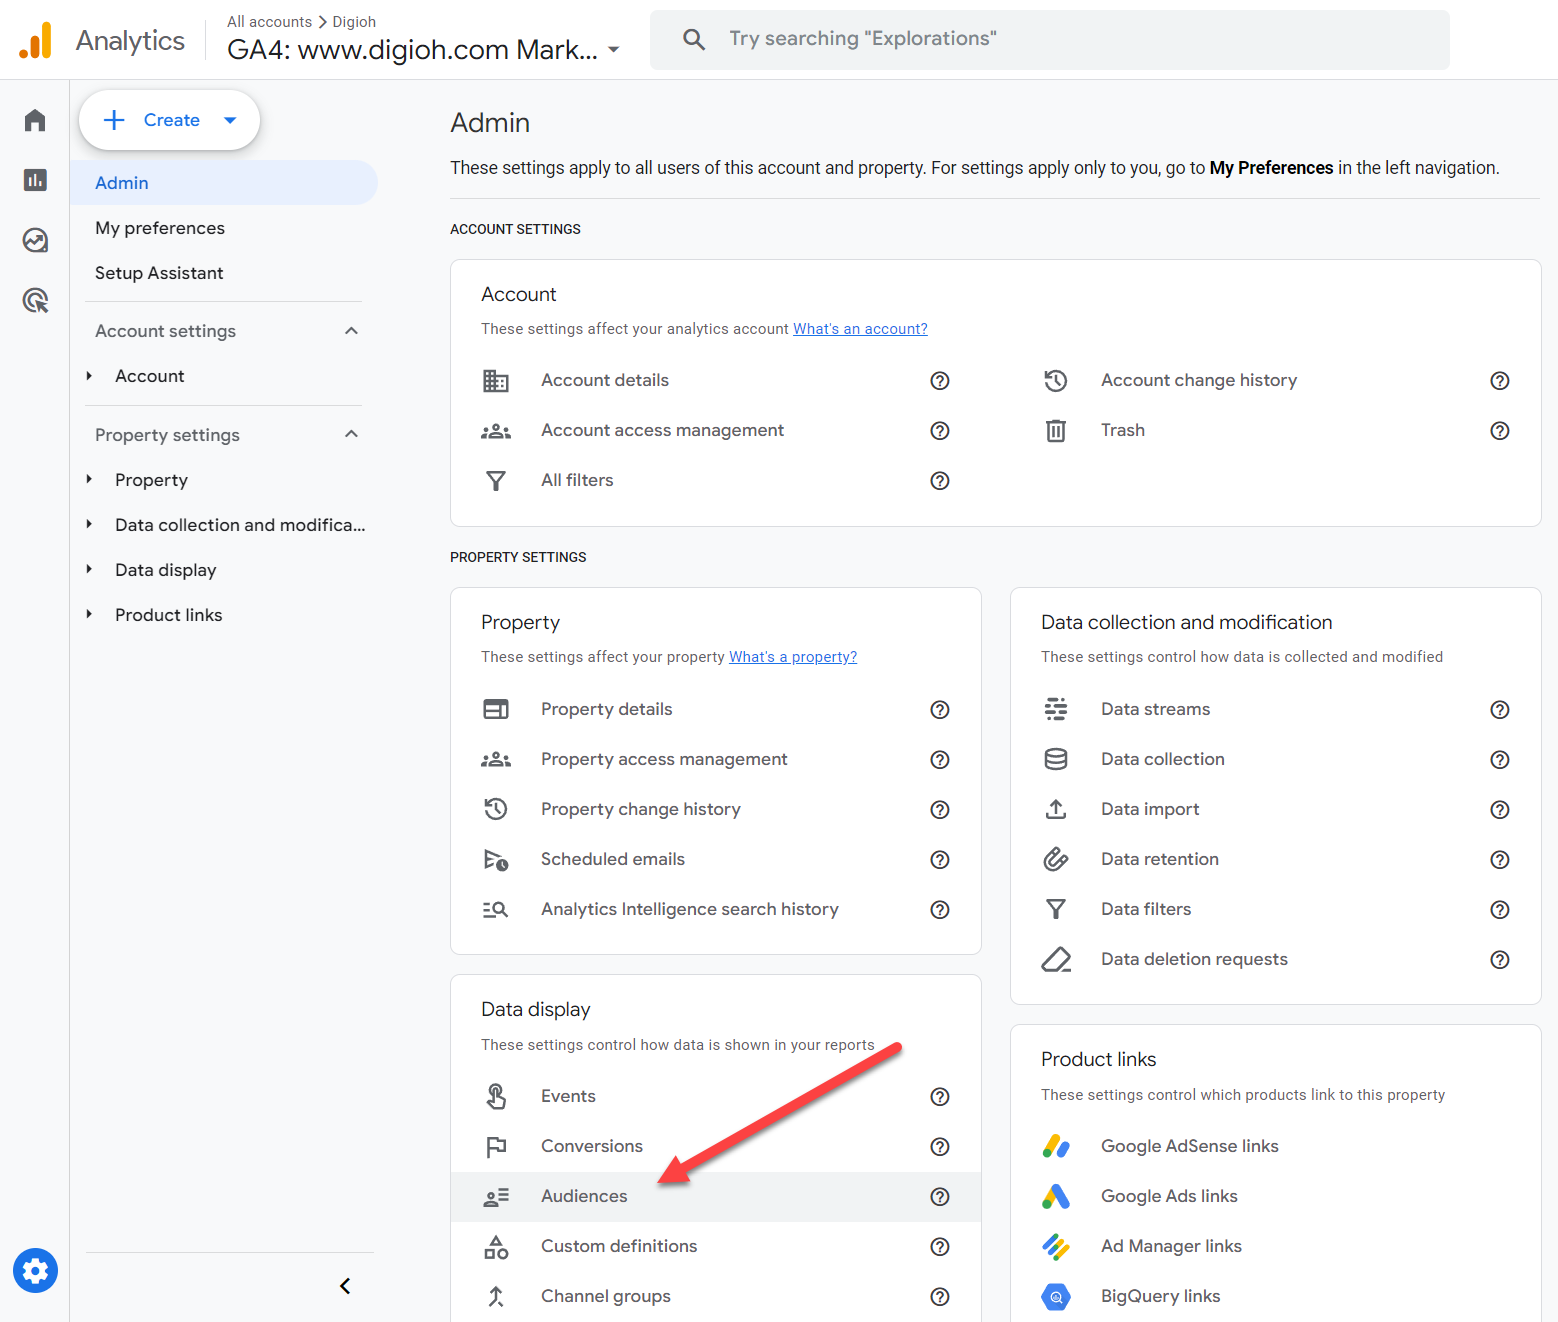
Create Audiences in GA4
In GA4 go to Admin then first go to Audiences, and create a new Custom Audience based on the digioh_box_engaged event.
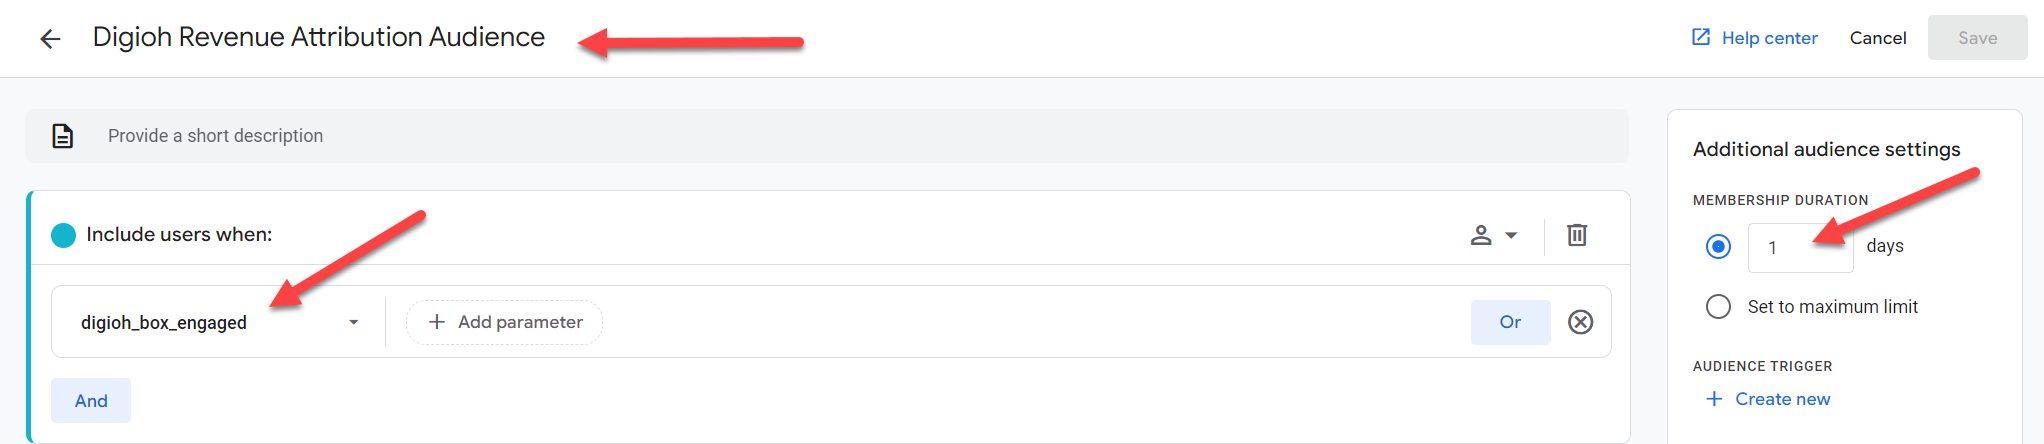
Click “New Audience” then “Create a Custom Audience”, then use this audience definition. It is very important that the audience name be exactly “Digioh Revenue Attribution Audience”.
Create Custom Dimensions
You can create custom dimensions in your Digioh account or your GA4 account. Please see the specific instructions below.
Creating Custom Dimensions in Digioh Account (Recommended)
Create the dimensions from Digioh UI. To navigate there, click your account menu in the top right and select “Google Analytics Integration”.
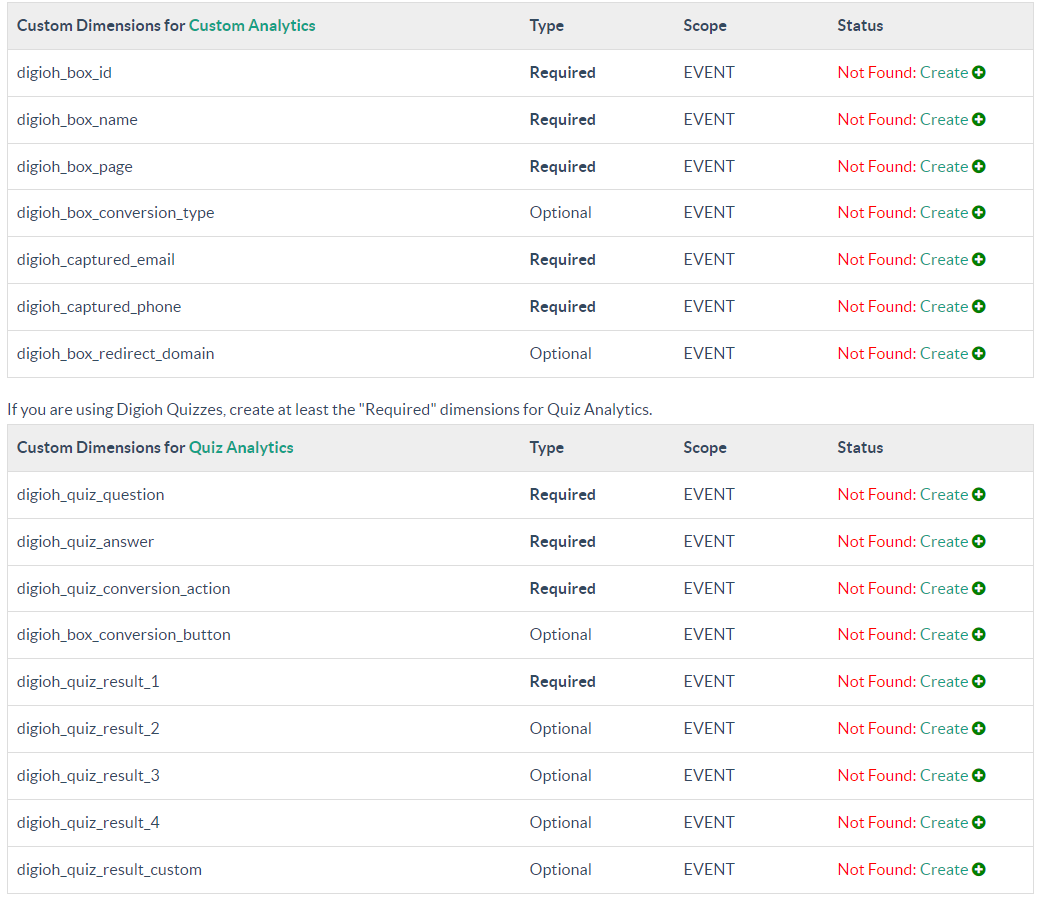
There’s some required and some optional ones. We recommend creating only the required ones, as you may find that you are limited by a maximum number of dimensions.
Click on create and it will create the dimensions in your GA4 instance.
Create Custom Dimensions in GA4 (Optional)
To create custom dimensions in GA4, from the GA4 Admin screen, go to Custom Definitions (just below Audiences) and “Create Custom Dimension” for each of the Required event properties listed on the Digioh HQ GA Integration screen, also listed below.
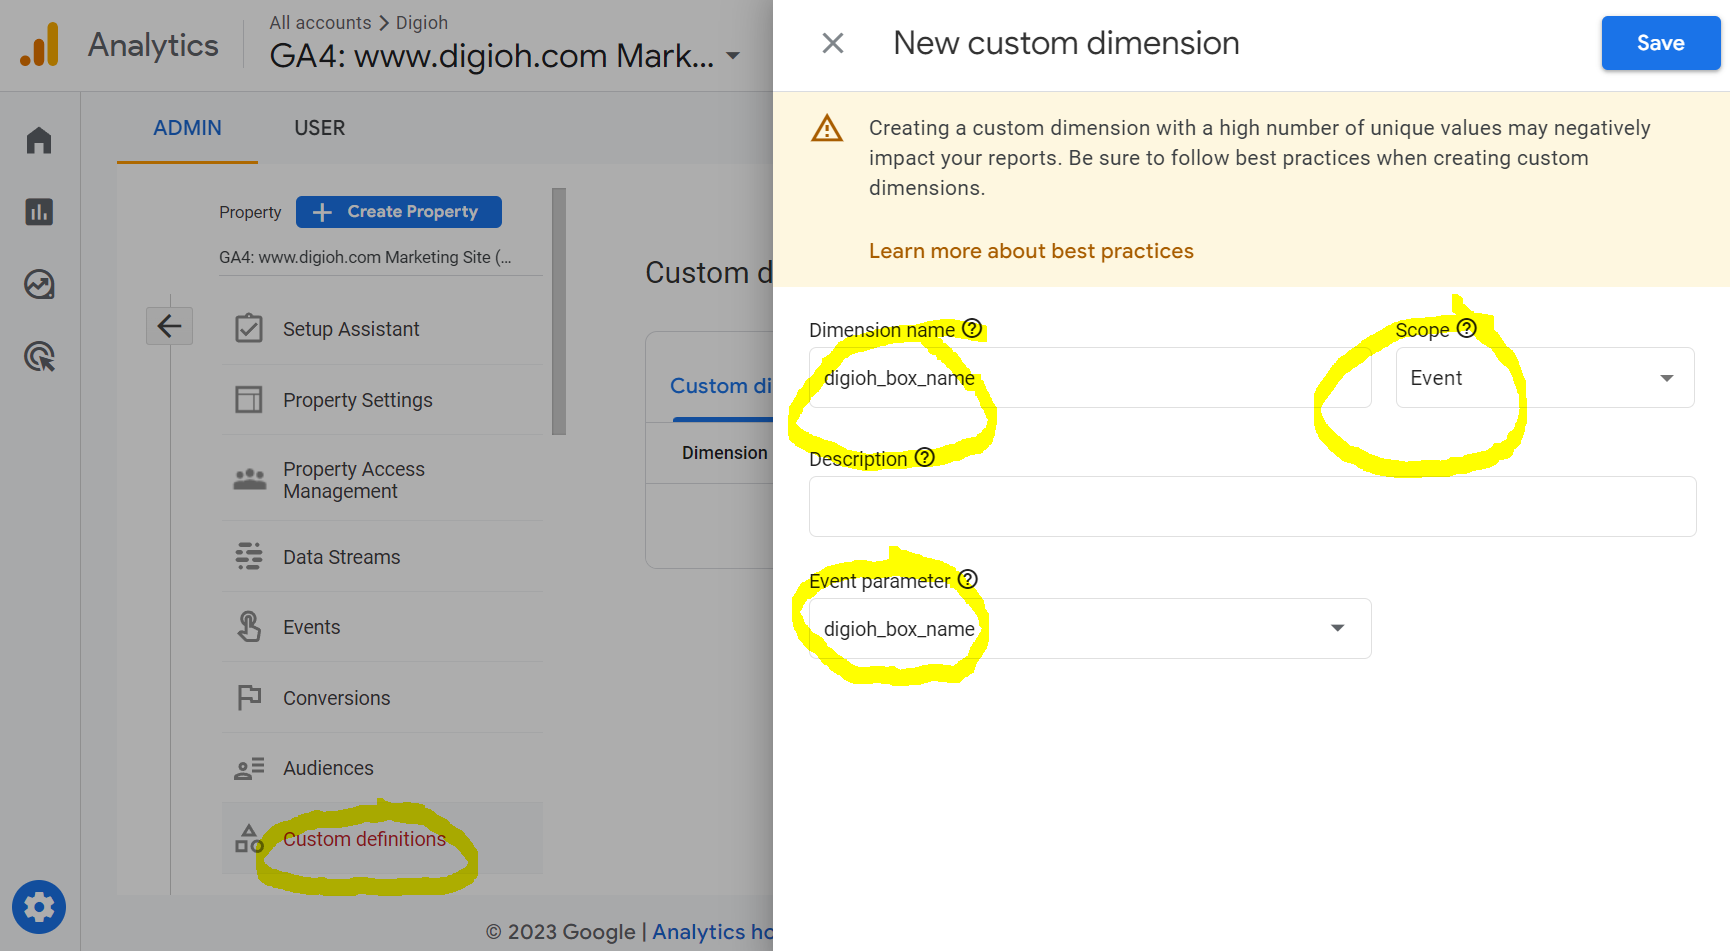
Make sure to set the scope to “Event”, and to set dimension name the same as the property name.
- digioh_box_name
- digioh_box_page
- digioh_collected_email
- digioh_collected_phone
- digioh_box_redirect_domain
- digioh_box_redirect_path
- digioh_box_conversion_type
- digioh_box_conversion_button
If you are using Digioh Quizzes, more data is available, add these dimensions too:
- digioh_quiz_conversion_action
- digioh_quiz_question
- digioh_quiz_answer
- digioh_quiz_result_1
- digioh_quiz_result_2
- digioh_quiz_result_3
- digioh_quiz_result_4
GA4 has a maximum of 50 custom dimensions and 50 custom audiences. If you get an error saying “maximum resource limit”, then you’ll need to archive dimensions or audiences as applicable to make room.
For more information about these event properties, see:
- Tracking Digioh Box Interactions to Google Analytics 4
- Standard Event Tracking Data Model for Digioh Box Interactions
- Product Recommendation Quiz Analytics Data Model