What you’ll learn
- Add Extra CSS to editor elements
- Add Wrapper CSS to editor elements
- Add CSS to the Outer Box
- Link to an external stylesheet
We designed the Digioh form editor to give you a ton of control, but with a little CSS, you can unlock even more potential in your lightboxes, pop-up forms, and other onsite widgets. There are several ways to add CSS to elements in the editor. Certain elements like Text, Buttons, Images and HTML blocks have an Extra CSS Styles section, where you can add CSS information to them.
For advanced styling, you can add styles into an HTML block that reference the class or ID of any element in your widget.
Add CSS to Elements in the Editor
Extra CSS
To add CSS styles to Text, Buttons, Images or HTML blocks, enter the CSS Property and value under Extra CSS Styles.
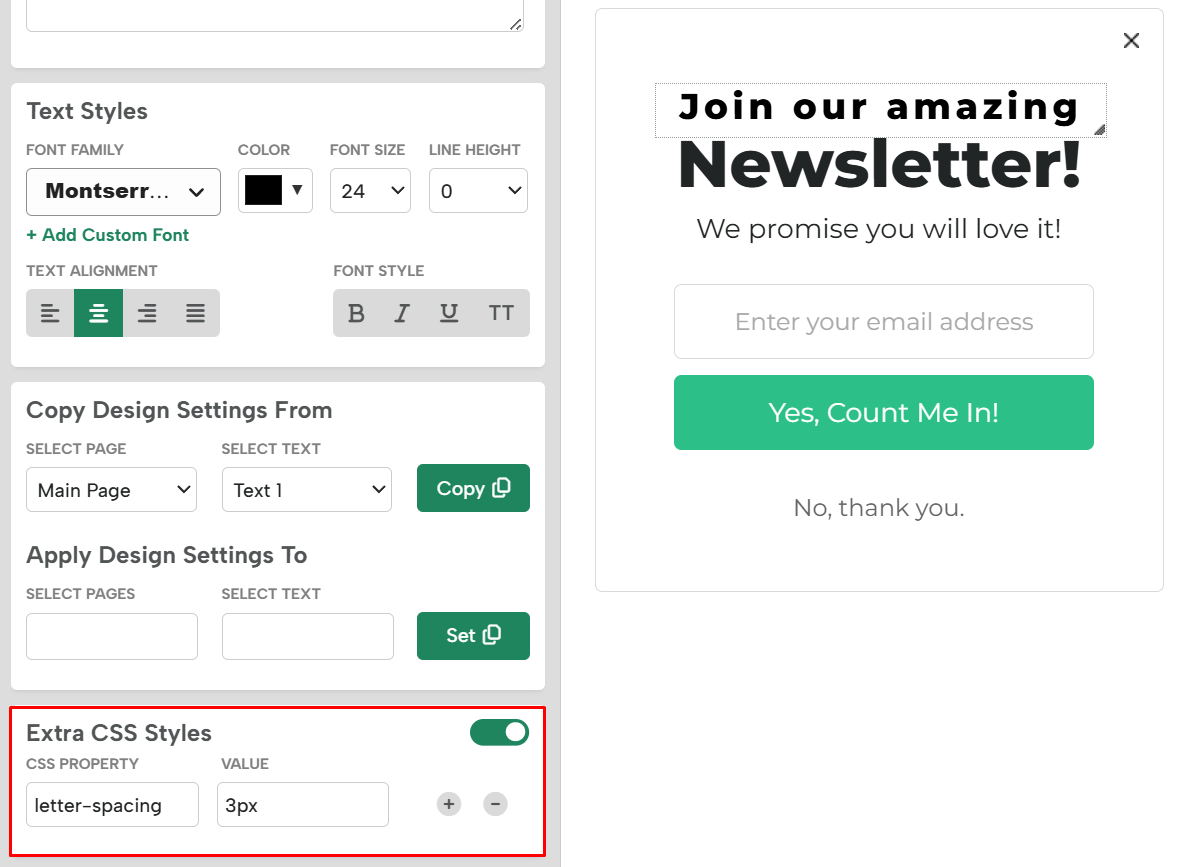
For example, to add “letter-spacing: 3px;” enter “letter-spacing” in the CSS Property, and “3px” in the Value field.
Wrapper CSS
Wrapper CSS is a container around the component, that lets you apply CSS like positioning, margins, padding, or z-index.
For example, if you add “z-index: 0;” to a wrapper CSS, this will place the image behind a text and any other element.

Add CSS to the Outer Box
To add CSS that applies to the box itself, add it under the Widget blade.
At the bottom is an Extra CSS Styles field. Here, you can add extra details like a shadow or margins. Save and preview your box for changes to take place.
Enter the information as you would normally in a stylesheet, separated by semicolons.
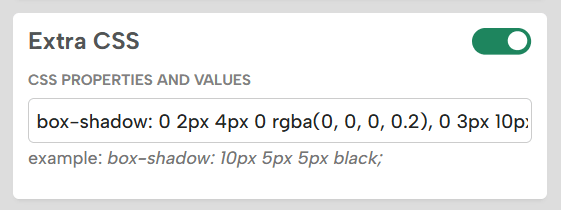
In this pop-up form example, we added a box shadow with this code:
box-shadow: 0 2px 4px 0 rgba(0, 0, 0, 0.2), 0 3px 10px 0 rgba(0, 0, 0, 0.19);
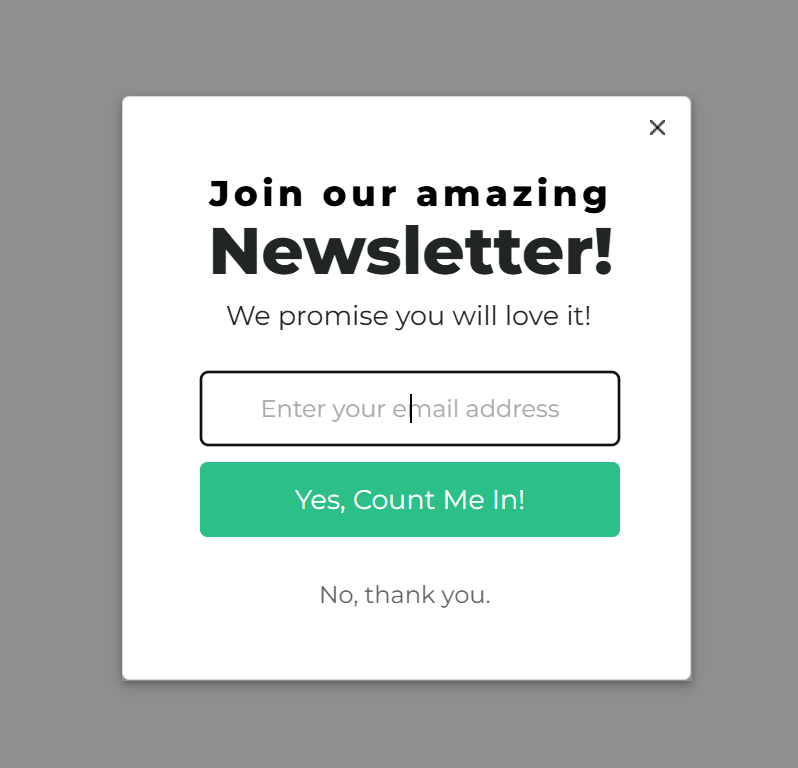
Save & Preview to see the styles applied to the entire widget.
Add CSS to Specific Fields with an HTML Block
While options like like height and border color are available in the editor, sometimes you may need something more specific.
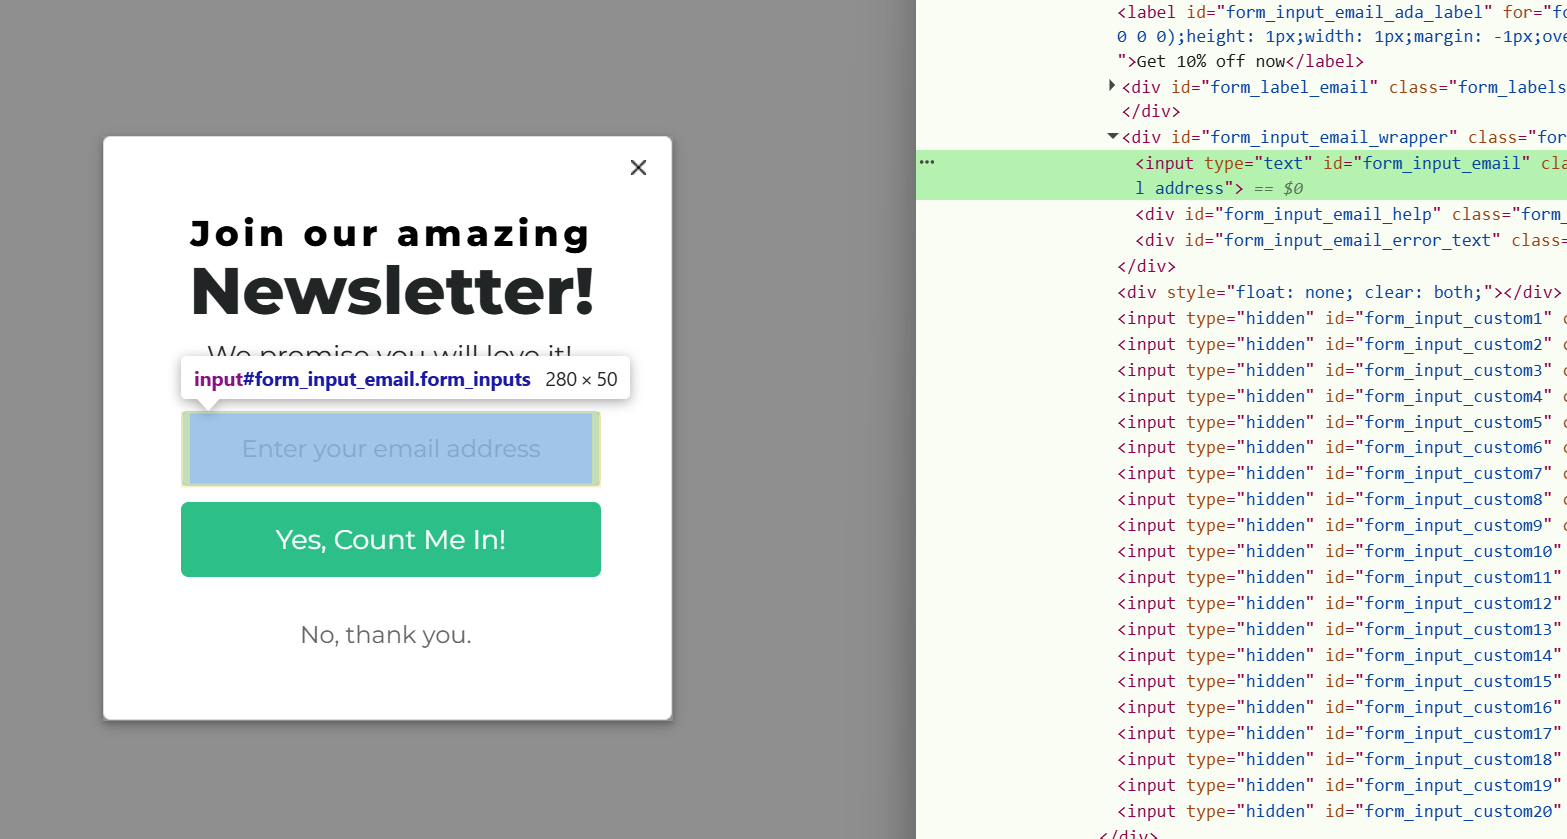
To add CSS to a specific ID or class of a form field, preview the widget and inspect the element with your browser’s Dev Tools to get the ID or class of that particular element.
Note: Make sure you get the class or IDs from the preview, rather than the editor. You may have to Save and Preview to see the changes.
For example, to add a 2px bottom border to a specific field, insert the following code:
#[FIELD_ID_HERE] {
border-bottom: 2px solid black;
}
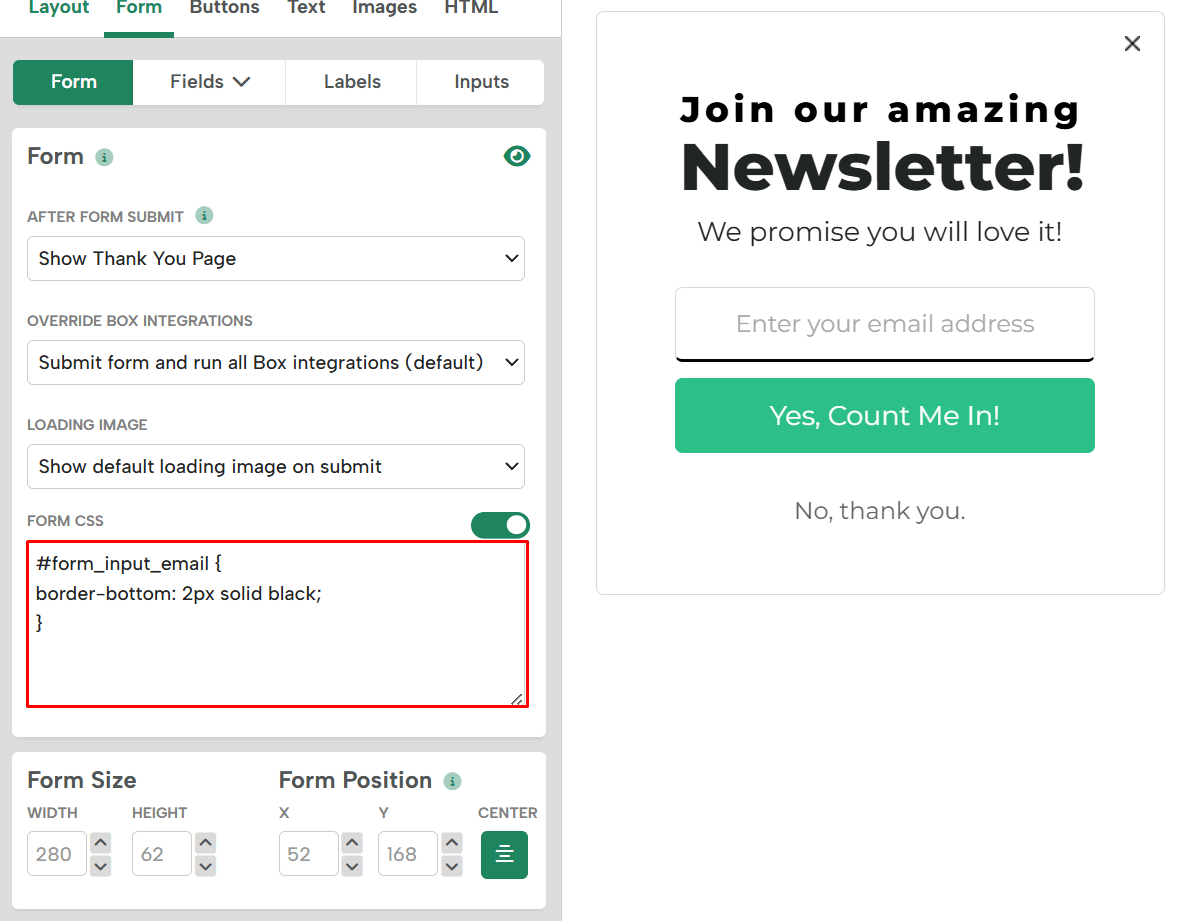
This will add a 2px black border to the bottom of that field.
You can also add styles to all of the same type of element, like all text fields or buttons.
For example, to remove the outline of all text fields when selected, add this code:

input[type=text] {
outline: none;
}
Note: If you don’t see changes, mark your new styles as !important.
Linking to an external stylesheet
To link to a CSS file for your box to reference, upload the CSS file to your Upload Files section.
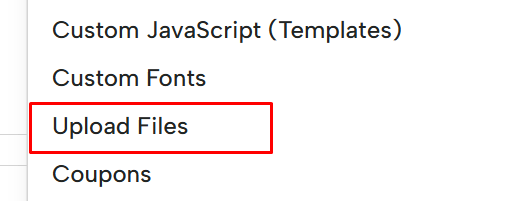
Then select Upload Stylesheet option

Then, link to your stylesheet in an HTML block.
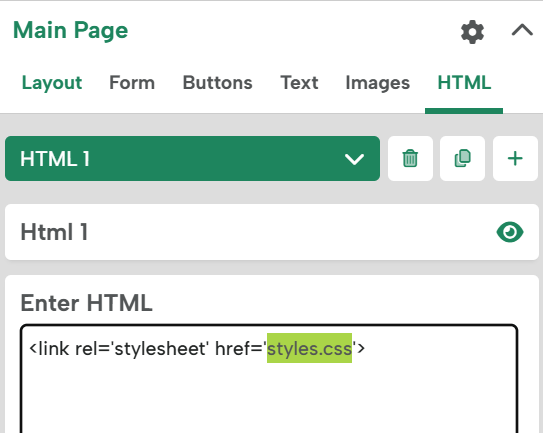
<link rel='stylesheet' href='styles.css'>
Note: Make sure your stylesheet references the relevant IDs and classes from the widget. (See above “Add CSS to specific fields with an HTML block” section for details.)
Depending on your CSS skills and knowledge, you can really push the envelope on your box designs!