Adding a rating system to your lightboxes within Digioh can greatly enhance user experience.
With this app, you can easily add a rating system to your forms and quizzes, allowing your audience to provide feedback and rate your content. This can help users to gain valuable insights into your audience’s preferences and identify areas for improvement. By integrating this app into your Digioh box pages, users can create a more interactive and engaging environment for their audience, ultimately leading to greater user satisfaction and retention. Overall, this JavaScript app provides an effective solution for users looking to add a rating system to their forms, quizzes and other Digioh lightboxes.
To start, simply install the app. Under the top menu “Admin” button, choose “Custom Javascript (Apps)”. Then, under the “Available” tab, install the app “Add Rating Stars”.
To configure the App, first you will need to store the rating in a specific field. For this example, we will use custom_1. This step is required, and this custom field should not be used for any other field in the lightbox.
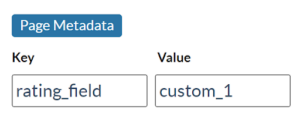
To set the field that will store the score, configure page-level metadata with: key ‘rating_field’ and value ‘custom field’
For example:
The second step in the App configuration is to set the rating label. This will be the label that is sent with the score wherever the rating data is sent. Often, you will want a specific label that is easily searchable, or perhaps one that matches the syntax of other labels in your collected data. This step is not required, and, if skipped, the default label will be ‘rating_x‘, where ‘x‘ is the rating. For example, a rating of 5 will be ‘rating_5′.
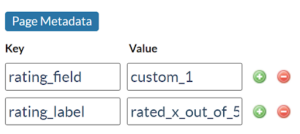
To configure the rating label, again add page-level metadata , this time with key ‘rating_label‘ and value ‘specificLabel_x’ (‘x’ is going to be where the rating is added through the App).
Here are some example rating label values:
- if ‘quiz_rating_5’ is desired, use value ‘quiz_rating_x‘
- if ‘rated_5_out_of_5’ is desired, use value ‘rated_x_out_of_5‘
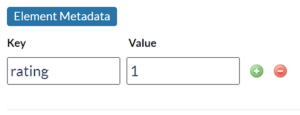
The next step is to set up the buttons. To do this, set the button metadata with key “rating” and value of a numeric rating score (value must be numeric).
Finally, set up the button’s background image. To do this, navigate to the background section of the button settings. To set the background image of the empty star, be sure the ‘use image’ toggle is on, and add the desired image. (Be sure all the rating stars use the same background image).

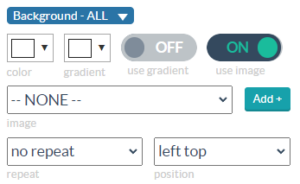
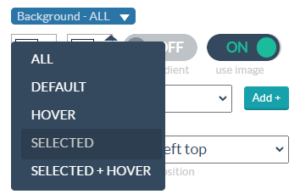
To set the filled star image, change the ‘Background- ALL’ dropdown to “Selected” and add the desired image there. Then, change the “Selected” dropdown to “Hover”, and add it there as well.

If you have any questions, send us an email at support@digioh.com, and we’ll be glad to help!
