This page from our help doc contains a full step-by-step guide on creating pipelines in Digioh to integrate with your Iterable project. Below are some examples of Iterable Pipelines that you may create.
Iterable Profile Update
As your audience in Iterable expands, you may want to begin capturing additional information on your users to be able to better segment them and provide a more personalized experience. You can use the Profile Update pipeline to help expand those user profiles! Additionally, if you are looking to add users to Dynamic Lists in Iterable, you’ll want to use the Profile Update pipeline to update the user’s profile to match the necessary criteria for the list.
Creating the Box
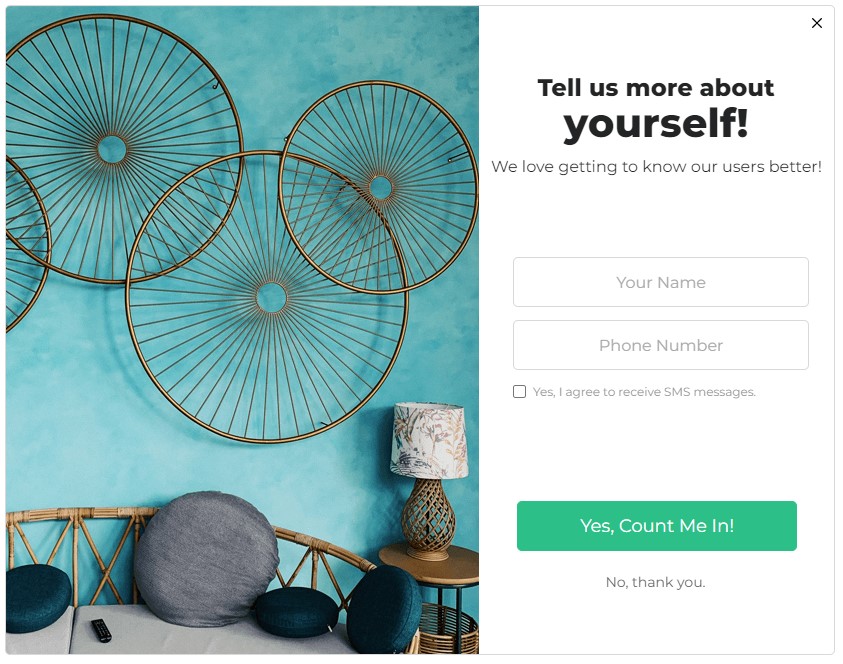
For this example, we’ll create a new box that’s targeted at known Iterable users, and ask them for their name and phone number.
Here’s an example of a box created from one of our themes:
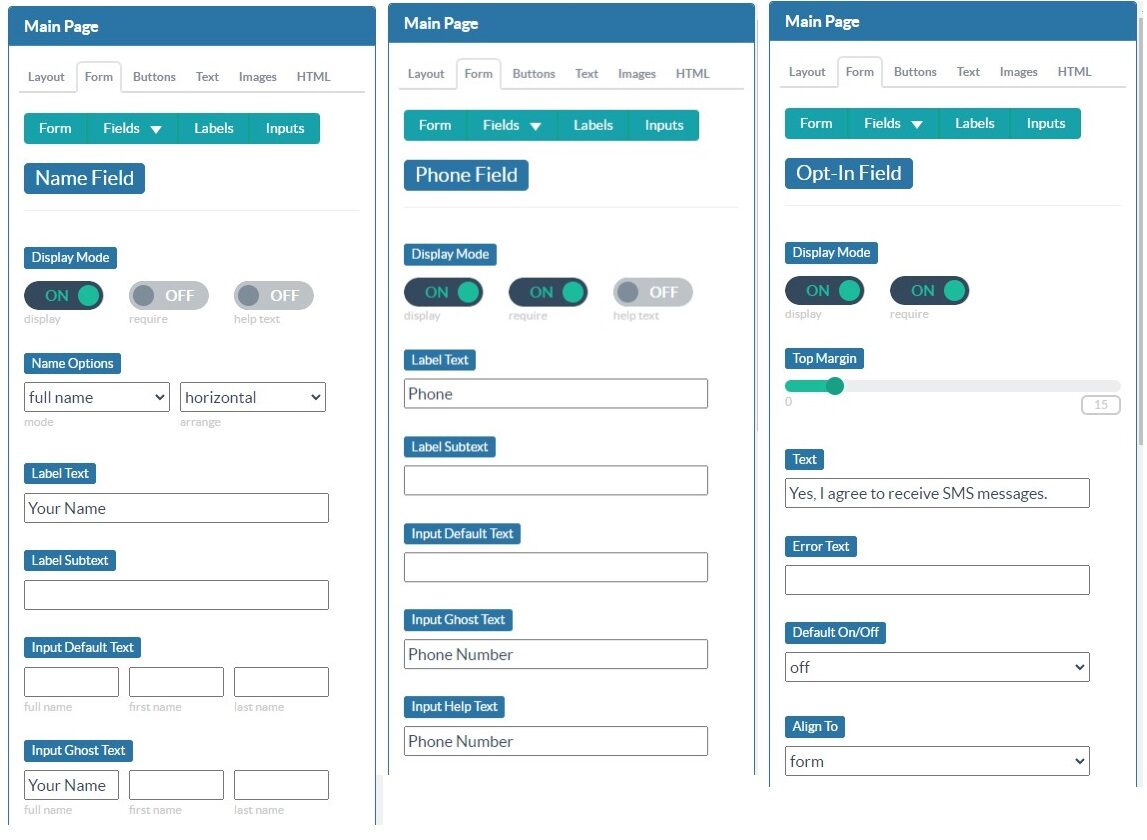
This box’s form is using the default Name, Phone, and Opt-In fields:
Conditioning the Box
For this box’s conditions, we want to specifically target known users who have previously submitted their email through a Digioh box. To do that, we’ll add an ‘Other Box’ condition to our box.
To start, open the conditions on the box and select “Add Conditions”:

In the new rule, scroll down towards the bottom and you’ll find a section labeled “Your Other Boxes”. Find the email capture box you’ve previously created and select it.

Then set the rule to use the “This event has occurred” evaluator and select “Box form is submitted”:

This rule will now ensure that your box will only fire for users who have previously filled out and submitted their email via another box. Because Digioh tracks user’s interactions with our boxes and stores submitted values in the browser’s local storage, the submitted email will now “follow” the user as they continue navigating the site and will be automatically included in future submissions.
Creating the pipeline
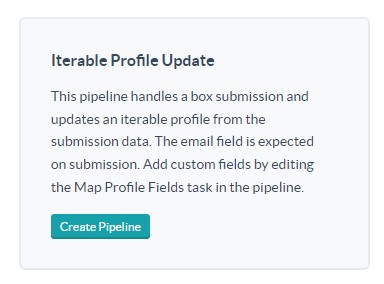
Once your box is created and conditioned, you’ll then want to create a new Iterable pipeline using the Iterable Profile Update Template:
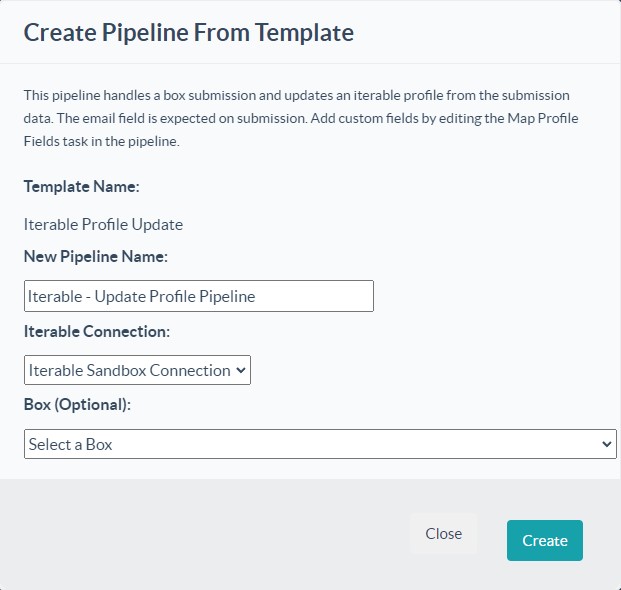
You’ll need to provide a name for the pipeline and select which connection it will use. You can also select which box the pipeline should be added to.
Once you’ve created your pipeline, it will then appear in the list of available pipelines. Next we’ll edit the pipeline to update its mapping to send the correct data to Iterable:
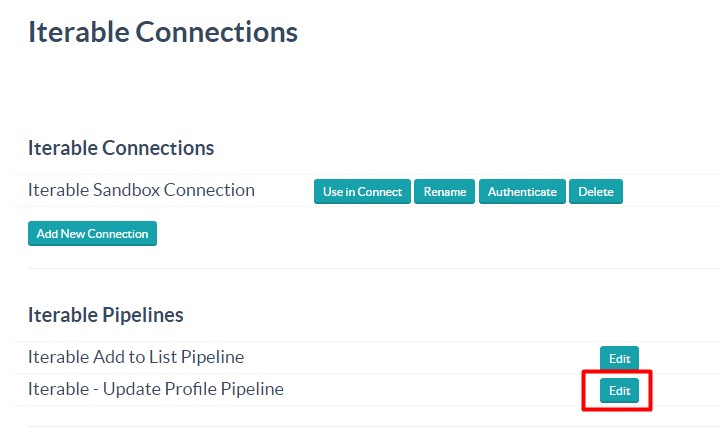
Next, select “Edit” on the “Map Profile Fields” step of the pipeline:
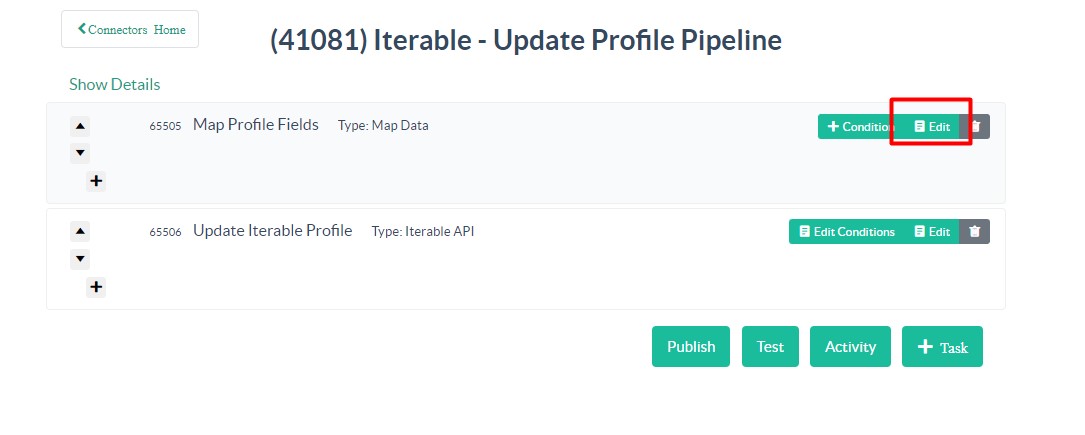
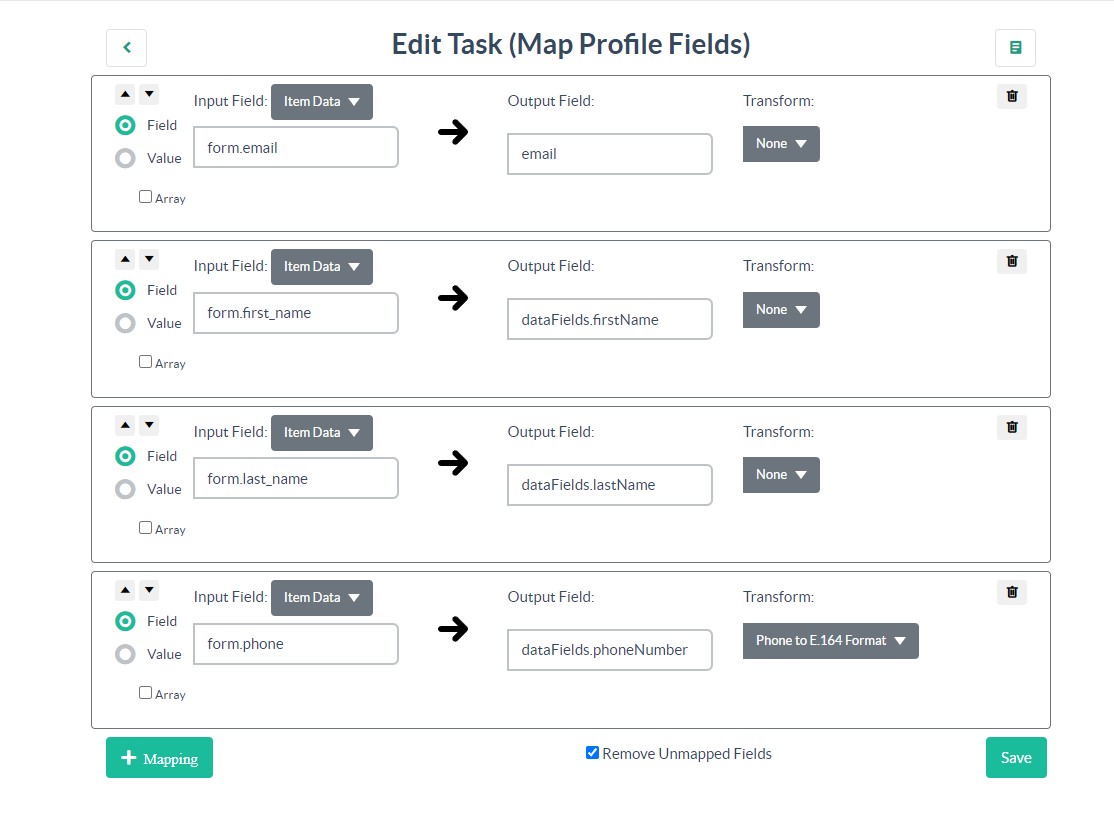
When you first edit the Map Profile Fields step, you’ll see that there are some pre-canned mappings included in the template:
For this example, we’ll start with deleting the form.last_name mapping – Because we used the “Full Name” version of the name field in our example form, there isn’t an individual Last Name field that was captured. Instead, we’ll be changing form.first_name to form.name:
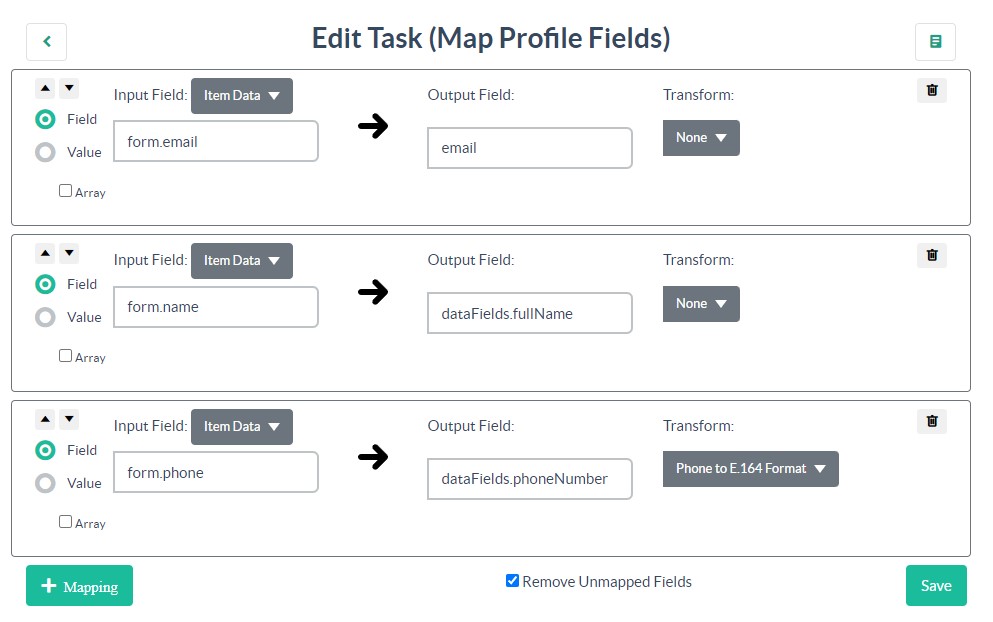
Next, because the template has already included the phone number mapping to Iterable’s phoneNumber field, all that’s left is to add the mapping for the opt-in field.
First select “+ Mapping”. In the new field enter “form.opt_in” for the Input Field, this is how we reference the default Opt-In form field. In the Output Field, enter dataFields.optIn (or whatever data field you’re using to track opt ins in Iterable). And for the Transform, be sure to select “Bool” to ensure that the form value is properly transformed into a true / false value and not the string value “true” / “false”:
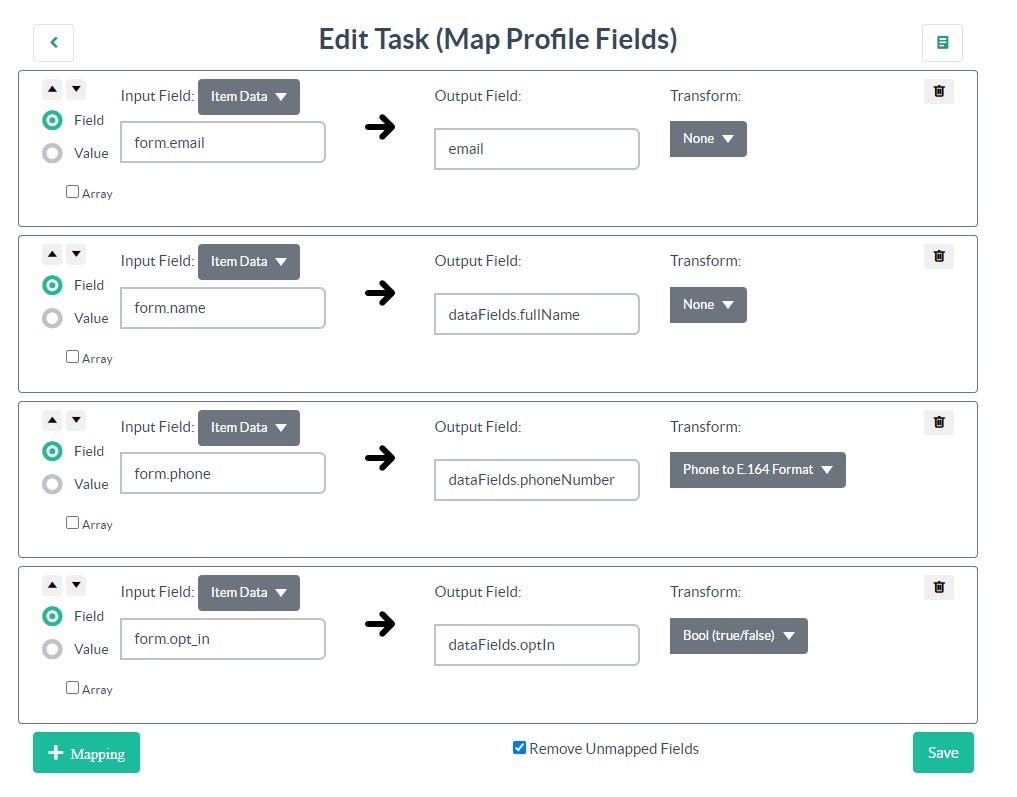
Now that the mappings have been added, you can hit Save. And then don’t forget to navigate back to the pipeline and hit Publish to push the changes live!
Now you can add this pipeline to your newly created box and start capturing additional user information!
Custom Iterable Event Pipeline
Sometimes when capturing a new user’s email address, rather than signing them up directly for a list, you may want to cause the email capture to instead kick off a Welcome Journey that you’ve created in Iterable to send the user a series of welcoming emails. To do that, you can use the Iterable Track Event pipeline template.
For this example, we’ll use be using a basic email capture box similar to the one created in this guide. But instead of adding the users to a list, we’ll instead of firing off a “newUserSignup” event to Iterable.
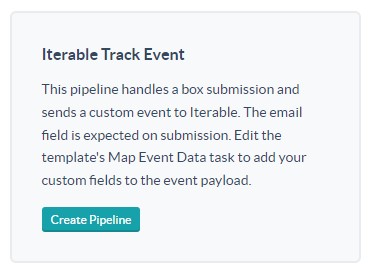
To start, we’ll create a new Track Event pipeline:
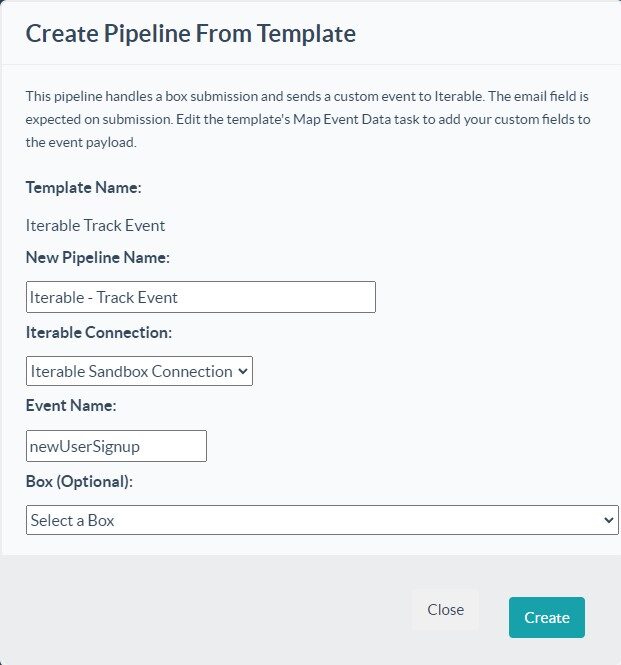
To create your pipeline, you’ll first need to provide a name for the pipeline, select which connection will be used, and enter the event name that you’ll be sending to Iterable. You can also select which box the pipeline should be added to.
Once the pipeline is created, select “Edit” from the list of pipelines to modify its mapping:
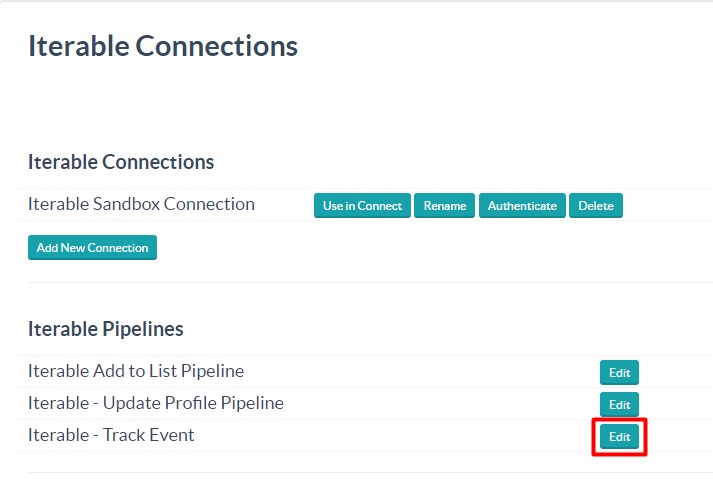
You’ll notice that in this pipeline, there are 2 sets of steps: one step to map profile fields and then perform the add / update profile action in Iterable, and another to map event data and send the event to Iterable. You’ll first want to start with editing the Map Profile Data step:
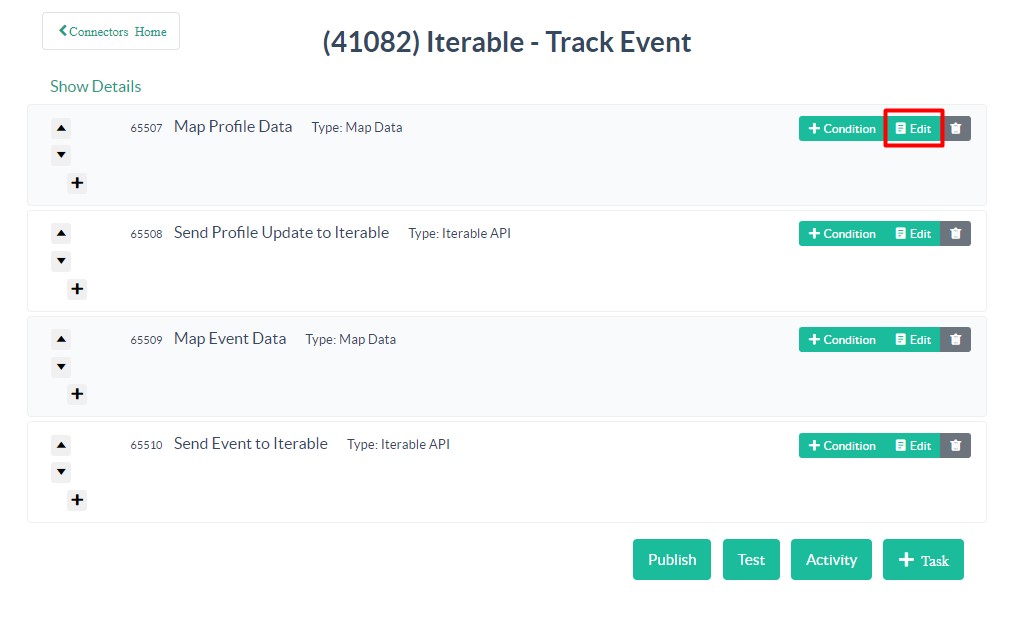
In this step, the email mapping is already included and will only need to be changed if you’re using a custom field to capture the email. Also included is an example custom field mapping. Unless your box is capturing additional user information that you want to include in their profile, you can delete the extra mapping:
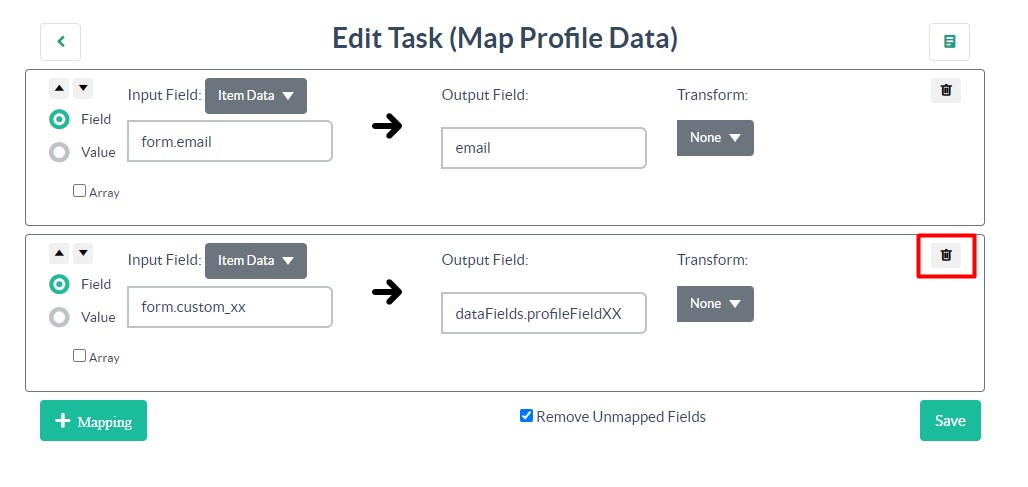
Once finished, save the mapping and then go back to the pipeline steps. You’ll next want to edit the Map Event Data step:
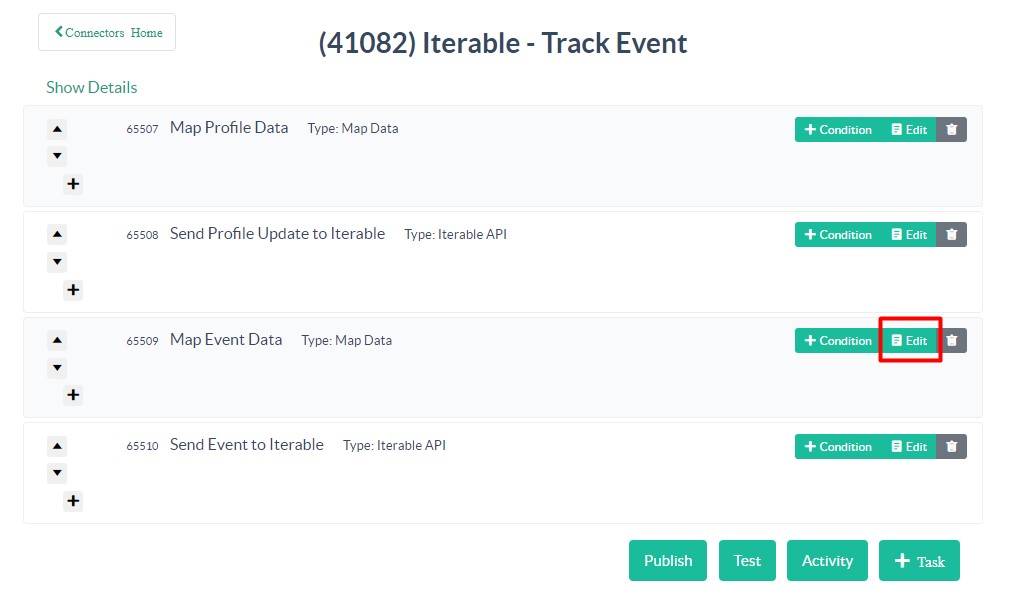
In the mapping, you’ll first see that the event name provided when the pipeline was created is already mapped to eventName, and a mapping for the email is included. There are also several example mappings using custom, analytics, and attribute fields. This page from our help docs has a list of all of the available fields that can be included in the mapping if you want to include any of them in the event. If, however, you just want to include just the email, you can safely delete the extra mappings.
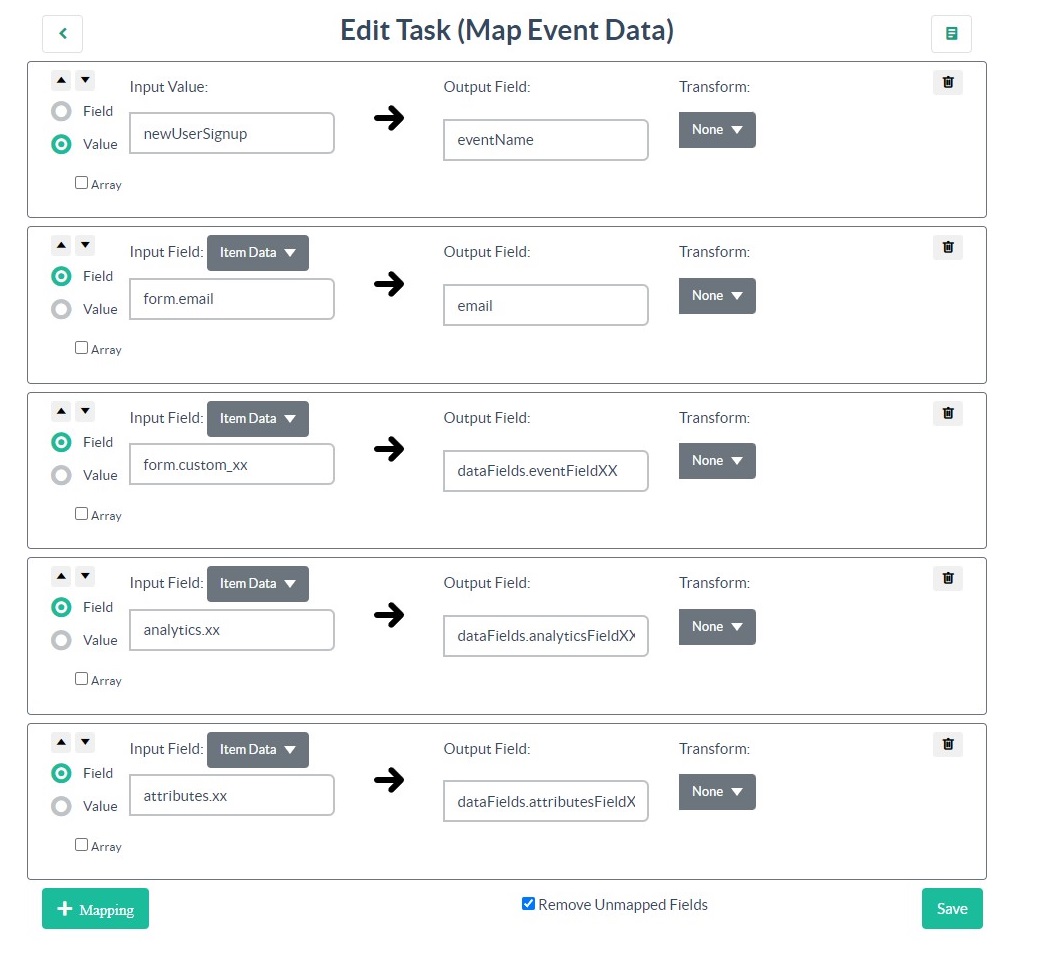
Once finished, save the mapping. Be sure to return to the pipeline and publish your changes to push them live. Now you can add the pipeline to your Digioh box and start firing events off to Iterable!
The Iterable Journey
Once everything is ready in Digioh, we recommend running a test via our Preview mode in the Editor. This will ensure that the Event is created in Iterable and available for use in Journeys.
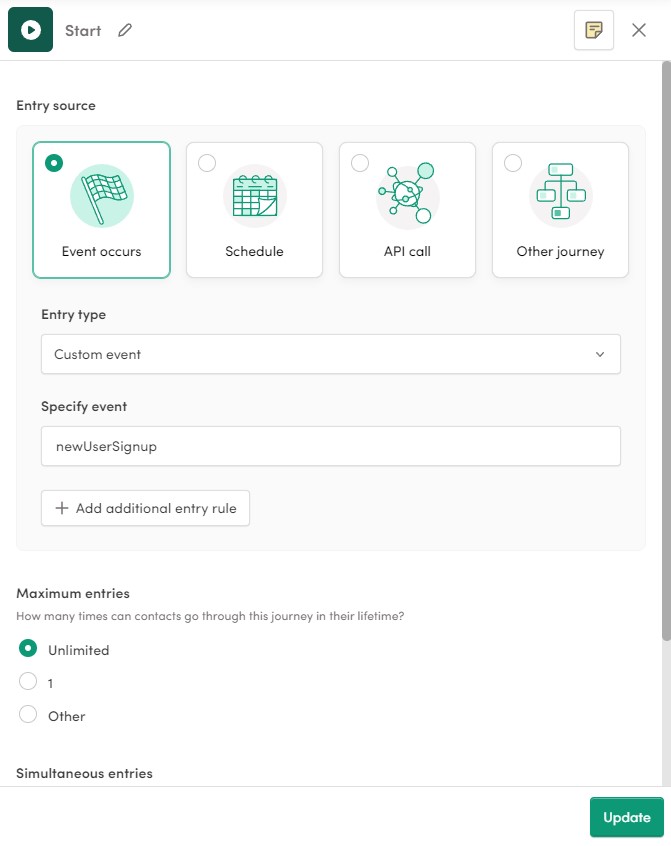
To use the Event to start a Journey, you can configure the Start tile to use the Custom Event as the Entry Source:
If you’ve built out a more advanced Journey, you can insert pauses until a custom event has occurred:
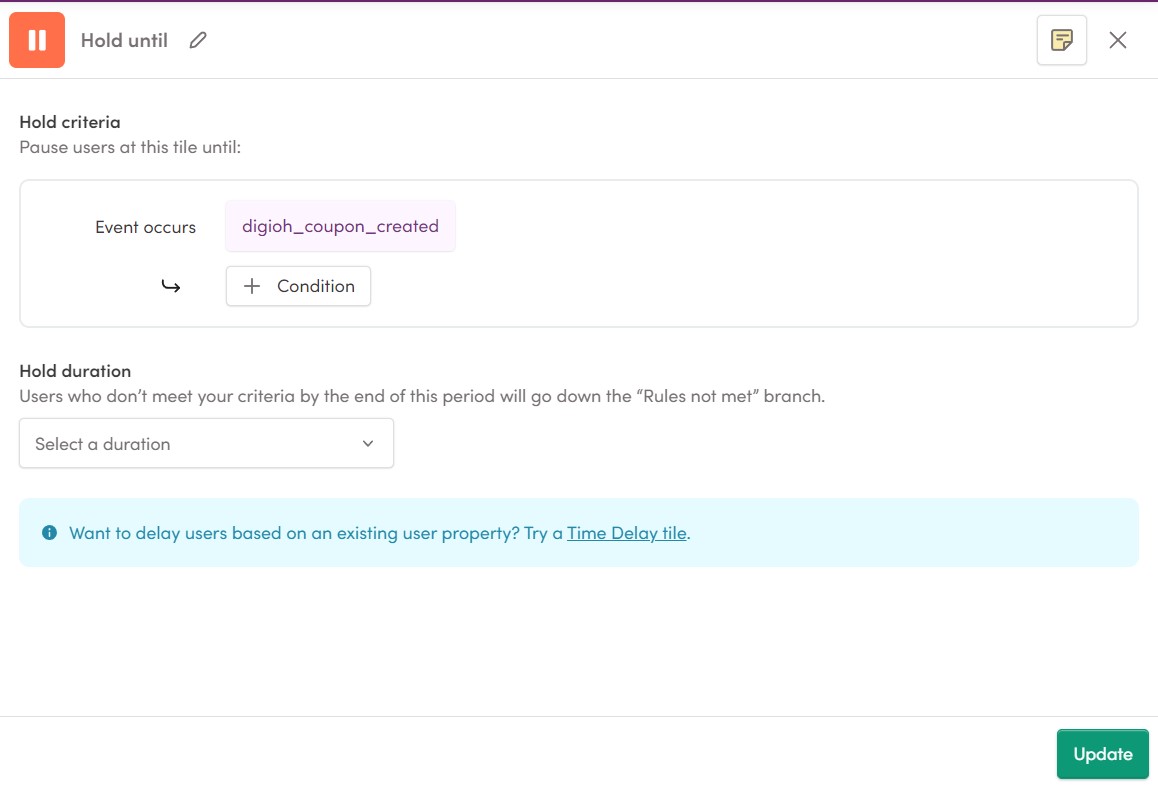
This could be useful if you’re building a Journey in Iterable where you want to direct users to sign up for a specific event. For example, you could:
- Create an Iterable Journey that sends out an email directing users to a specific page with a Digioh box embedded on it
- Once users fill out the box, it will fire an event back to Iterable
- The Journey will intercept that event to then route users to the next steps
Please let us know if you have any questions or run into any issues while creating your integration with Iterable. You can always email us via support@digioh.com and our Support Team will be happy to answer any questions you have and assist you with getting everything setup!
