What You’ll Learn in This Article
By following this article, you’ll confidently integrate Digioh with Klaviyo, enabling seamless data synchronization between the two platforms. Specifically, you’ll learn how to:
- Establish a Primary Klaviyo Connection: Authenticate and connect your Digioh account with Klaviyo to enable data sharing.
- Create Digioh Pipelines: Set up pipelines to manage the flow of data from Digioh to specific Klaviyo lists or profiles.
- Capture Quiz Submissions: Configure Digioh to send quiz data to Klaviyo, enhancing your marketing personalization efforts.
There are two primary parts of Digioh’s Klaviyo Integration:
- Primary Klaviyo Connection
- Digioh Pipeline(s)
The primary Klaviyo connection establishes a trusted connection between each platform and only needs to be done once.
Once the connection is established, how do you determine which data should be sent where? That’s where Digioh pipelines come in!
Primary Klaviyo Connection
To authenticate your Digioh account with Klaviyo you’ll want to take the following steps:
- Hover over “Integrations” in the top navigation of your account, then select the “Integrations” option from the dropdown.
- Select the green “+New Integration” button
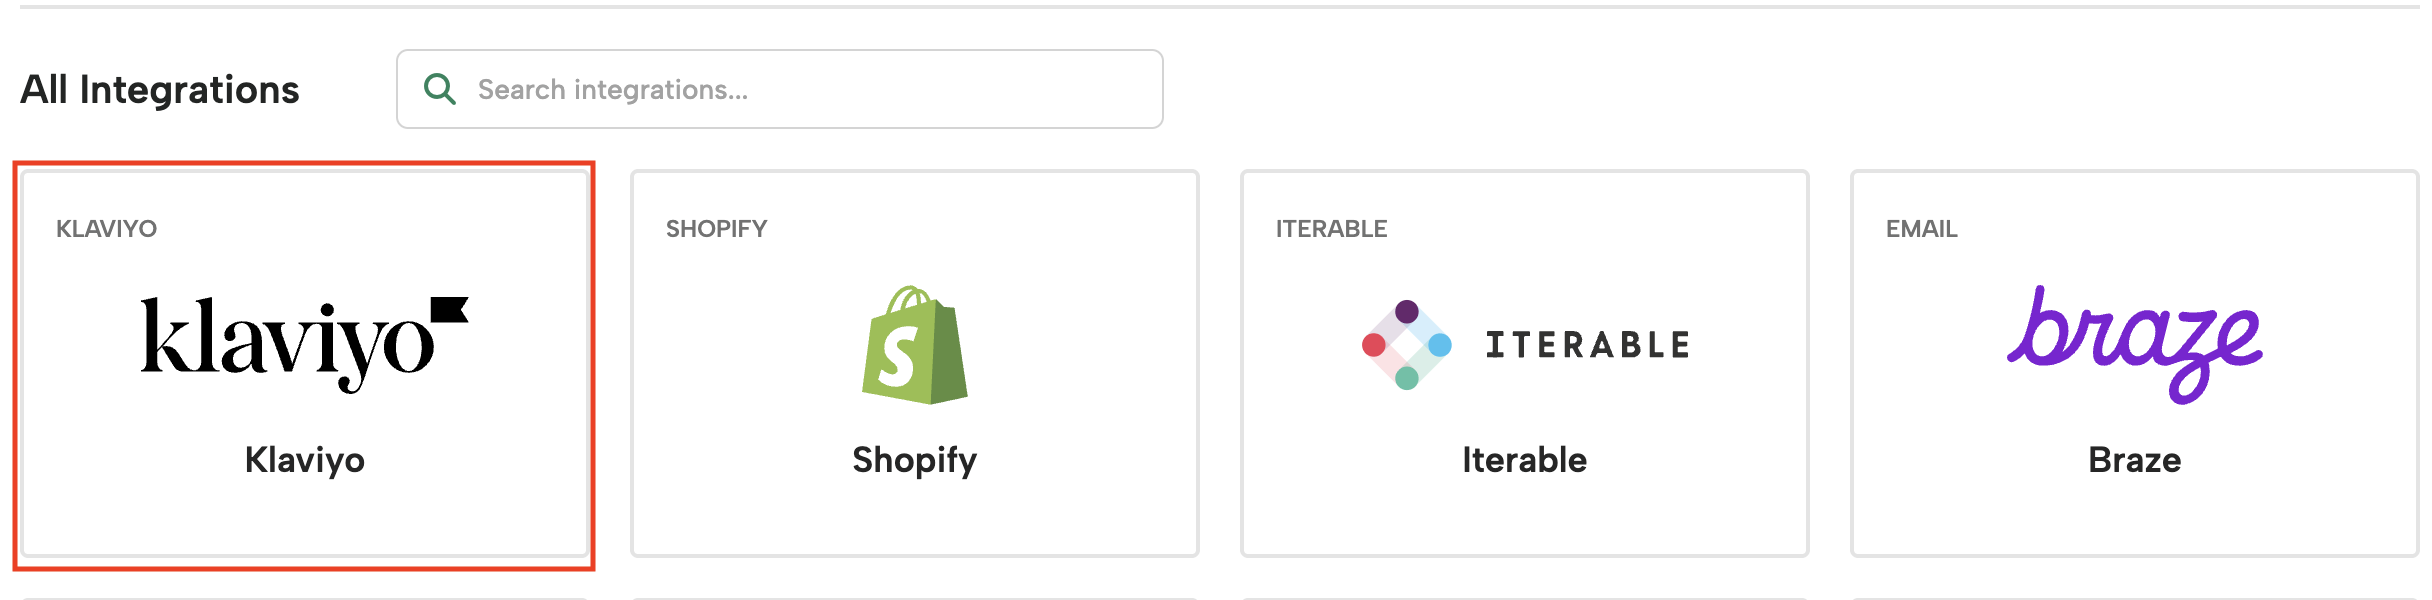
- Select the Klaviyo option from the list of available integrations:
- Wait to be redirected to the Klaviyo Connections homepage
- Click “Add Connection” and Name your connection
- You will be redirected to Klaviyo.
- If you are already logged into the Klaviyo account, you can see the Information Sharing page confirmation (Permission) page.
- Click on “Install” and Click “Allow”.
And in just a few clicks, you have now successfully connected Digioh to your Klaviyo account!
Restricting Klaviyo Profile Fields
By default, Digioh will restrict profile fields for the Klaviyo integration. This is a security best practice and allows your brand to protect sensitive User Profile data by specifying only the specific fields you want to operate on.
Keeping this setting enabled ensures Digioh only updates the Klaviyo profile properties you explicitly allow, helping prevent unintended changes to existing profile data.
You can configure which Klaviyo profile fields Digioh is permitted to update by adjusting the restricted fields list in the connection settings.
To configure restricted profile fields:
-
Once your account is integrated with Klaviyo, navigate to the Klaviyo integration page within Digioh
-
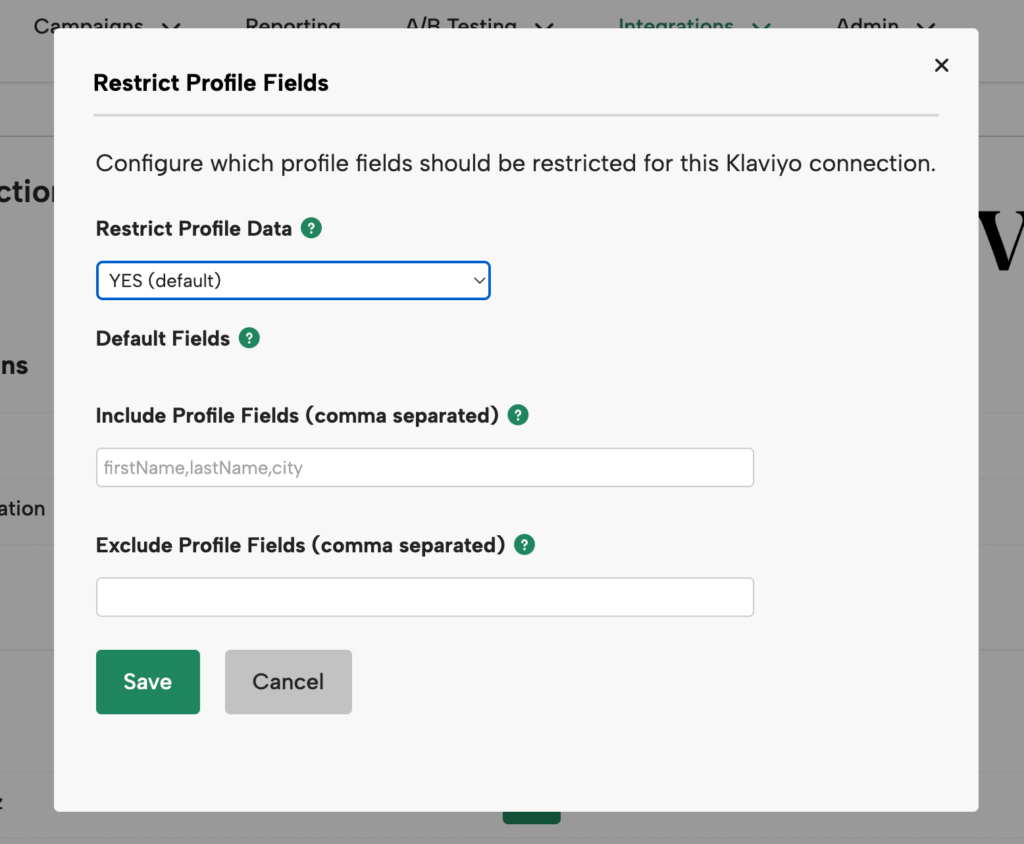
Click the Restricted Profile Fields setting.
- The following fields are always included in the payload by default and will not be excluded unless you explicitly add them to the Exclude list:
- lists
segments
data.id
data.attributes.external_id
data.type
data.attributes.email
data.attributes.first_name
data.attributes.locale
data.attributes.location.timezone
data.attributes.location.country
data.attributes.properties.$consent
data.attributes.properties.Accepts Marketing
- lists
- The following fields are always included in the payload by default and will not be excluded unless you explicitly add them to the Exclude list:
- If you need to add additional fields, add them in the Include Profile Fields section. Include the specific user profile fields you want to operate on, as a comma-separated list.
-
If you need to exclude certain fields, do that in the Exclude Profile Fields section.
-
Save your changes. Once saved, Digioh will only send updates to the fields listed here. Any other Klaviyo profile properties will be ignored during submission processing
Digioh Pipeline: Klaviyo Profile Capture
Once you’ve successfully connected your Klaviyo & Digioh accounts together, you’ll want to ensure any standard Digioh campaigns are sending profiles to the right list in Klaviyo.
This subscription pipeline is not needed for Digioh quizzes, as the Quiz pipeline (covered in the next section) will also subscribe users to a list when they enter their email on the last step of the quiz.
These subscriptions will be done through a Digioh pipeline, using the instructions below:
- In Digioh, go to your Integrations page.
- Click on the Klaviyo Integration that you established in the “Primary Klaviyo Connection” section above
- Scroll down and click on the green “Create Pipeline” button in the “Klaviyo Subscribe to List” box.
- Name your Pipeline (i.e Subscribe to Newsletter List)
- Select your Connection (this should be the Klaviyo connection you established in the “Primary Klaviyo Connection” section above).
- Select the Klaviyo list you would like to send these subscribers to.
- Select the Campaign that should use this Pipeline
And that’s it!
This pipeline automatically connects to the proper Klaviyo fields for both email & SMS to ensure subscription and consent statuses are accurately updated on a person’s Klaviyo profile.
Digioh Pipeline: Klaviyo Track Quiz Submission
First, why is this pipeline valuable?
One of the best things about our Quizzes is that they supply a ton of Zero Party data. Every click allows you to understand your customers better so you can send them better emails.
For example, if you know someone is really into matcha tea, you can then send them the latest matcha recipes and new matcha products.
The Digioh Klaviyo integration allows you to do a few things:
- Pass all Quiz data to Klaviyo profiles, which can be utilized in segmentation and flow conditional splits to further personalize your messaging
- Pass all Product Recommendations to Klaviyo profiles, which allows you to send a real-time email highlighting the recommended products immediately after a quiz taker completes their quiz
- Bonus: our Klaviyo Integration also allows you to detect anonymous visitors!
The good news? Setting up a Klaviyo pipeline takes just a few clicks!
Pipeline Considerations
Before creating your pipeline, decide where you want to send Quiz taker emails to within your Klaviyo account: either your existing subscriber list or a net new list.
We recommend creating a new “Digioh Quiz Taker” list within Klaviyo, so you can easily track the list growth being generated by your Digioh quiz.
If creating a new list on Klaviyo to send quiz takers to, we recommend two additional steps:
- Confirm dual opt-in is turned off so their quiz results email immediately sends through
- Ensure these profiles are being added in some way to your primary mailing list
Creating the Quiz Submission Pipeline
Follow the steps below to create your Klaviyo Track Quiz Submission Pipeline:
- In Digioh, go to your Integrations page.
- Click on the Klaviyo Integration that you established in the “Primary Klaviyo Connection” section above.
- Scroll down and click on the green “Create Pipeline” button in the “Klaviyo Track Quiz Submission” box.
- Name your Pipeline (i.e Digioh Tea Quiz).
- Select the Klaviyo Connection you would like to use (this should be the Klaviyo connection you established in the “Primary Klaviyo Connection” section above).
- Select the Klaviyo List you would like these Quiz submissions sent to.
- Select the Campaign that should use this Pipeline (this should be the Campaign Name of the quiz you just designed).
Now you’re set up to create your product recommendation email in Klaviyo. You can follow those instructions here!
Some Common Questions
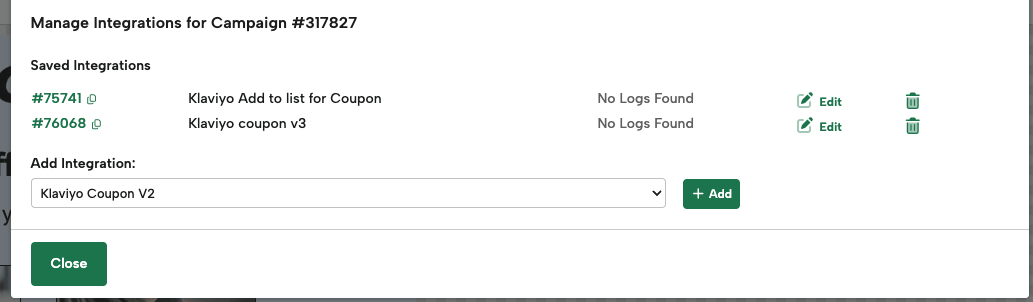
Can I associate a pipeline to a Digioh campaign after the pipeline is created?
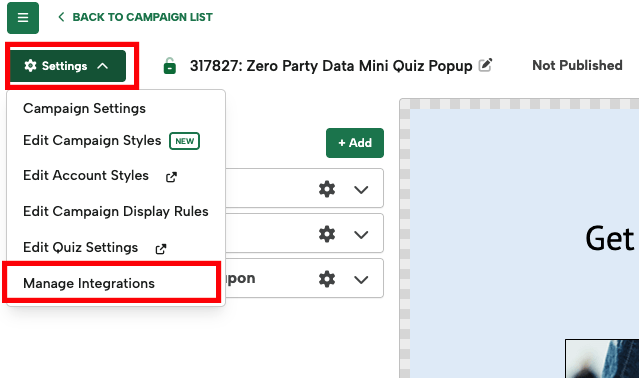
Yes! Within your Campaign Editor, navigate to “Settings” and you’ll see the option “Manage Integrations”. This will provide you with a list of your existing pipelines to select from and associate with the campaign.

Can I have more than one pipeline associated with a Digioh campaign?
Yes! One of the more common use cases here is when a Digioh customer needs to send emails to one platform and SMS numbers to another.