Digioh’s integration with Salesforce Marketing Cloud also allows you to trigger SFMC Journeys. We are happy to walk you through these steps or even configure this for you.
If you are setting up a Digioh integration by yourself, we first recommend reading about Digioh Integration Basics.
Triggering a Journey requires the Salesforce API. To use the Salesforce API, you need to create a connected app.
These are the first step (to create a basic app):
https://help.salesforce.com/articleView?id=connected_app_create_basics.htm&type=5
These is the next step (to give the app API access):
https://help.salesforce.com/articleView?id=connected_app_create_api_integration.htm&type=5
Once the app is created, we need the following information from it:
- clientId
- clientSecret
- subdomain
- accountId
- scope
The “scope” must be set on the app itself. Assign the following permissions for the scope:
- email_send
- journeys_read
- list_and_subscribers_read
- data_extensions_read
- data_extensions_write
Digioh also needs the “EventDefinitionKey”. Here is an example of what that looks like: APIEvent-sei9lsdkff-sdlfjk-97wels-lksdj-flsdjfdkje630
In order to get the Event Definition Key, you will need to first create a Journey with “API Event” as the entry source. The journey also needs to be activated. (Go To Journey Builder > Entry Sources and click New Event. Select API Event as an event type)
Some customers have set up a custom named EventDefinitionKey that might look different. But usually it is an auto-generated one like the above format.
We also want to verify that the table has a “primary key” assigned (and what field the “primary key” is). Typically it is called “EmailAddress,” but you may use a different primary key name or field.
Finally, we want to verify that we should use the email address as the “ContactKey” – The ID that uniquely identifies a subscriber/contact.
Here is the API documentation showing the fields mentioned, as a reference:
https://developer.salesforce.com/docs/atlas.en-us.noversion.mc-apis.meta/mc-apis/postEvent.htm
This screenshot shows what the integration typically looks like for pushing to a Data Extension and Triggering a Journey. In this example the ContactKey is the Email Address. We are passing the email, signup_date, and 2 custom fields (Site_Campaign and sign_up_category).
The API Endpoint URL will look something like this:
https://[SUBDOMAIN].rest.marketingcloudapis.com/interaction/v1/events
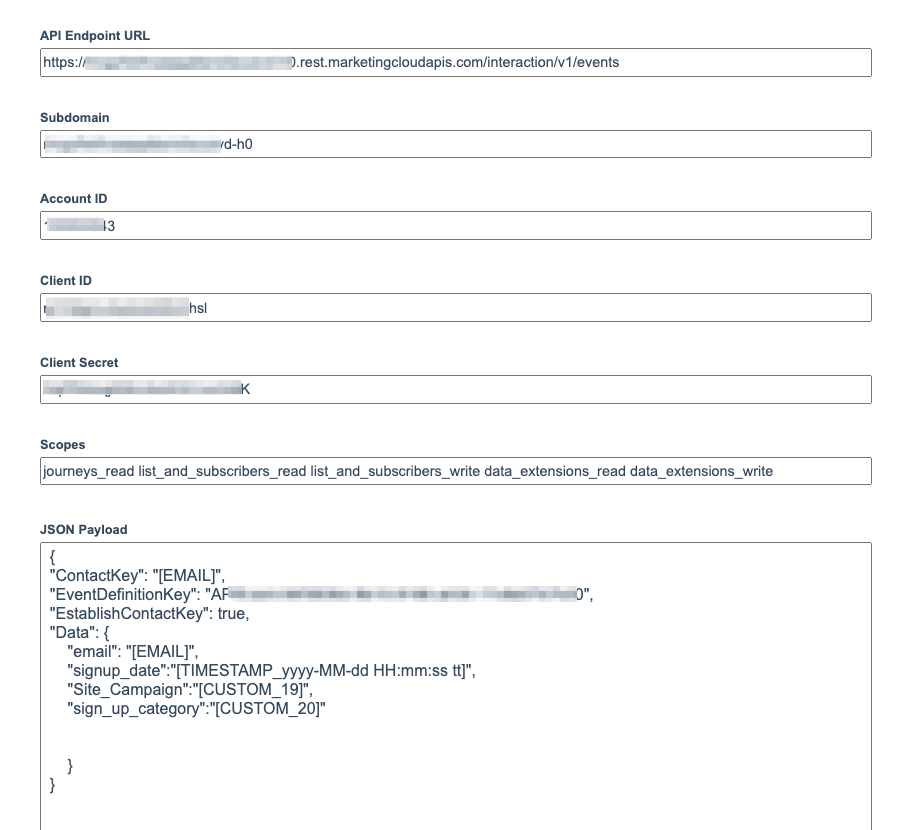
Here is what the JSON Payload is in this example:
{
"ContactKey": "[EMAIL]",
"EventDefinitionKey": "APIEvent-XXXX",
"EstablishContactKey": true,
"Data": {
    "email": "[EMAIL]",
    "signup_date":"[TIMESTAMP_yyyy-MM-dd HH:mm:ss tt]",
    "Site_Campaign":"[CUSTOM_19]",
    "sign_up_category":"[CUSTOM_20]"


    }
}