Zapier makes it easy to integrate services together to create a custom workflow. With Digioh’s Zapier integration, you can trigger actions in a variety of services when you get a new lead.
If you are setting up a Digioh integration by yourself, we first recommend reading about Digioh Integration Basics.
For the purposes of this tutorial, we’re going to connect Digioh with Mailchimp via Zapier, but the process is similar for most other services.
1. Click this Zapier invite link to get access to Digioh on Zapier.
2. Log into Zapier, and click Make A Zap.
3. Use the search bar at the top of the “Choose a Trigger App” page to search for Digioh
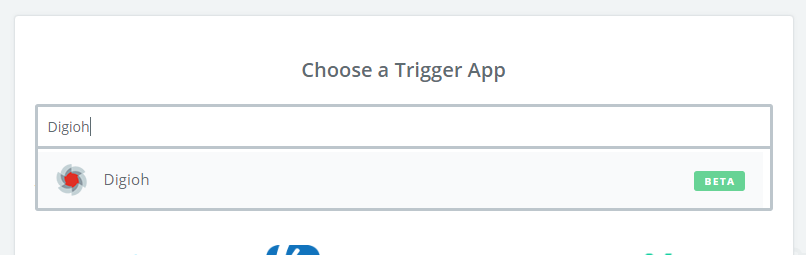
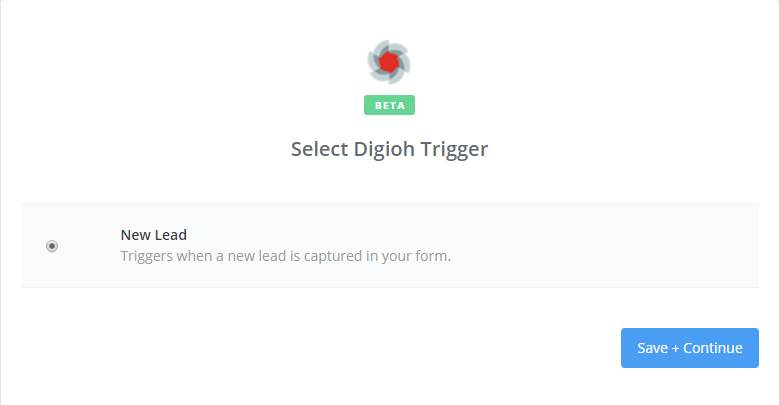
4. Click on Digioh below the search bar. On the next page, click the “Save + Continue” button.
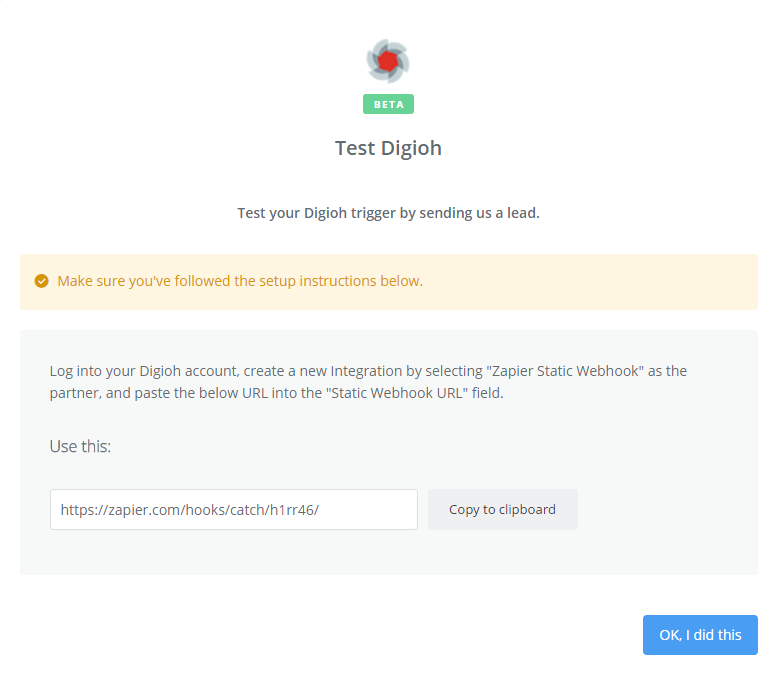
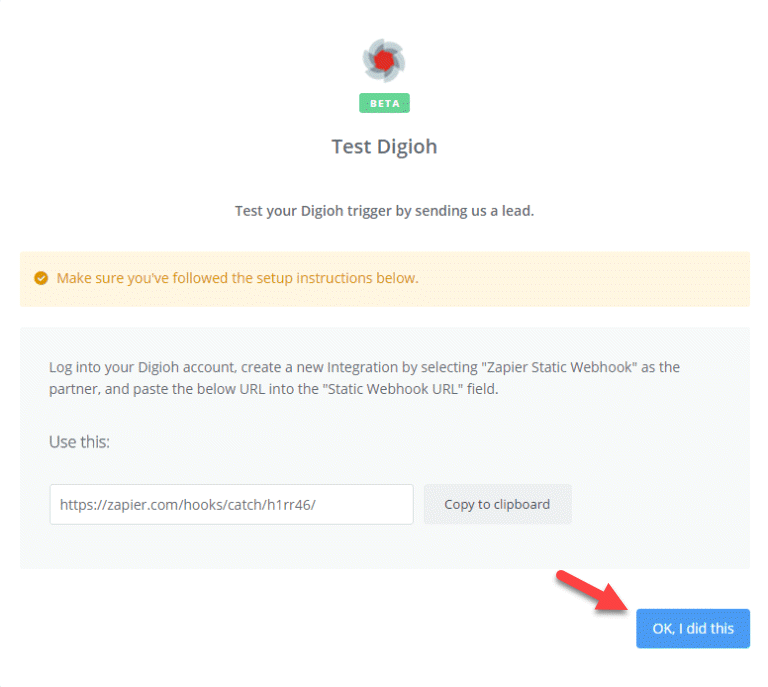
5. On the next page, copy the URL.
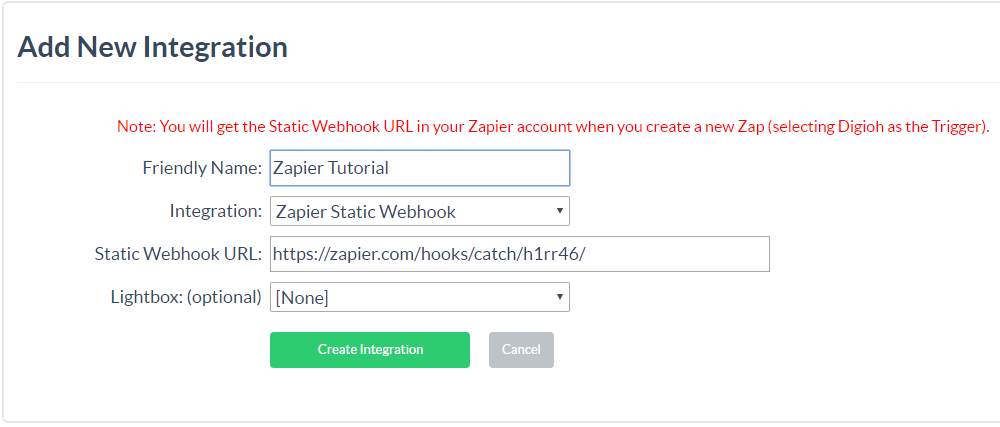
6. In Digioh, go to Integrations, and click the New Integration button. On the next page, name your integration, select “Zapier Static Webhook” from the integration dropdown, and paste the URL you copied in the last step into the Static Webhook URL field.
7. Back in Zapier, click the “OK I did this” button. You’ll see a message asking you to create a new lead.
Do this by assigning your Zapier integration to a lightbox, then use the preview of that lightbox to submit a test lead.

After a few seconds, Zapier should recognize the test lead, and allow you to move on to the next step.
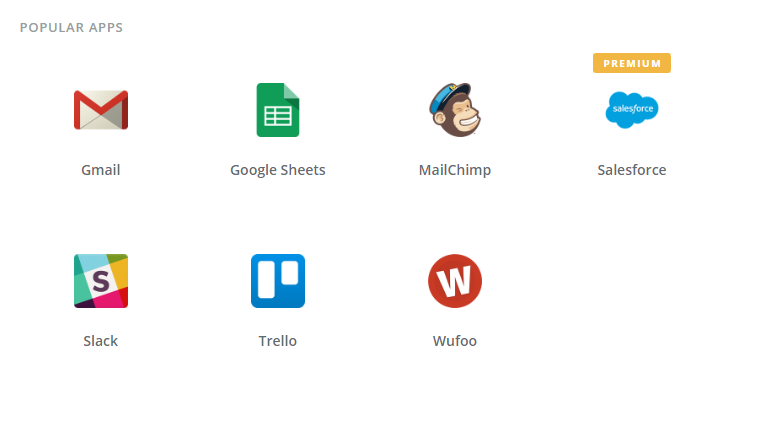
8. Now choose your action app. For this example, we’re using Mailchimp, which will show under the Popular Apps section.
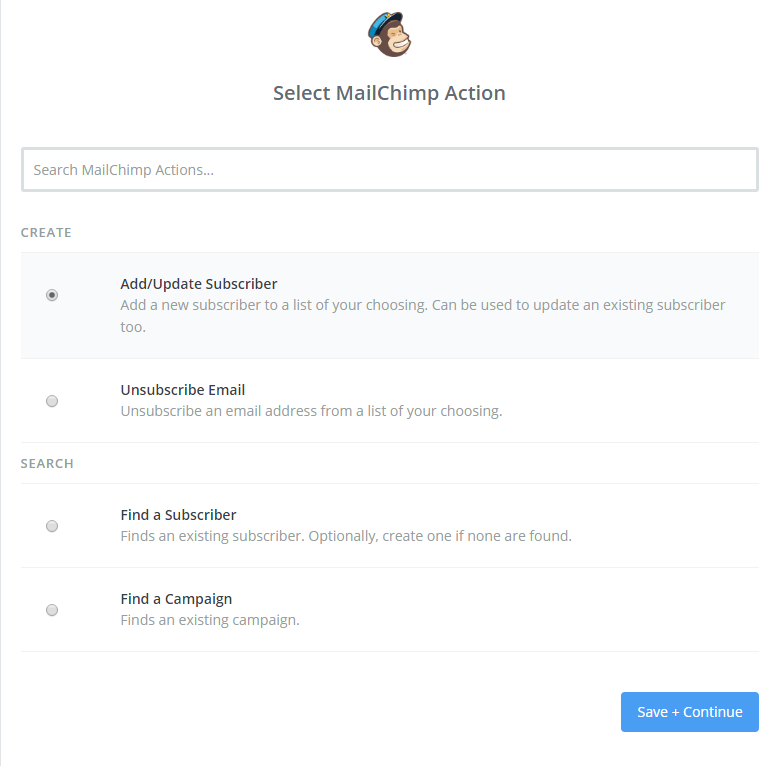
9. Select the action you want to trigger when a new lead is submitted, then click Save + Continue. In this case, we’re going to Add/Update a Subscriber.
10. On the next page, either select one of the Mailchimp accounts you’ve already linked with Zapier, or add a new one.
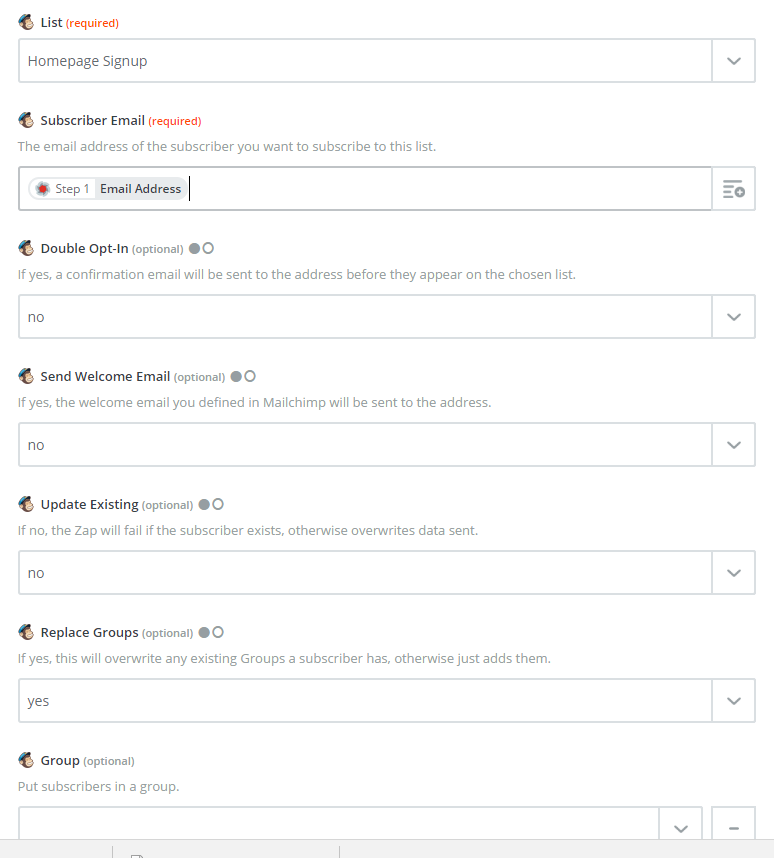
11. Pick a list to add your leads to. Use the “insert a field” dropdown and select “email address” for the subscriber email field. Set all other options to your liking.
12. On the next page, Zapier will ask you to test that it can communicate with your Mailchimp account. Once that’s done, your new Zap will be ready to go!
Make sure you turn it on, and you’ll be all set!
If you have any trouble setting up your Zap, let us know, and we’ll help you out!