Digioh Connect can be used to sync contacts or leads (or other objects) in Salesforce to Iterable. The easiest way to do this is through a Digioh Connect Job paired with a Digioh Connect Pipeline. The job is responsible for periodically retrieving newly updated contacts from Salesforce and sending them to the Pipeline. The Pipeline is responsible for mapping the fields from Salesforce into your Iterable user schema and making the updates at Iterable.
Digioh onboarding will help you get your first syncs up and running. You will be able to add more, or update them yourself whenever you like. We are also just a support request away if you have any questions or needs.
Prerequisites:
- Working Salesforce Connection in Digioh
- Working Iterable Connection in Digioh
- Digioh Connect enabled in your account
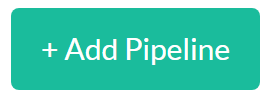
Step 1: Create a new Pipeline
Navigate to Digioh Connect and add a new Pipeline.
Name the pipeline accordingly.
You can publish the pipeline without adding anything else to it. This will allow us to send records from the Job to the Pipeline without processing them so we can validate the data looks good and use it for testing.
Step 2: Create a new Job
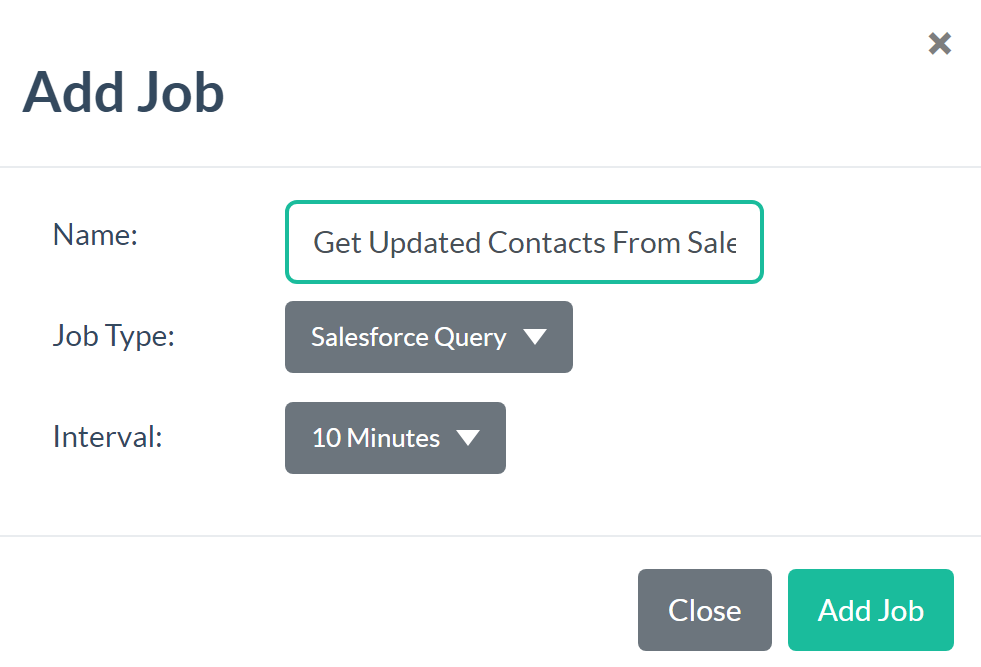
From the Digioh Connect home screen create a new Job
Name the job appropriately, set the Job Type to “Salesforce Query” and set the Interval.
For now, leave the status as “Inactive”. Set the Pipeline, the Connection, and appropriate value for the max records per job, and add your query.
Step 2: Create a new Job
From the Digioh Connect home screen create a new Job

Name the job appropriately, set the Job Type to “Salesforce Query” and set the Interval.
For now, leave the status as “Inactive”. Set the Pipeline, the Connection, and appropriate value for the max records per job, and add your query.
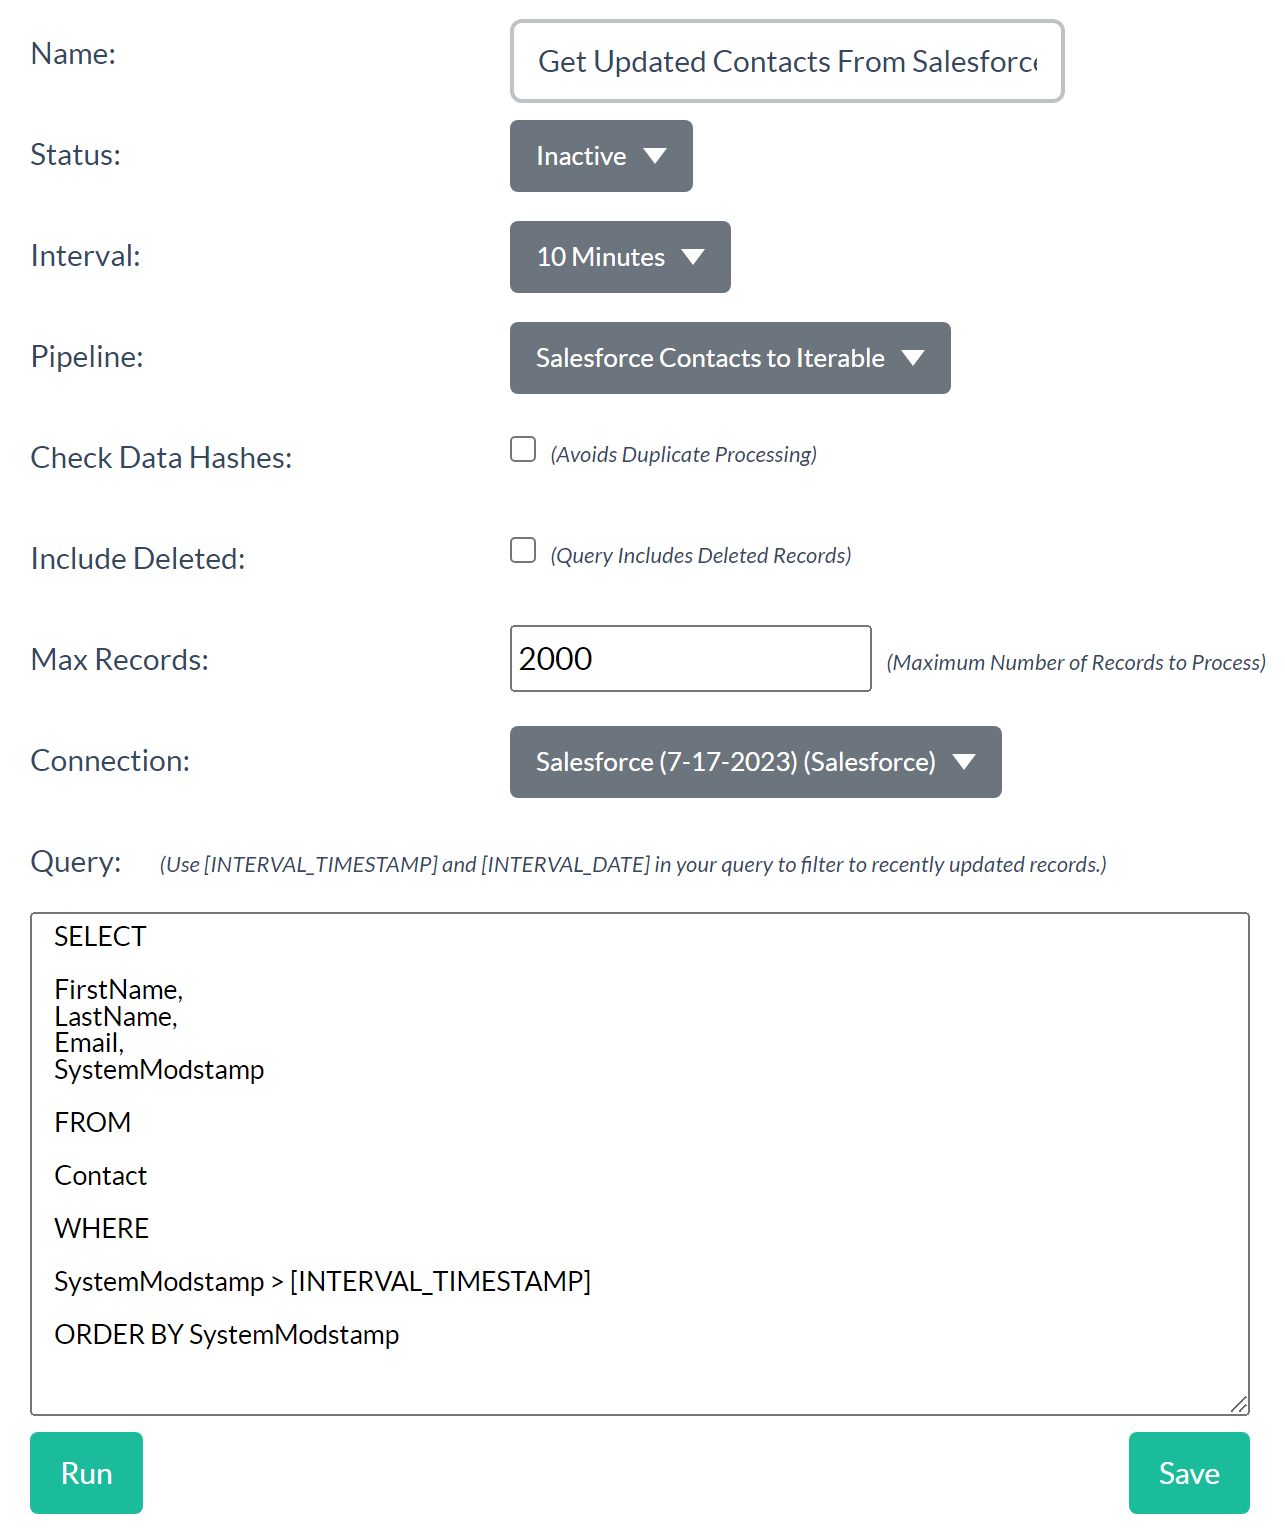
Salesforce Query jobs execute Salesforce Object Query Language (SOQL) statements. Anything you can write in SOQL should be able to be executed by the job so long as the connection has the appropriate permissions.
Here are some example queries to get you started:
Query Updated Contacts:
SELECT
FirstName,
LastName,
Email,
SystemModstamp
FROM
Contact
WHERE
SystemModstamp > [INTERVAL_TIMESTAMP]
ORDER BY SystemModstamp
Query Updated Leads:
SELECT
FirstName,
LastName,
Email,
SystemModstamp
FROM
Lead
WHERE
SystemModstamp > [INTERVAL_TIMESTAMP]
ORDER BY SystemModstamp
You can add whatever fields you need to from your Salesforce object, and you can select from any object the connection has permissions to access, including your custom objects.
Here is an example that retrieves a custom object:
SELECT
MyCustomField__c,
AnotherCustomField__c,
CustomRelationship__r.CustomField__c,
SystemModstamp
FROM
MyCustomObject__c
WHERE
SystemModstamp > [INTERVAL_TIMESTAMP]
ORDER BY SystemModstamp
In these examples, the SystemModStamp is used to identify newly updated records. If you have other field(s) you would like to use to indicate which records to retrieve you can modify the query accordingly. The [INTERVAL_TIMESTAMP] in the queries is a system value that is replaced at the time of execution with the recorded last timestamp of the previous query executed by the job. This value will advance with each run of the job so we are always retrieving only the newly updated records. The SystemModStamp in the SELECT fields and ORDER BY clause helps the system know where to pick up if a query returns more than the Max Records value. It will use the SystemModstamp value of the last processed record for the [INTERVAL_TIMESTAMP] for the next job run.
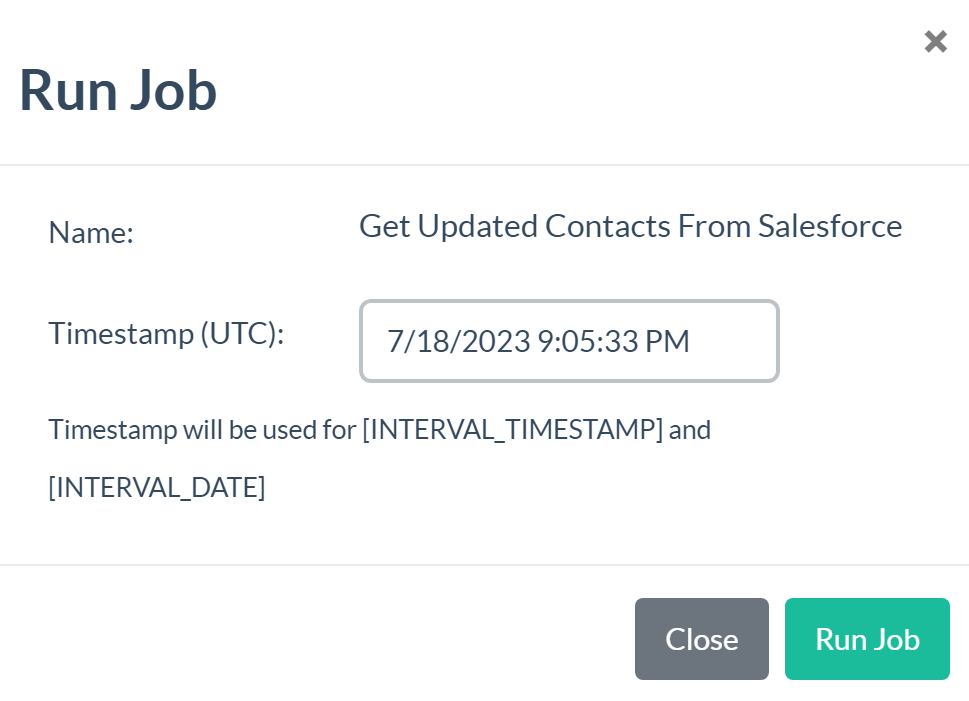
Now that you have a configured Job you can run it manually to test. Hit the “Run” button and set a reasonable timestamp to be used for the [INTERVAL_TIMESTAMP]
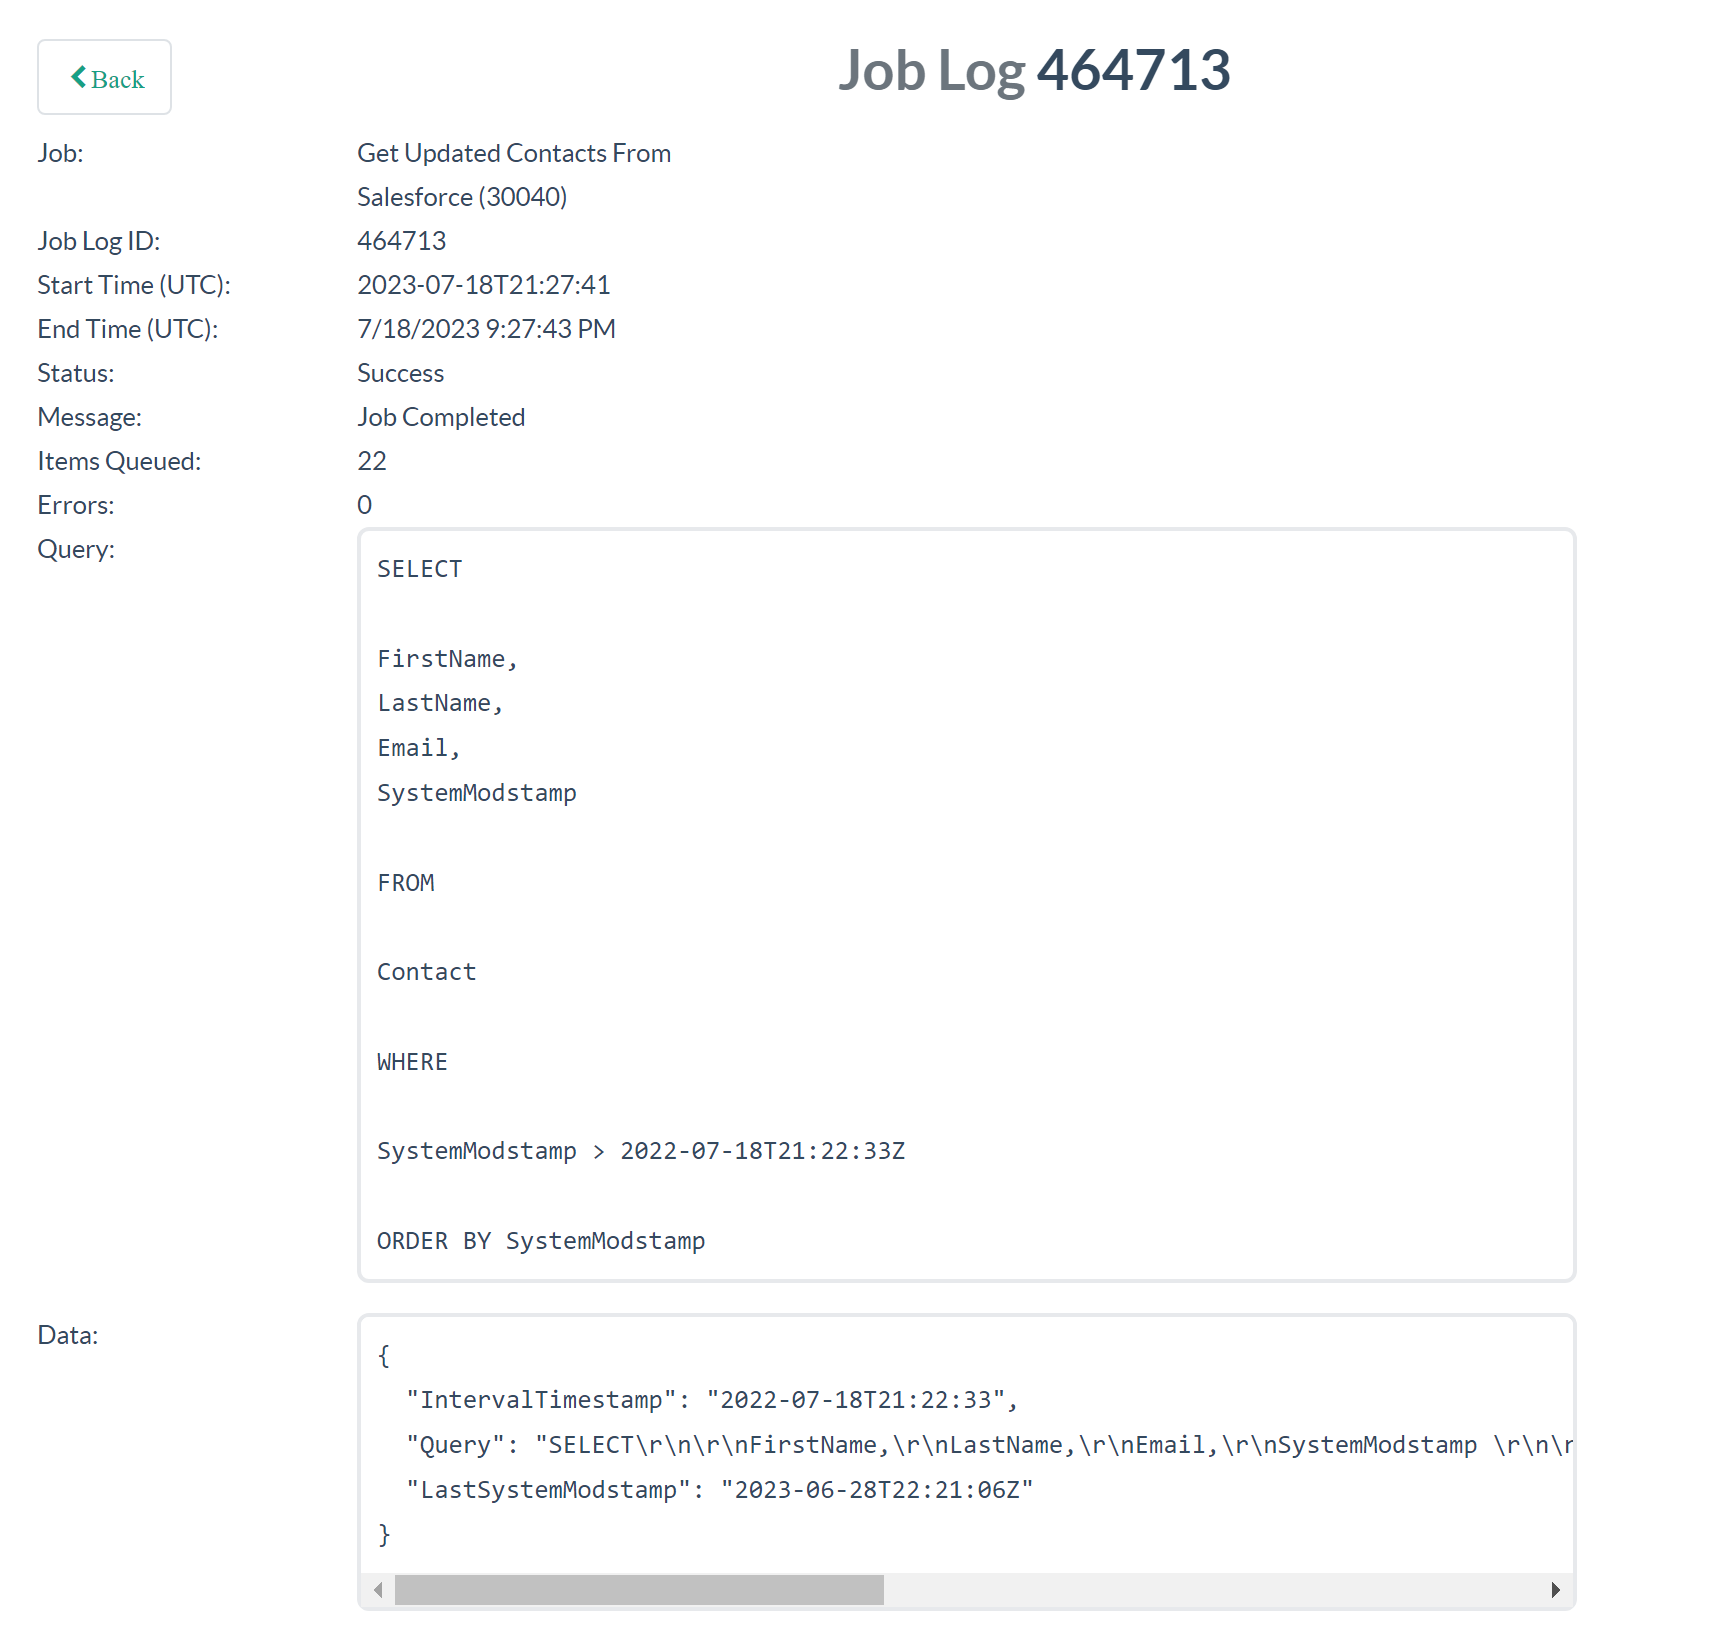
You will see the job log output, which includes the query executed, and number of items queued to the pipeline:
Step 3: Configure the Pipeline
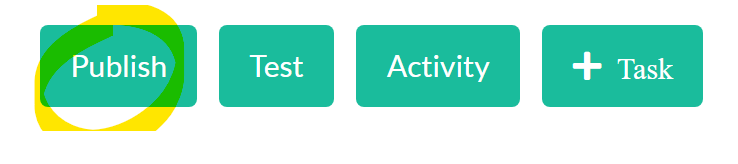
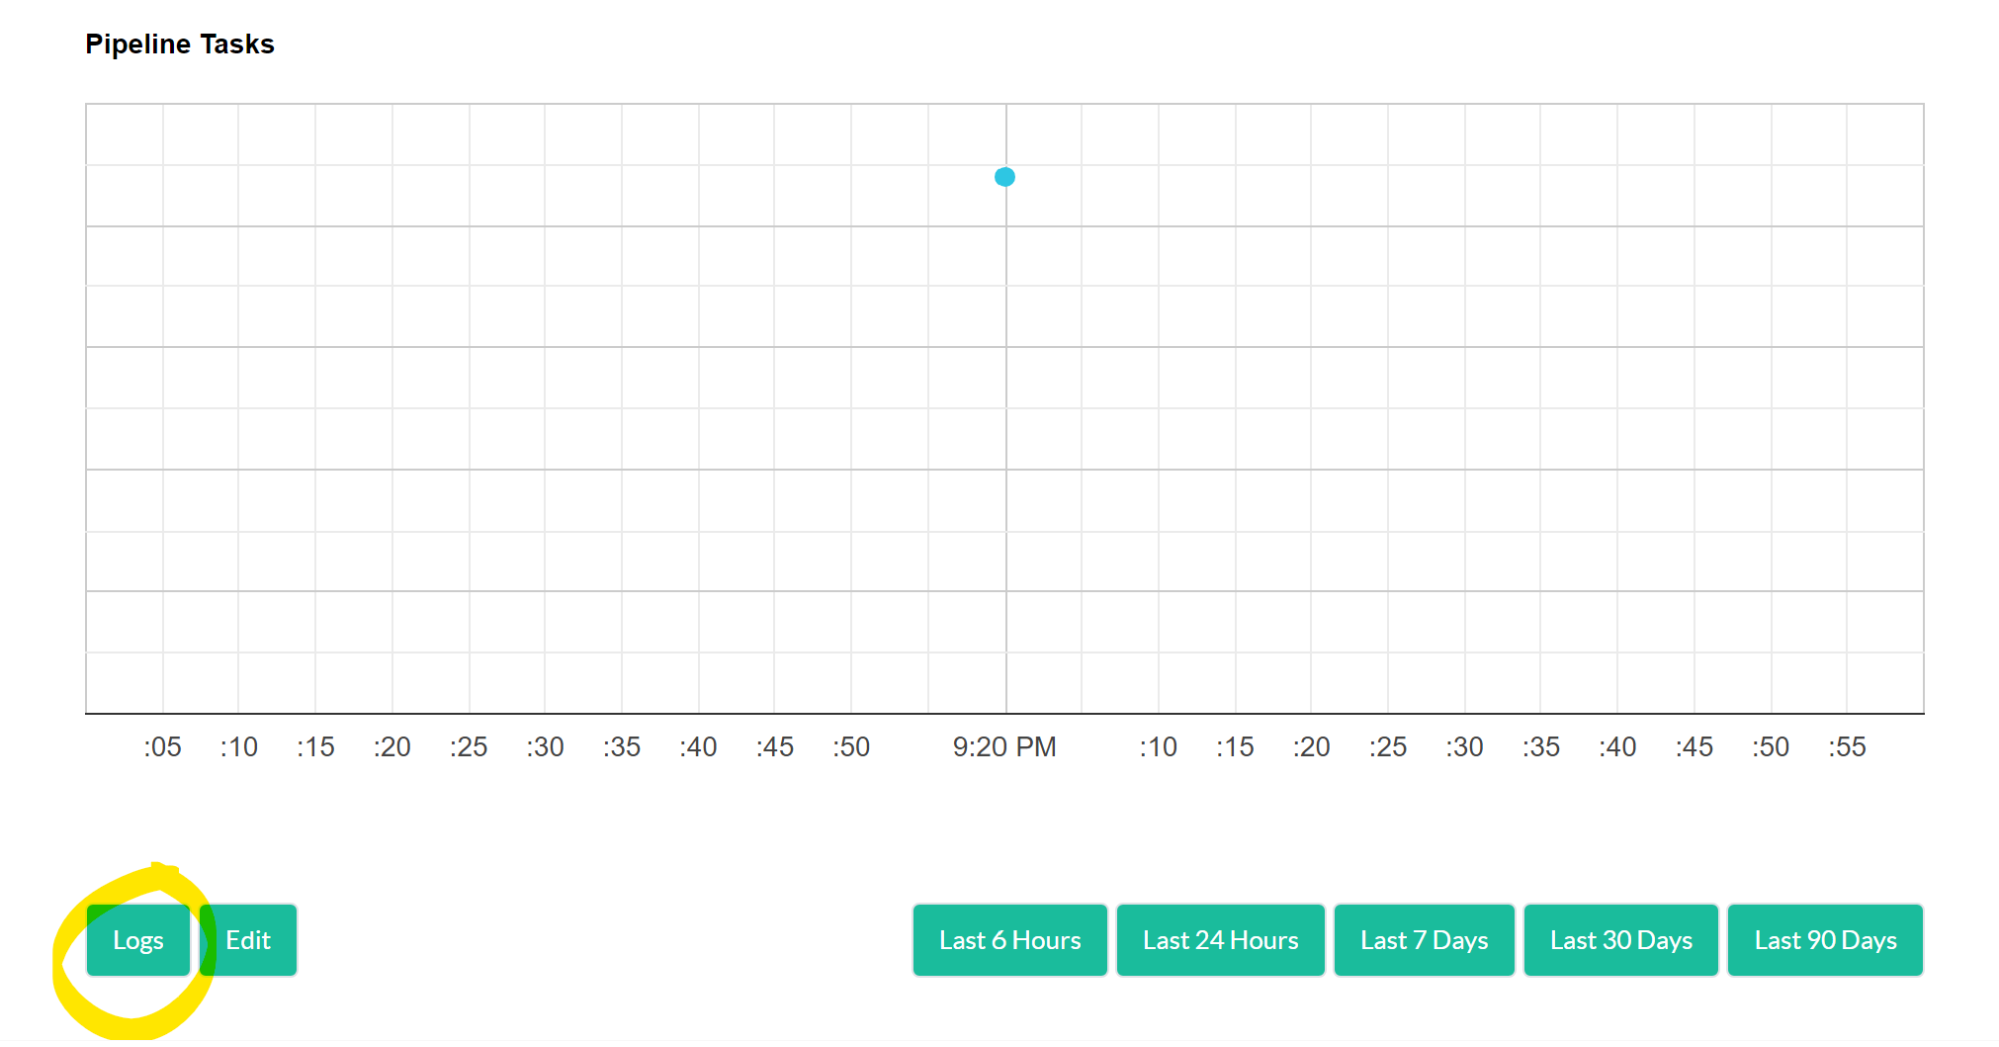
Now that we have a working job sending Salesforce Contacts to our Pipeline we can configure the pipeline to map the data and update Iterable. It helps to see the data that is coming into the pipeline so we know what to map. To view the Pipeline logs you can click “Activity” next to the pipeline in the list, and then click the “Logs” button.

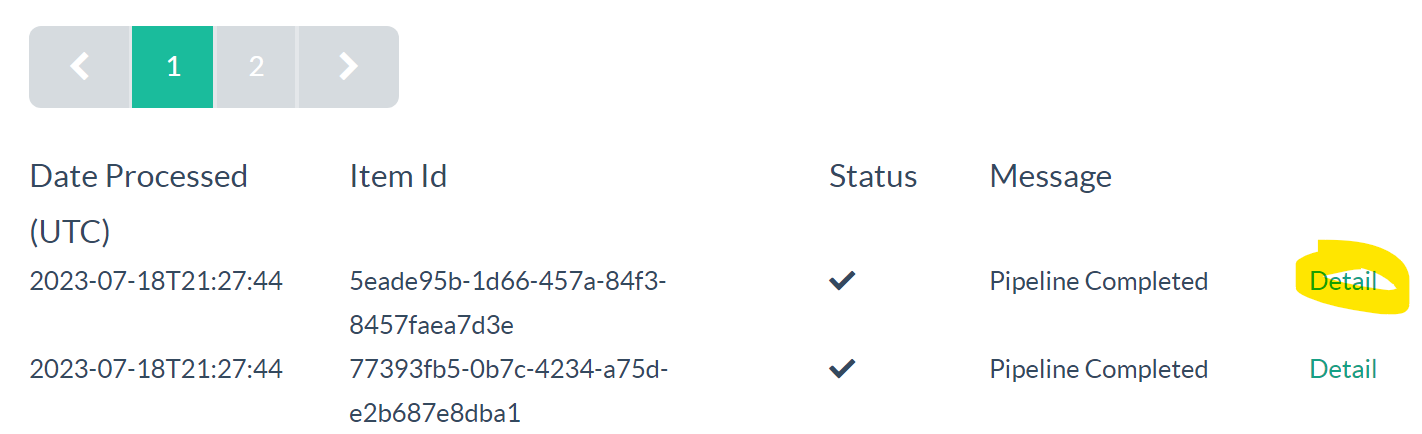
You can click on the “detail” for a log to see the data:
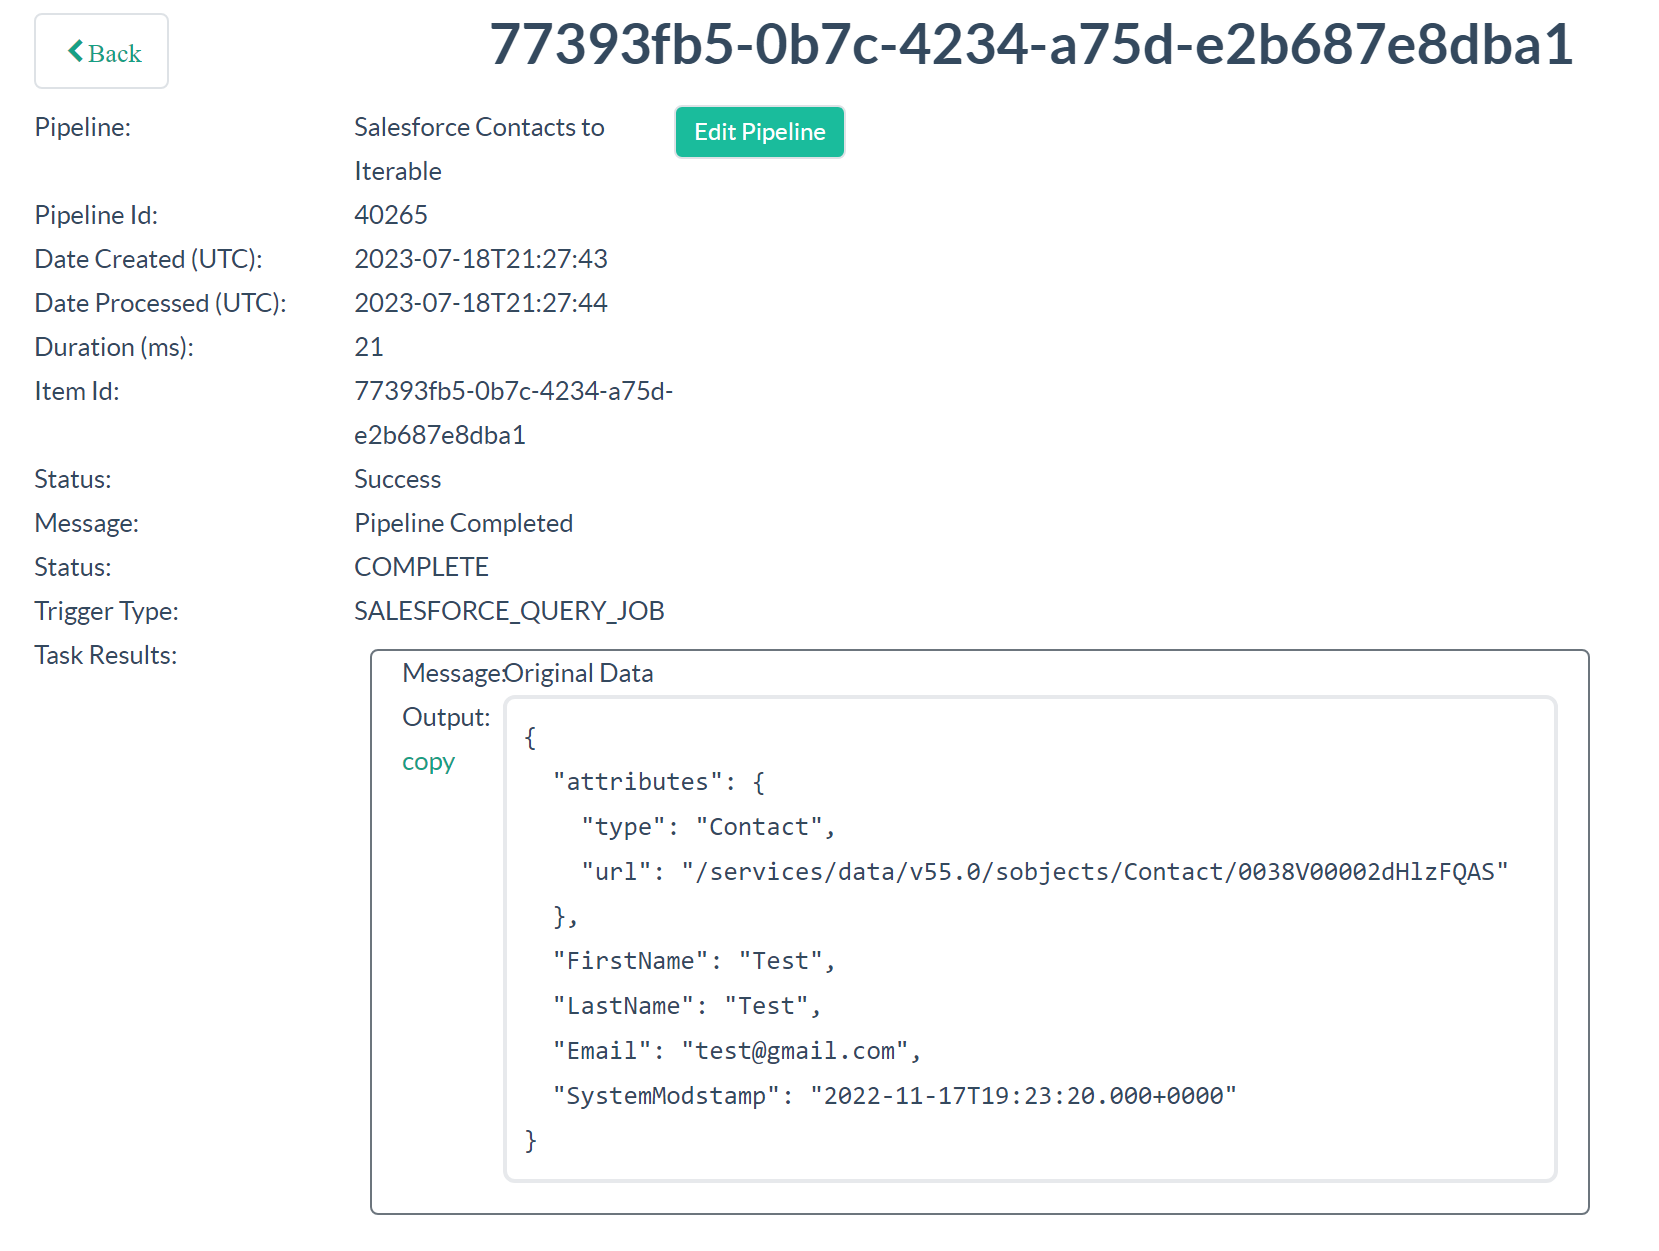
Now you can see the data for the contact as it is coming into the pipeline. The fields here are what we are going to map in the pipeline. You can also use this data to test the pipeline before publishing. Click the “copy” link next to the data to put it on your clipboard to use for testing, which we’ll cover below.
Now, let’s configure the pipeline to map the data and update Iterable. Click “Edit Pipeline”, or “Edit” from the Digioh Connect homescreen. From the Pipeline Editor add a “Map Data” task.

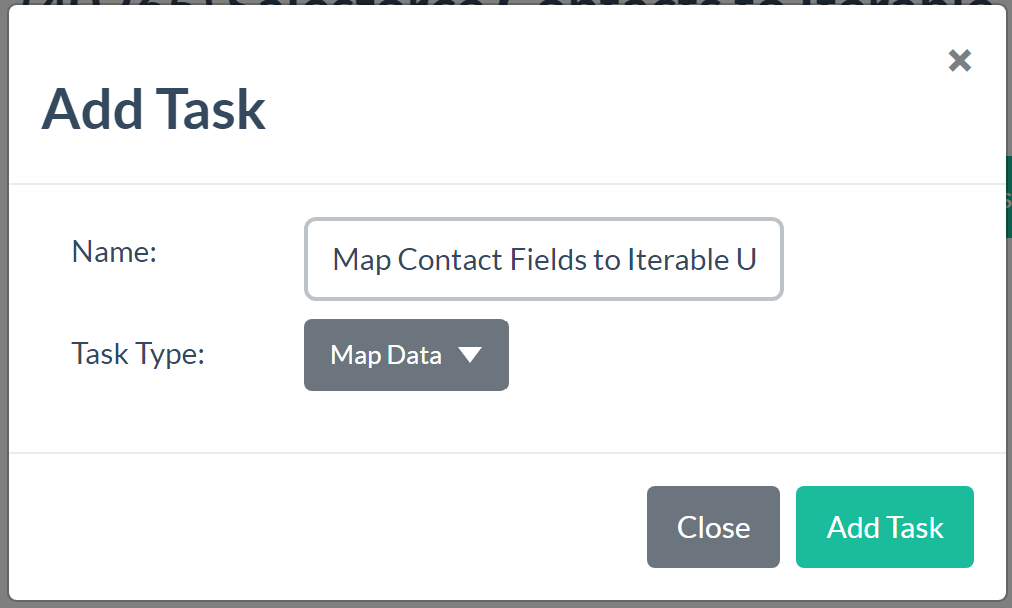
Click “Edit” on the task

Now we are in the Map Data editor where we can add the individual mappings. You can reference the data from the logs to know what to map.
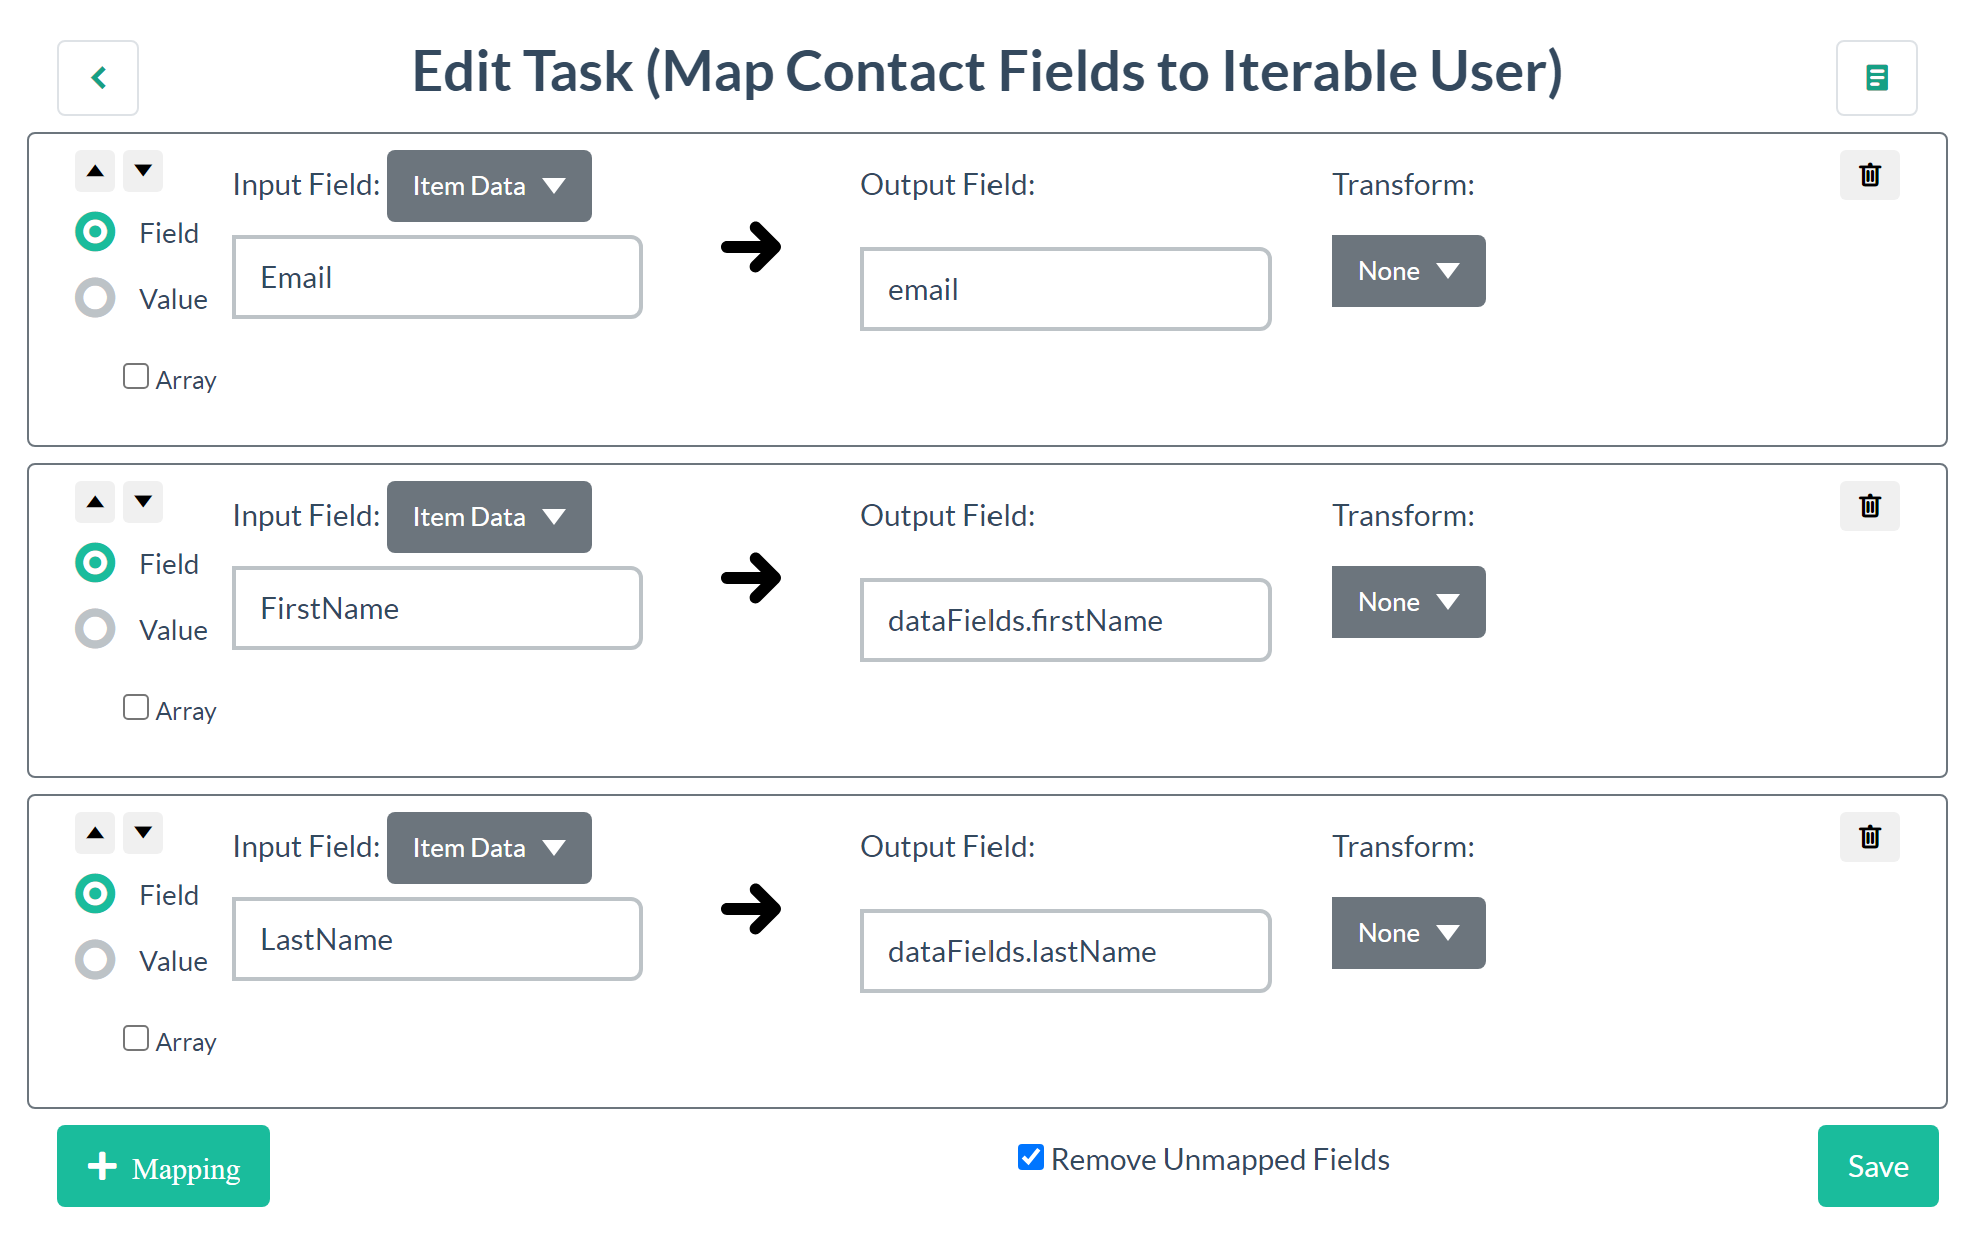
For Iterable, the email needs to be mapped to a top level “email” property, and any user data needs to be mapped under a dataFields property. So the mapping for FirstName goes to dataFields.firstName.
Now that we have mapped the fields, we can send the mapped data to Iterable. From the Pipeline Editor page add a new task of type “Iterable API”
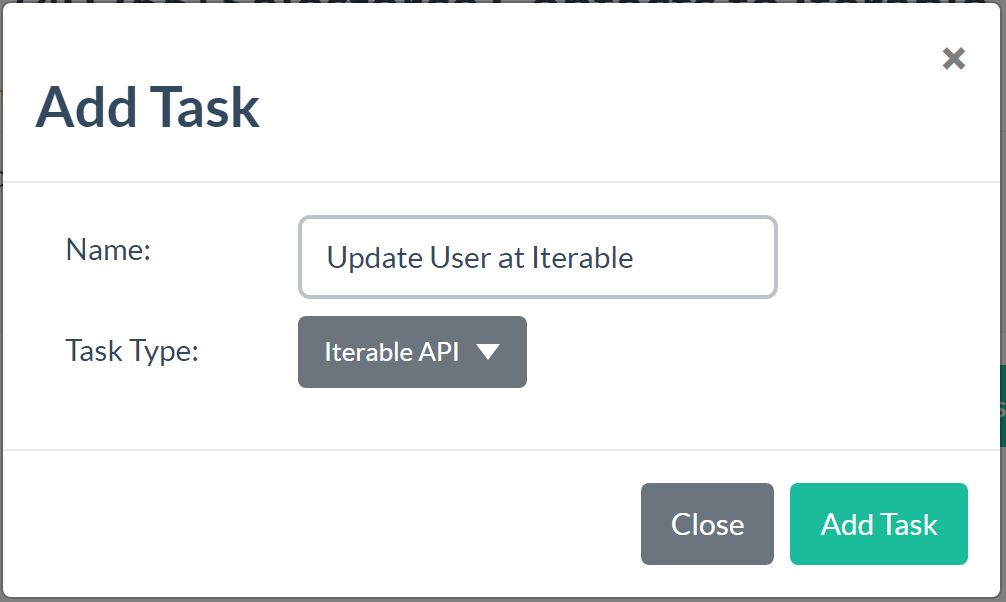
Click “Edit” on the task and select the correct “API Operation”, “Connection”, and “Path to User”. The “Path to User” should be the location of the complete, mapped user record, which is the output of the Map Data task. Click the Drop Down and select “Map Data”. It should look like this:
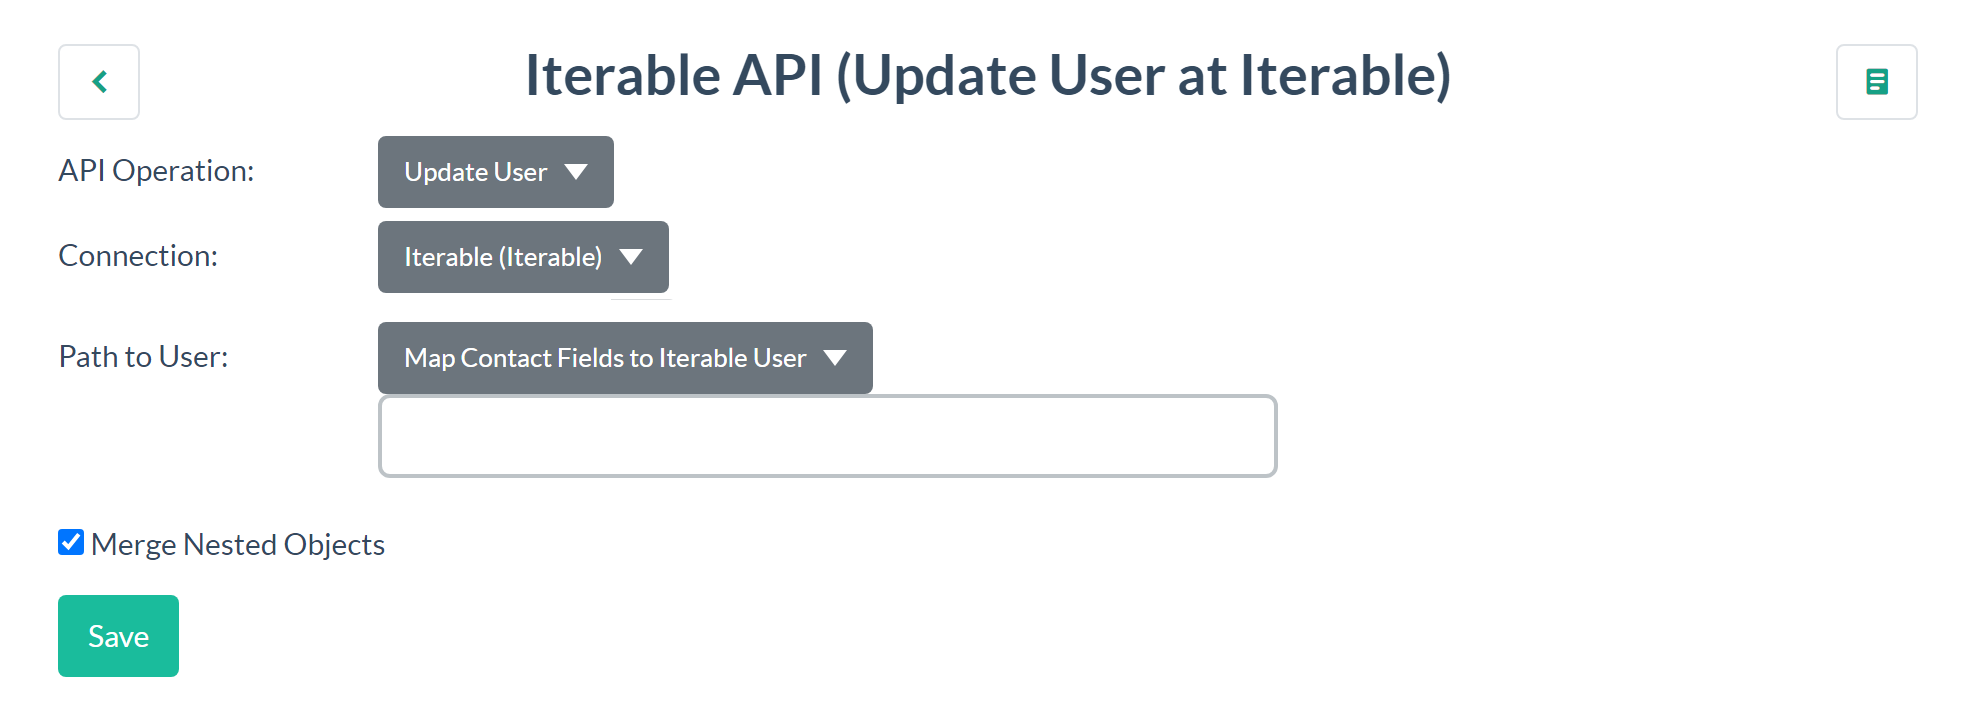
Keep “Merge Nested Objects” checked to prevent this update from overwriting the entire user record in Iterable and potentially losing data as a result. “Merge” will only update the fields sent.
The pipeline is now complete and we can test it. From the Pipeline Editor click the “Test” button and supply it the data you copied from the activity log.

This will show the complete log of the pipeline execution for the supplied record, including any errors. You can check this log to make sure everything looks correct, and check your Iterable project to verify the user was created with the correct data. Once you have verified everything is correct you can publish the pipeline, and set the job to “Active”.
Now your Salesforce Contacts will be automatically updated in Iterable at the interval you defined! There are many more capabilities of Digioh Connect Pipelines that this documentation does not cover. Schedule a training session with us to go in depth on all of the capabilities.