What You’ll Learn
- How to configure the layout and display of your Digioh Results Page (e.g. number of products, items per row, hero product).
- How to update the design of your results page using Campaign or Account Styles
- How to use CSS for advanced styling
Access and Setup your Digioh Results Page
Open your Digioh Quiz in the campaign editor. In the left menu, click on settings and select Edit Quiz Settings.

You can also navigate to the quiz settings by clicking the three dots in the main campaign dashboard.
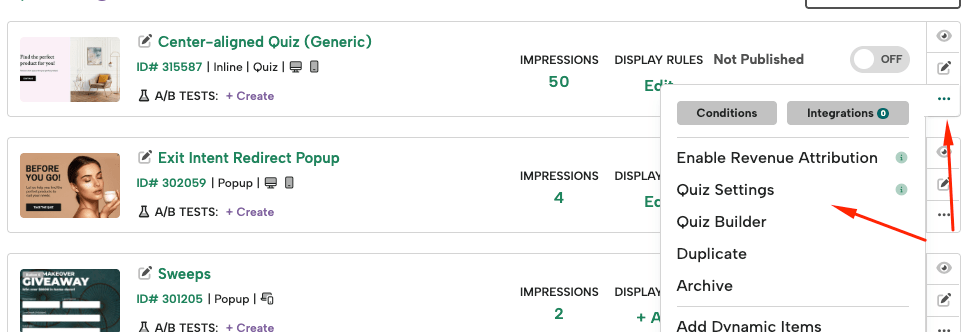
Go to the “Results” tab to begin configuring the results page. Under “Result Page Type” select “Digioh Results Page”.
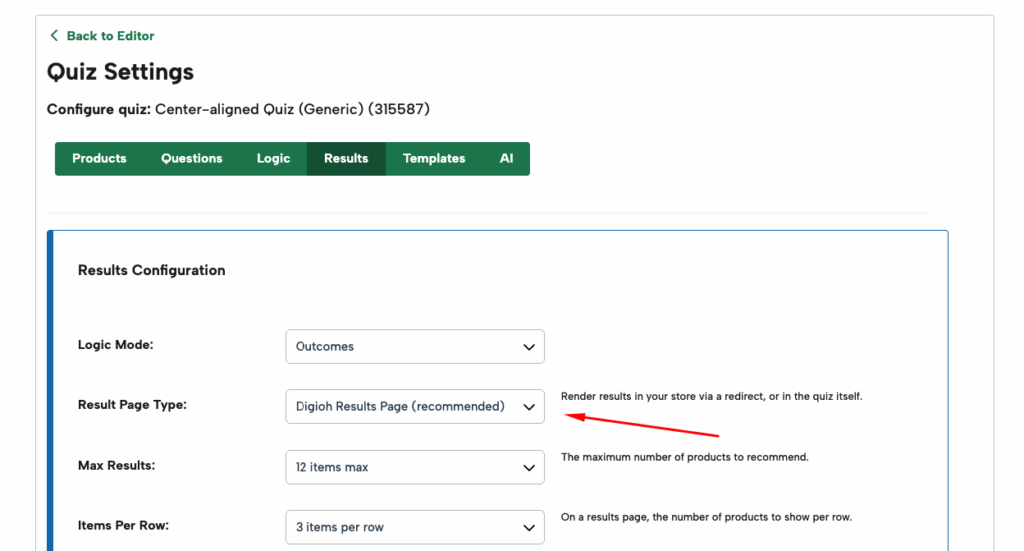
Now you can begin setting up how your result page will be formatted.
-
- Max Results: The maximum number of products to recommend.
- Items Per Row: The number of products to show per row on the result page.
- Results Buttons CTA: Button “Call to Action” for each product in your results page.
- Max Page Width: Maximum width of your results page.
- Max Item Width: On a results page, maximum width of each product card.
-
-
- Add ALL To Cart Button (Only Shopify): Show a button at the bottom of the page that adds all items to the cart in a single click.
- Product Descriptions: Show the product description underneath the product title for each item.
- Hero Product: On a results page, display the first recommended product larger and on its own row.
- Out of Stock: On a results page, don’t include out of stock items in the recommendations.
-
- Results Redirect Delay: Configure the pause before redirecting to the results page (default: 2 seconds).
- Price Format: Display your product prices in a specific currency and format.
-
- Fallback Results Type: Fallback options for what to display when no products are recommended.
- Results Page URL Query: This is an advanced option if you want to pass any data collected in the quiz as a URL parameters
- Results Page Header HTML: This is the header text that will appear on your results page. You can use any field that you collect throughout the quiz to display here as well. (ex. [NAME] or [CUSTOM_3])
- Results Page CSS: This is where you can edit the CSS for how your result page looks.
Styling your results page
You have the ability to use Campaign Styles or Account Styles on the Digioh Results page. This feature will allow you to use similar styles you’ve used throughout your quiz. This will help to speed up your results page design, make it cohesive with the quiz, and limit the amount of CSS needed.
Scroll down to the Element Styling and simply select the Campaign or Account Styles you want to use for each specific element.
![]()
Don’t have a Campaign Style created that works exactly how you want for some of the results elements? No problem! You can always go back into the quiz editor and add new styles specifically to be used on the results page. Just make sure to save your quiz campaign after adding them, then go back into the Results page editor to select them from the drop down.
Make sure to Save and Preview your results page to see it in action!
Additional Root CSS
You also still have the option to use Custom CSS to design your page as well. Any CSS added will overwrite the Campaign/Account Element Styling used (where applicable), so it’s recommended to set those up first and then tweak anything needed with CSS.
Some results page styling may not be editable with Element Styling. In those cases, you can use CSS and view which Root Variables are available by clicking the View Custom CSS Variables Reference dropdown.
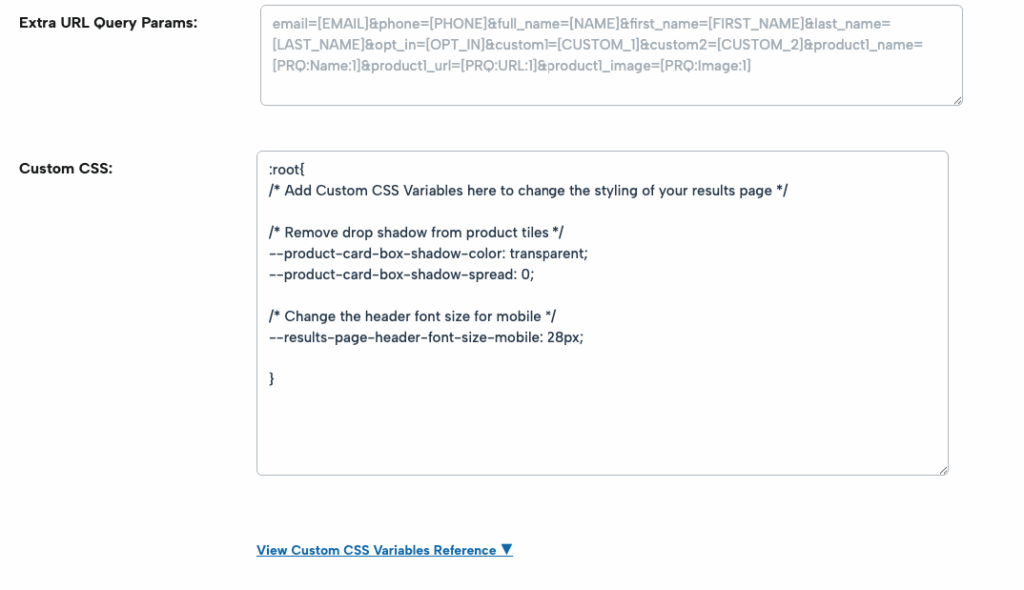
Here are a few common CSS variables you may want to include:
:root {

/* Remove drop shadow from product tiles */
--product-card-box-shadow-color: transparent;
--product-card-box-shadow-spread: 0;

/* Reduce the padding below the header text */
--results-page-header-padding-bottom: 0px;

/* Change the header font size for mobile */
--results-page-header-font-size-mobile: 28px;

}
Full Root CSS Method
We recommend using Element Styling whenever you can to save time and coding—but if you want to be very specific with your styling, you can use the Full Root CSS method below.
You can style your results page using Root CSS Variables to change fonts, colors, button styles and more. You’ll find all of the available variables in the “View Custom CSS Variables Reference” dropdown below the Custom CSS input. Simply copy and paste the ones you need into the “Custom CSS” section and update the values to match your branding.
Here’s an example of root CSS you can paste in to get an initial look of the page and edit its components:
:root {
/* High Level Settings */
--results-page-background-color: white;
--results-page-font-family: "Open Sans", sans-serif;
/* The styling above will set the font family for the whole page.
You can then edit individual section font families as needed or remove the CSS if not */

/* Product Card Settings */
--product-card-box-shadow-color: transparent;
--product-card-box-shadow-spread: 0;

/* Header HTML Settings */
--results-page-header-font-family: "Open Sans", sans-serif;
--results-page-header-text-color: #333333;
--results-page-header-font-size: 32px;
--results-page-header-font-size-mobile: 28px;
--results-page-header-padding-bottom: 0px;

/* Sub Hero Content Settings */
--optional-subhero-content-font-size: 18px;
--optional-subhero-content-text-color: #333333;
--optional-subhero-content-font-family: "Open Sans", sans-serif;

/* Hero Product Card Settings */
--product-feature-title-font-size: 30px;
--product-feature-description-font-size: 18px;

/* Product Title Settings */
--product-title-font-size: 20px;
--product-title-font-family: "Open Sans", sans-serif;
--product-title-color: #333333;

/* Product Price Settings */
--product-price-font-size: 14px;
--product-price-text-color: #333333;
--product-regular-price-font-size: 14px;
--product-regular-price-text-color: #333333;
--product-sale-price-text-color: red;
--product-sale-tag-background-color: red;

/* Product Description Settings */
--product-description-font-size: 16px;
--product-description-color: #333333;

/* Product Card Button */
--product-button-text-color: #333333;
--product-button-bg-color: #e8a798;
--product-button-border-color: #e8a798;
--product-button-border-width: 1px;
--product-button-border-radius: 4px;
--product-button-hover-text-color: #333333;
--product-button-hover-bg-color: #ece1d3;
--product-button-hover-border-color: #ece1d3;
--product-button-text-transform: uppercase;
--product-button-font-size: 16px;
--product-button-font-family: "Open Sans", sans-serif;
--retake-quiz-button-text-decoration: underline;

/* Retake Quiz Button */
--retake-quiz-button-background-color: transparent;
--retake-quiz-button-text-color: #333333;
--retake-quiz-button-border-width: 0px;
--retake-quiz-button-border-radius: 0;
--retake-quiz-button-text-transform: uppercase;
--retake-quiz-button-font-size: 16px;
--retake-quiz-button-font-family: "Open Sans", sans-serif;
--retake-quiz-button-hover-text-color: black;
--retake-quiz-button-hover-bg-color: transparent;
--retake-quiz-button-hover-border-color: transparent;

/* Add All to Cart Button */
--add-all-to-cart-button-background-color: #e8a798;
--add-all-to-cart-button-text-color: #333333;
--add-all-to-cart-button-border-color: #e8a798;
--add-all-to-cart-button-border-width: 2px;
--add-all-to-cart-button-border-radius: 4px;
--add-all-to-cart-button-text-transform: uppercase;
--add-all-to-cart-button-font-family: "Open Sans", sans-serif;
--add-all-to-cart-button-font-size: 16px;
--add-all-to-cart-button-hover-text-color: #333333;
--add-all-to-cart-button-hover-bg-color: #ece1d3;
--add-all-to-cart-button-hover-border-color: #ece1d3;
}
To preview how your result page will look, make sure to “Save”, then click the “Preview Results” button on the bottom right. This will open a new page of how your results page will display.
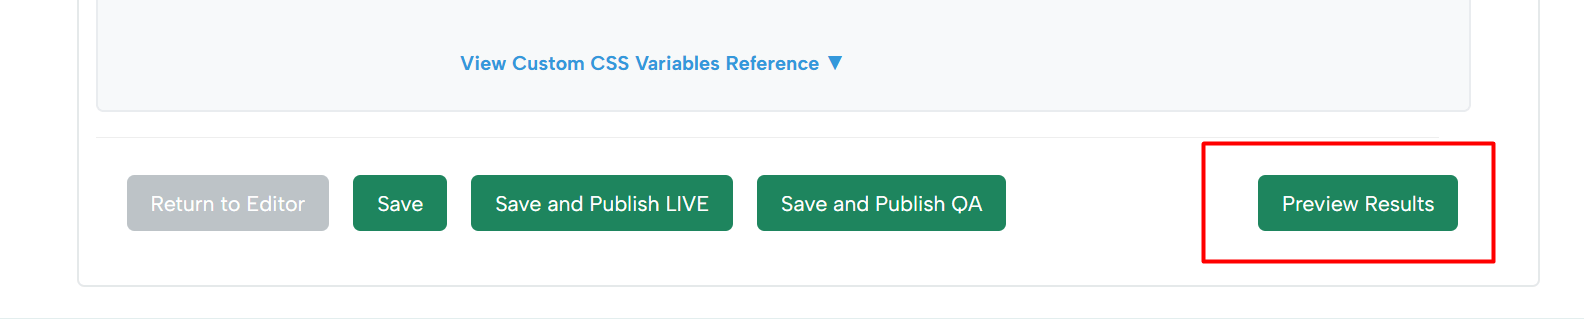
Once done editing be sure to click “Save” or “Save and Publish Live”.