Mailvio is a powerful ESP that gives you total control over your email campaigns. Digioh integrates with Mailvio to help marketers capture more emails with custom Pop-Ups and Forms that pass data to Mailvio in real-time. You can also use Digioh to create landing pages, surveys, quizzes, and email preference centers that are integrated with Mailvio.
If you are setting up a Digioh integration by yourself, we first recommend reading about Digioh Integration Basics.
Follow these steps to set up a Mailvio integration.
First, you need to grab the following information from your Mailvio account: 1) the group ID number for the group you want to add subscribers to, and 2) your API key.
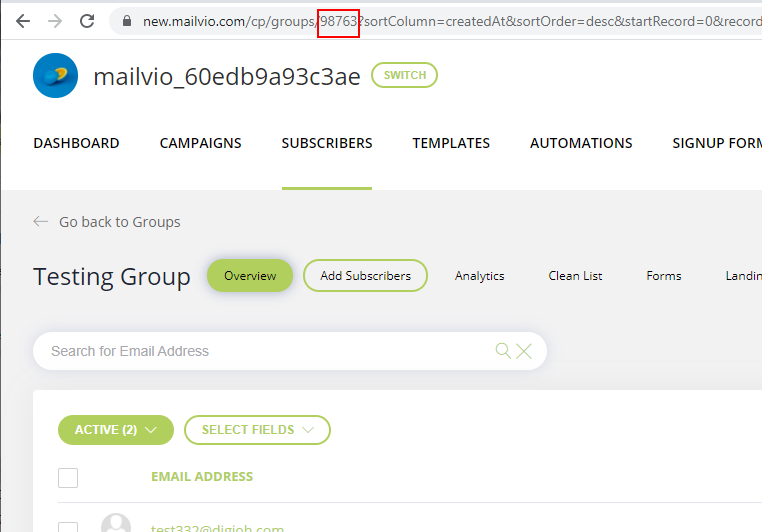
To get the group ID, head to the Groups page, and select the group you want. The ID will be in the URL for that page:

To get the API key, head to the API keys page in the Integration section of your account.

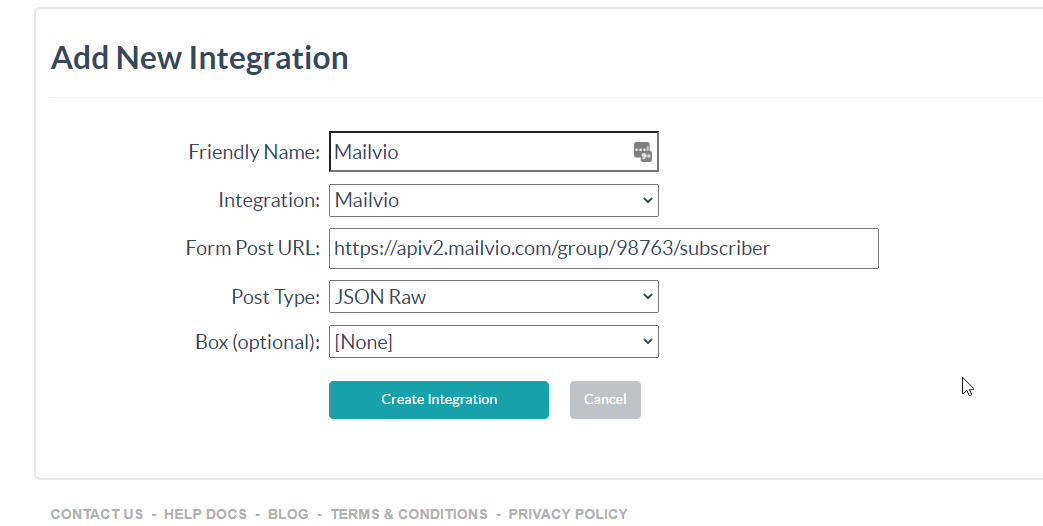
With both pieces of information in hand, log into your Digioh account. Head to the Integrations page, and create a new integration. Select Mailvio from the dropdown, and then set up a POST URL that looks like this:
https://apiv2.mailvio.com/group/[GROUP ID]/subscriber
Where “[GROUP ID] is replaced with the actual group ID. For example, the URL for group 98763 the URL would look like this:
https://apiv2.mailvio.com/group/98763/subscriber
Set the POST type to JSON Raw. The integration should look like this:

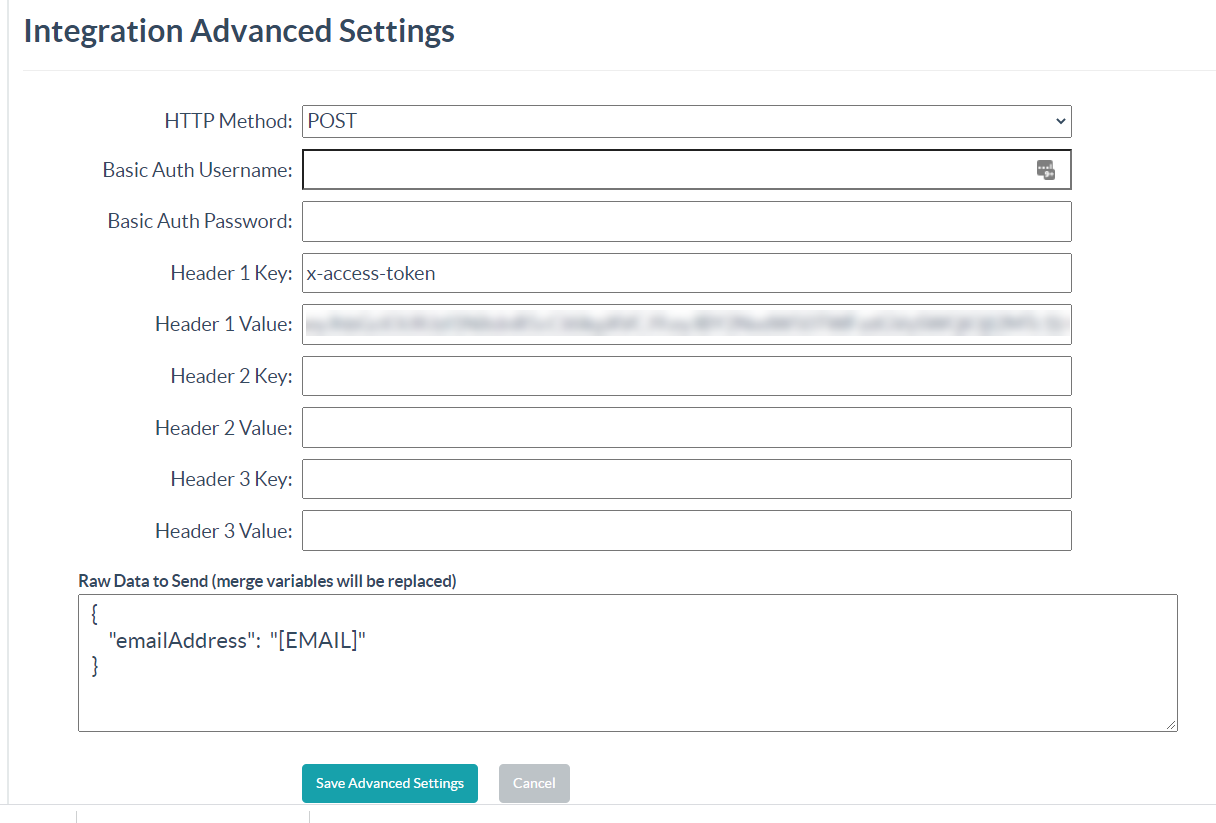
Click “Create Integration.” On the next page, enter
x-access-token
for Header 1 Key and enter your API key for Header 1 Value. In the Raw Data to Send field, map the fields in Mailvio to the corresponding fields in Digioh. It should look like this:

Save the advanced settings, and the integration is ready to go!
Assign the integration to a box, and the box will start sending form submissions to Mailvio.
If you have any questions about setting up your Mailvio integration, send us an email, and we’ll be glad to help.
