Klaviyo Integration Guide for Digioh Users
This guide provides a step-by-step process on how to integrate Klaviyo with your Digioh account. By following these instructions, you can set up Klaviyo to track quiz submissions, map custom fields, and verify the integration with a test lead.
Step 1: Selecting Klaviyo in Digioh
Log into your Klaviyo account.
In Digioh, navigate to the integrations dropdown menu.
Select Klaviyo from the available options.
Step 2: Authenticating Digioh with Klaviyo
Once Klaviyo is selected, you will be redirected to the Klaviyo OAuth page. Follow these steps to authenticate:
Authenticate Digioh with Klaviyo by approving the requested permissions.
Step 3: Create a Klaviyo Track Quiz Submission
After authentication, set up a Klaviyo Track Quiz Submission.
Step 4: Map Custom Fields
Map the custom fields in the Map Profile Task.
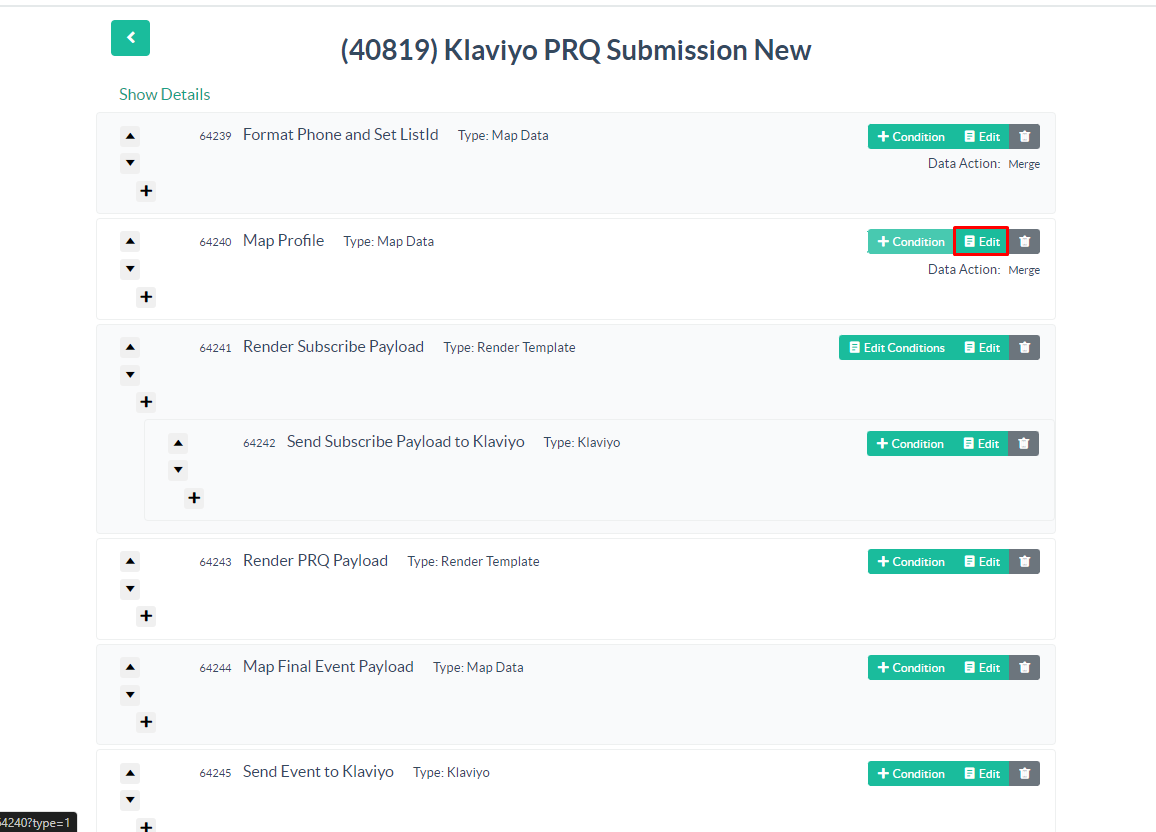
Detailed instructions on mapping can be found in Digioh’s documentation: How to Add New Mappings to Your Klaviyo Pipeline.
The data field mapping in Klaviyo is different, It’s profile.data.attributes.properties.{yourattribute}
Step 5: Submitting a Test Lead
Submit a test lead to check if the data is being passed correctly.
To do this, tie the integration to the box and submit the form.
After that, edit the pipeline and click on Activity. There you will be able to see the logs.
You will see a screen indicating whether the integration was successful. Take a screenshot of this page for your records.
Step 6: Building an Email Template in Klaviyo
If the integration test is successful, you can start using Klaviyo’s default drag-and-drop feature to build an email template.
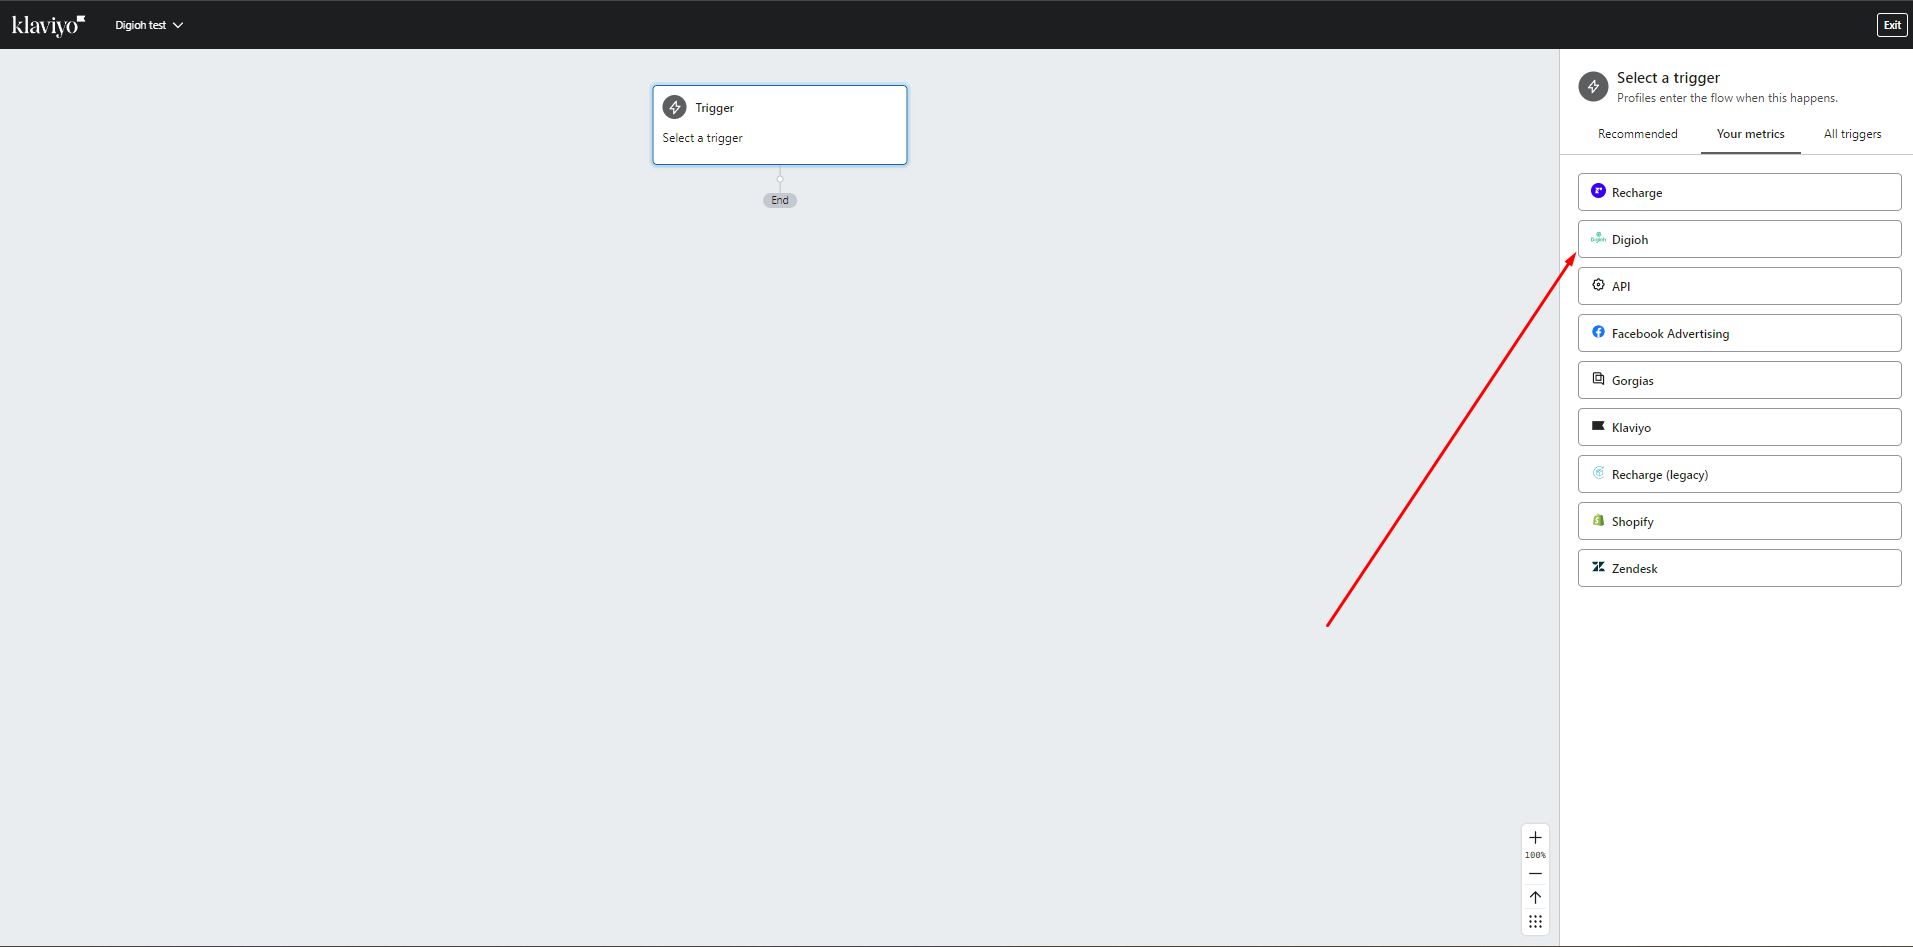
First create a flow from scratch using the Digioh trigger, It will be available in the your metrics section once you submit the quiz for one time.
Confirm and save.
Then move forward with your email template design. If you already submitted the quiz once, There should be some data in Klaviyo which we can use to get the merge tags.
To use Klaviyo merge tags:
Click on Preview and Test.
Click on any element you want to display on the results page Merge tags
Click on Image URL0; a popup will appear showing the copied merge tag for URL0.
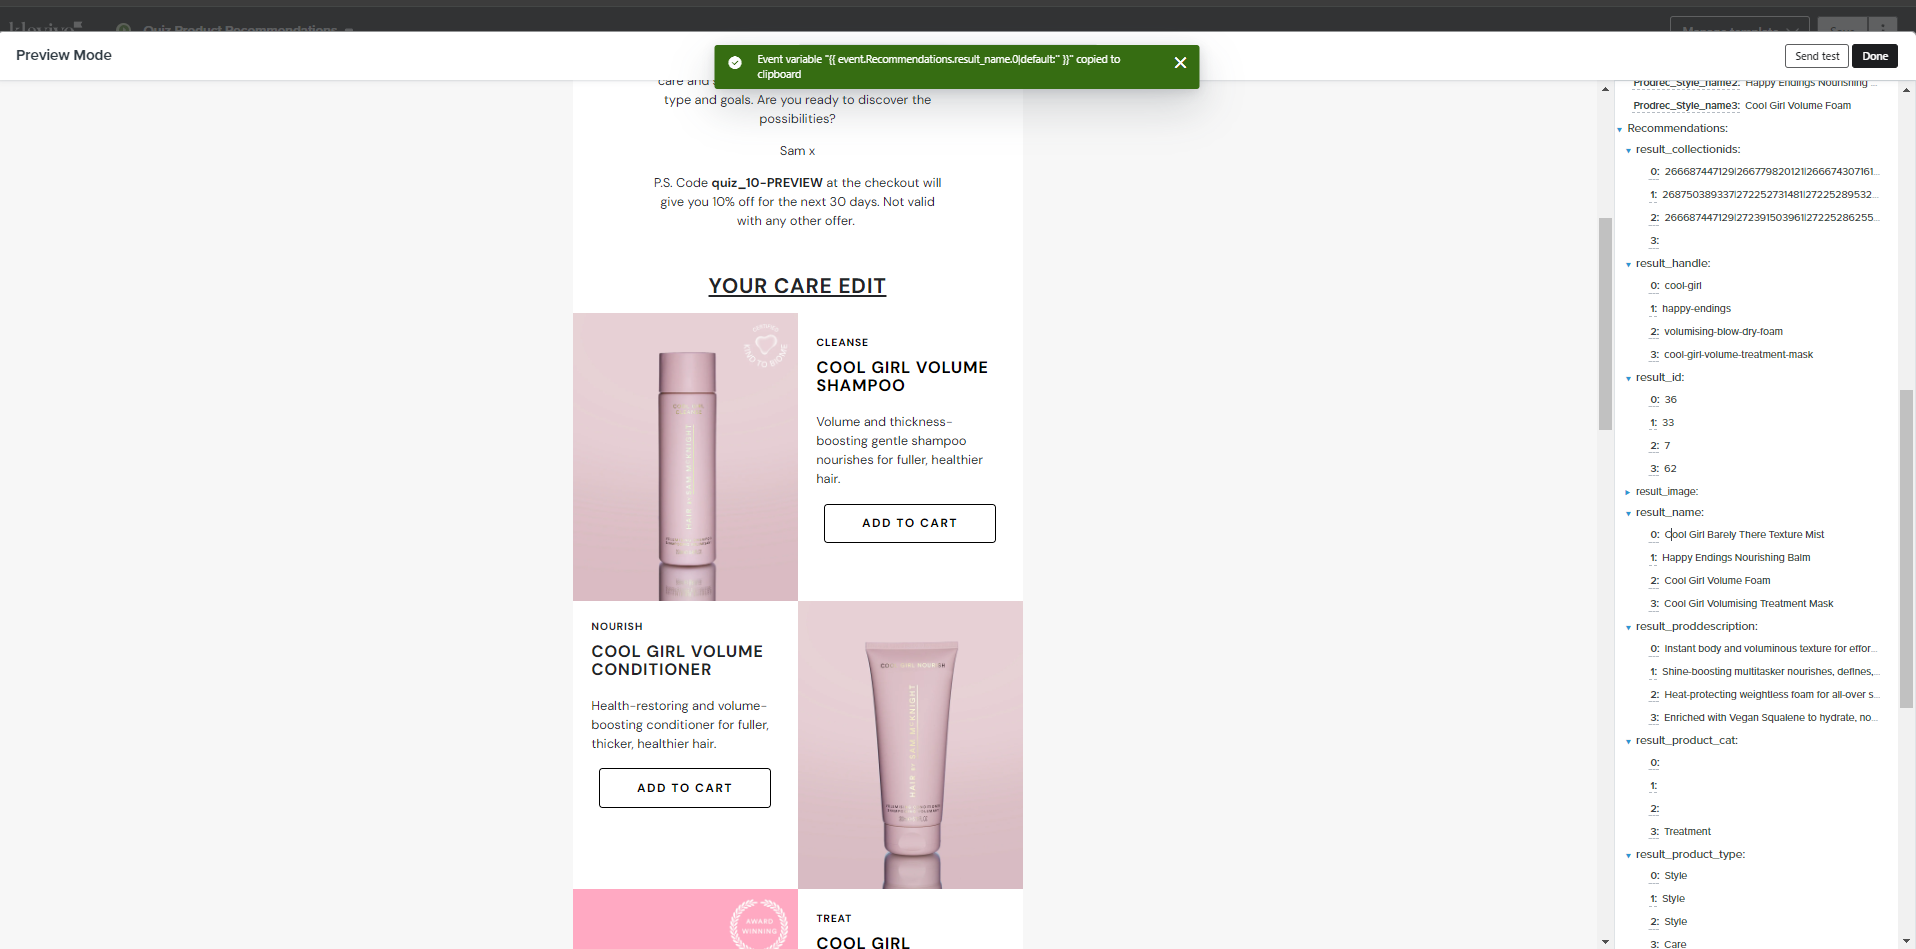
Use this merge tag in your Klaviyo email template.
Using the merge tags will help you build the results email. It will be copied to your clipboard and your results will populate.
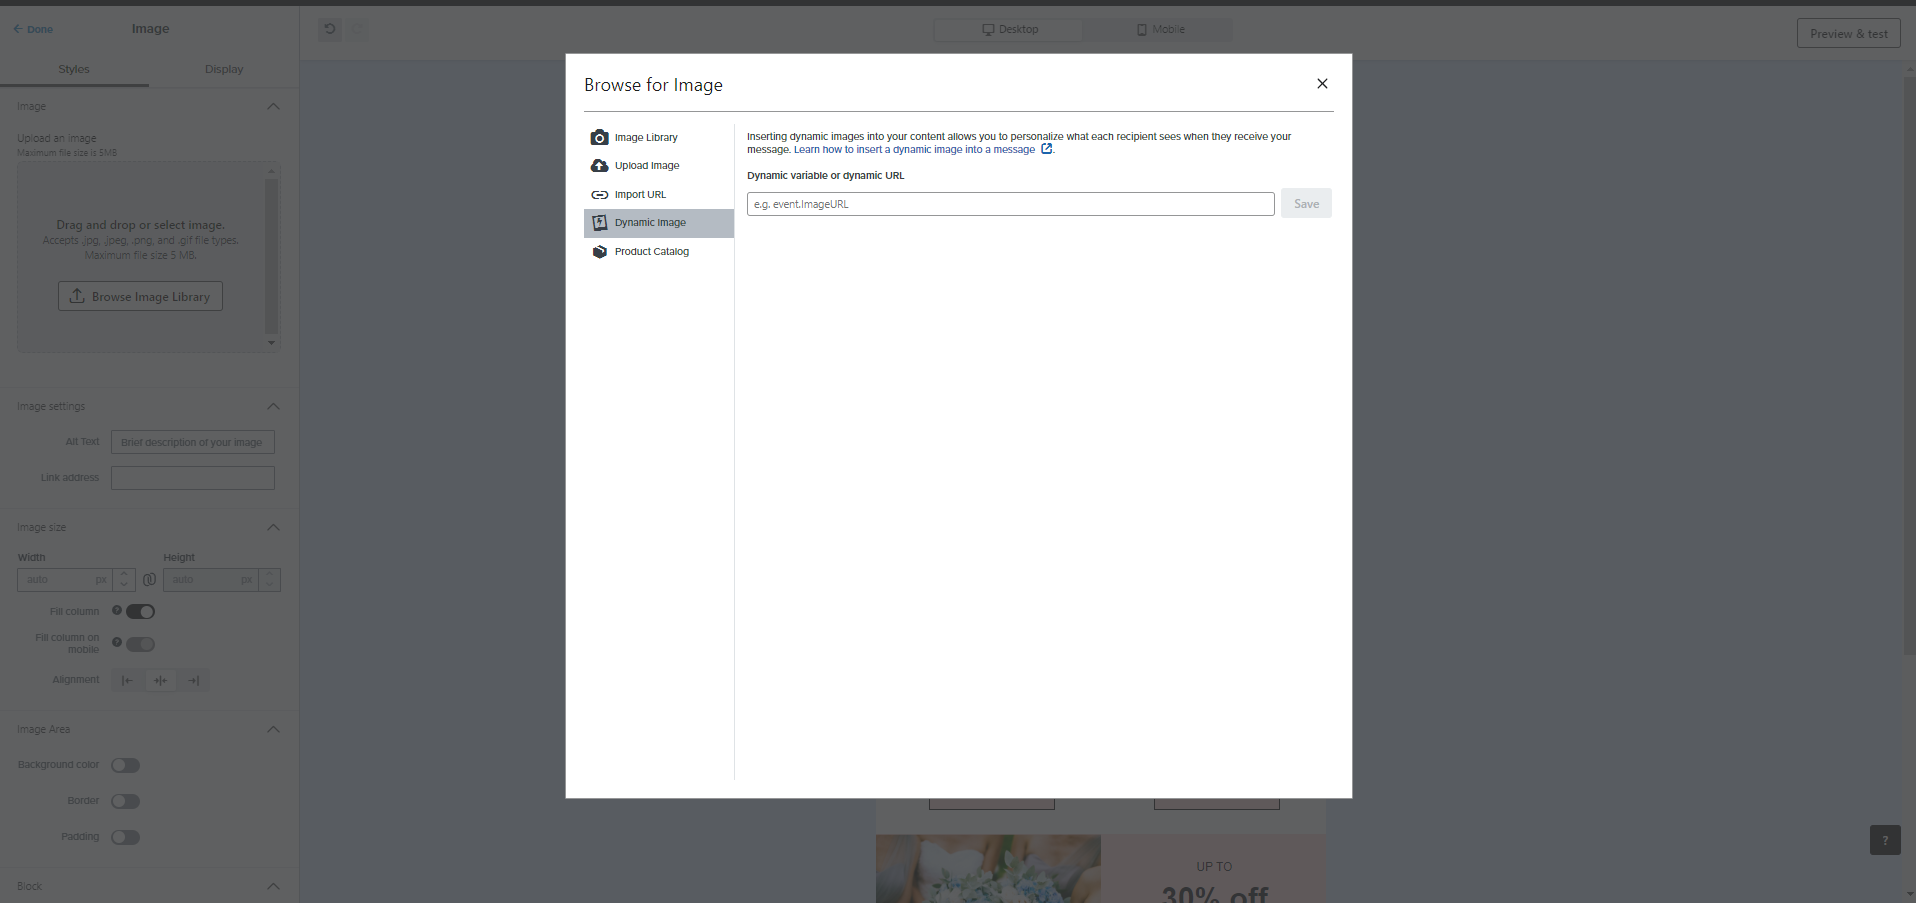
Then go to the Image section and select a general template that is going to represent your brand.
- First set up the images section, Copy the merge tag from the preview of PRQ image 1 and go to Browse image library and dynamic image, Paste your merge tag there.
- For buttons paste the merge tags in the URL section.
- And for texts, Just add the merge tags.
Conclusion
After completing these steps, you will have successfully integrated Klaviyo with Digioh, allowing you to track quiz submissions and customize your email marketing strategies using Klaviyo’s features. If you encounter any issues during the integration process, refer back to the detailed documentation or contact Digioh support for assistance.