The Shopify Cart Targeting and Personalization extension lets you display live product data from a shopper’s cart directly inside a Digioh Campaign. A common use case is an exit-intent Campaign that surfaces the first item in the shopper’s cart, showing its image, title, price, description, and a direct link back to the product page. This helps re-engage a shopper who is about to leave your store.
This is configured entirely through element-level metadata in the Campaign Builder. No custom JavaScript is required.
Prerequisites
- The Digioh JavaScript snippet must be active on your Shopify store.
How It Works
When a Campaign is about to open, the extension reads the shopper’s current cart from the browser cache and injects product data into any Campaign elements tagged with cart metadata keys. Each key targets a specific element type (text, image, or button) and a specific cart item slot identified by an index number.
For the most common use case, showing the first item in the cart, you will use the index value 1 on all elements.
Step 1: Install the Extension
-
- In your Digioh account, navigate to the top-right dropdown and click Extensions.
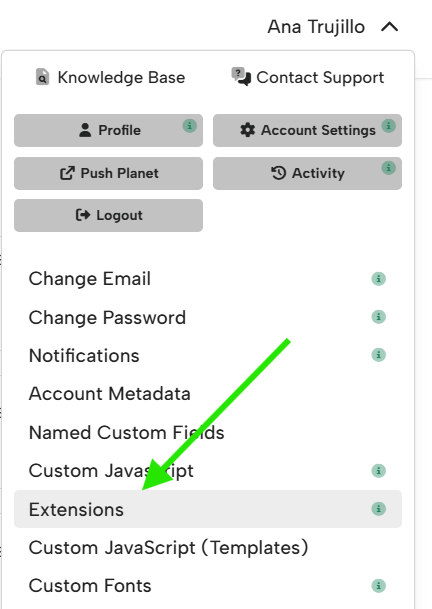
- Go to the Display Rules section, install the Shopify Cart Targeting and Personalization
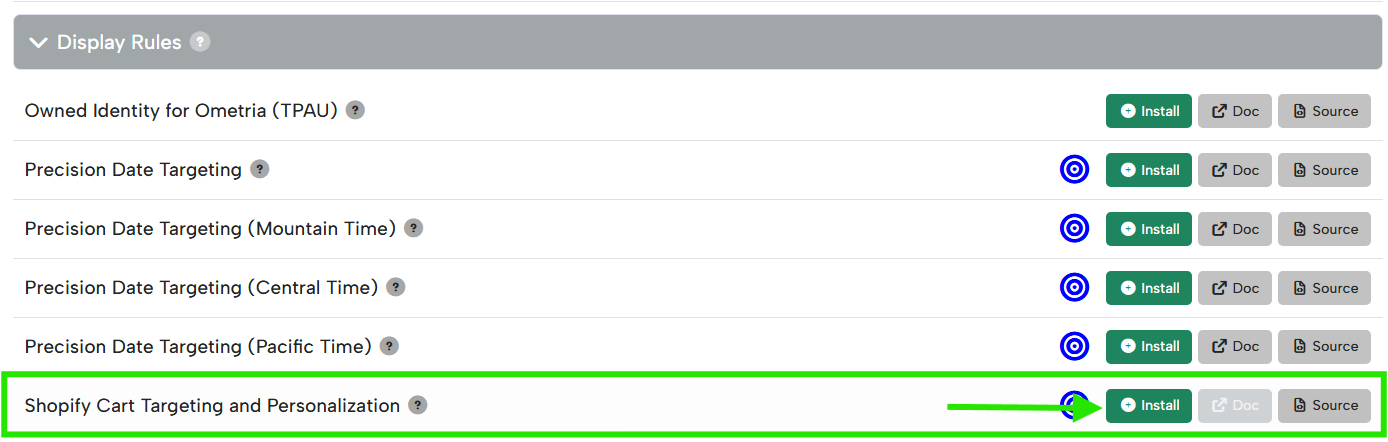
- Once installed, make sure to click Publish to Your Site for the extension to start running.
- In your Digioh account, navigate to the top-right dropdown and click Extensions.
Step 2: Design Your Campaign Layout
In the Campaign Builder, build the layout for your exit-intent Campaign. Add a separate element for each piece of product data you want to display. For a standard product card showing the first cart item, you will need:
- An image element for the product photo
- A text element for the product title
- A text element for the product price
- A text element for the product description
- A button element for the “Shop Now” or “View Product” CTA
These are all optional, depending on the information you want to display. For example, if you only want the product image, then you just need an image element.
Step 3: Tag Each Element with a Cart Metadata Key
For each element you want to dynamically display, add a metadata entry that tells the extension which product data to inject and which cart item to pull it from.
- In the Campaign Builder, click the element to select it.
- In the element settings panel, scroll down to the Element Metadata and toggle it on.
- Add a new metadata entry: depending on the cart element you want to display, reference the table below for the key to be used. For example, for displaying the image, set the key to
cart_rec_imgand the value to1(for the first cart item).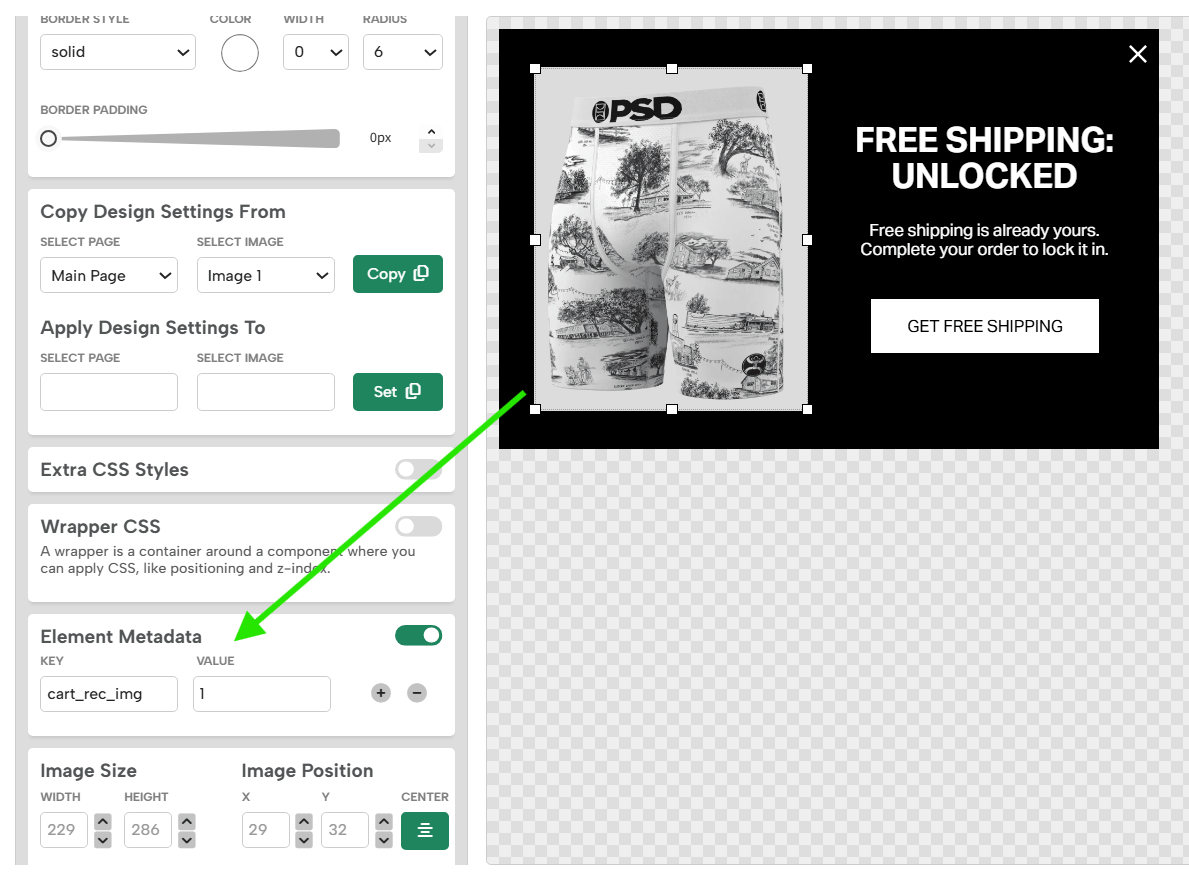
- Repeat for each remaining element using the keys based on the table below:
Available Metadata Keys
| Metadata Key | Apply To | Value | What It Injects |
|---|---|---|---|
cart_rec_img |
Image element | Item index (e.g., 1) | The product image of the specified cart item. |
cart_rec_title |
Text element | Item index (e.g., 1) | The product title of the specified cart item. |
cart_rec_price |
Text element | Item index (e.g., 1) | The product price, formatted with the store’s currency symbol (e.g., $49.99). |
cart_rec_desc |
Text element | Item index (e.g., 1) | The product description of the specified cart item. |
cart_rec_url |
Button element | Item index (e.g., 1) | Sets the button’s click destination to the product page URL. |
Step 4: Add Display Rules
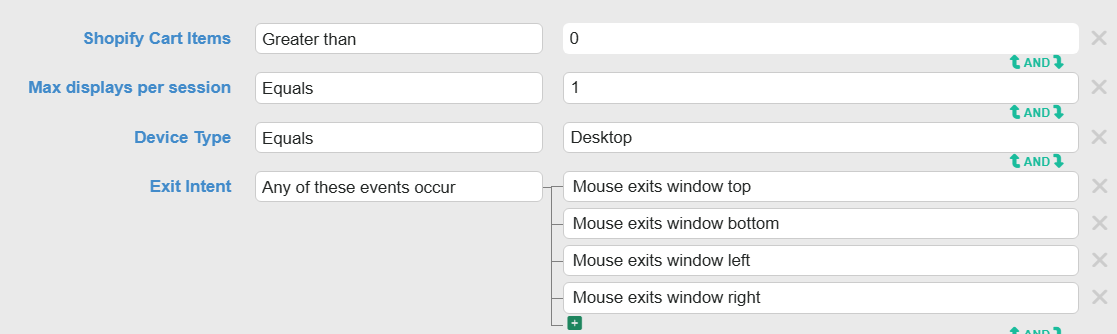
Add a display rule to ensure the Campaign only opens when there is at least one item in the cart to display.
| Dropdown Option | Operator | Value |
|---|---|---|
| Shopify Cart Items | greater than | 0 |
For an exit-intent Campaign, also configure the trigger to fire on exit intent in the Campaign’s Trigger settings.
Step 5: Publish Your Campaign
We recommend testing the Campaign on your live store before publishing. Add a product to your cart, trigger the exit intent, and verify that the correct product image, title, price, and description appear and that the CTA button links to the right product page.
- Confirm the Campaign is toggled on in your Campaign list.
- Click Publish.
Displaying Multiple Cart Items
To display more than one cart item in a single Campaign, for example, two product cards side by side, add a second set of elements and tag them with the same metadata keys but with index value 2:
| Element | Metadata Key | Value |
|---|---|---|
| Second image element | cart_rec_img |
2 |
| Second title text element | cart_rec_title |
2 |
| Second price text element | cart_rec_price |
2 |
| Second CTA button element | cart_rec_url |
2 |