Klaviyo OAuth integration is the preferred way of connecting your Digioh account to Klaviyo. We also support connecting via API keys if needed.
Digioh integrates with Klaviyo to grow your list with pop-up forms, one-time-use coupon codes, product recommendation quizzes, and other eCommerce conversion features.
Klaviyo Integration Requirements
Before setting up your integration, you will need the following parameters from Klaviyo:
- Private API Key
- Public API Key
- List ID
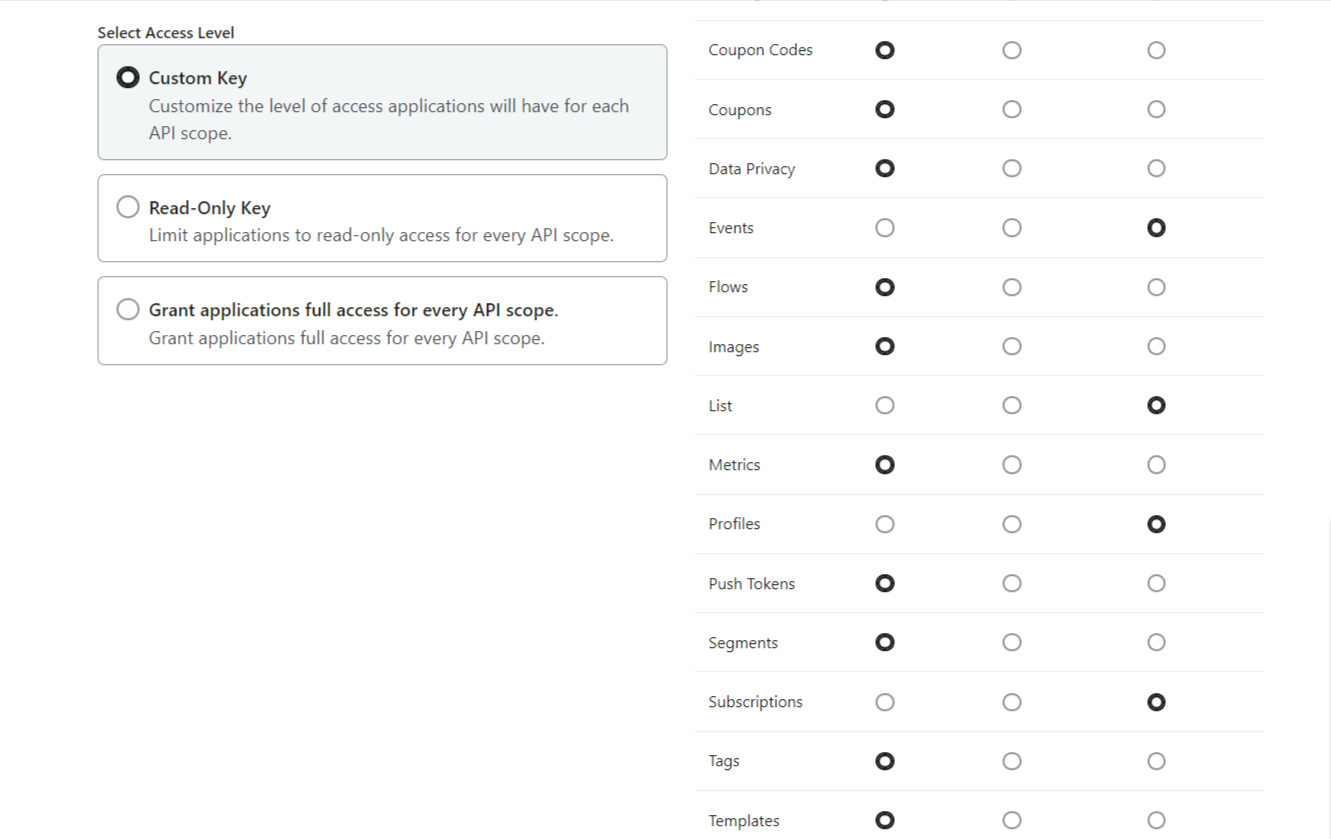
While Creating Private API Key Please Select Custom Access Level and Select the Following Module Permissions.
- Events (Full Access)
- List (Full Access)
- Profiles (Full Access)
– How to create Klaviyo List ID
How to Set up Your Klaviyo Integration
1. Create the Box in your Digioh account that you will integrate with Klaviyo (if you don’t already have one created).
2. Click the “Integrations” tab.
3. Select Klaviyo from the dropdown.
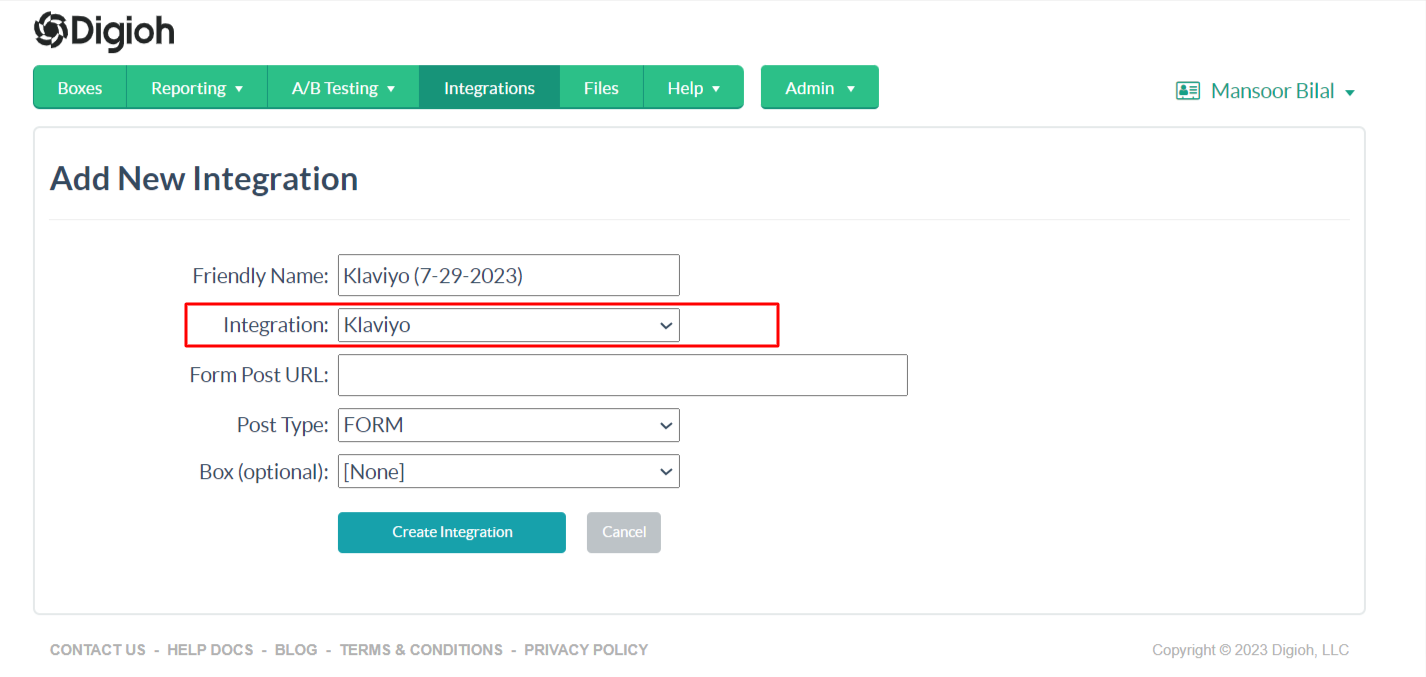
4. This will open the Klaviyo Main Integration Page.
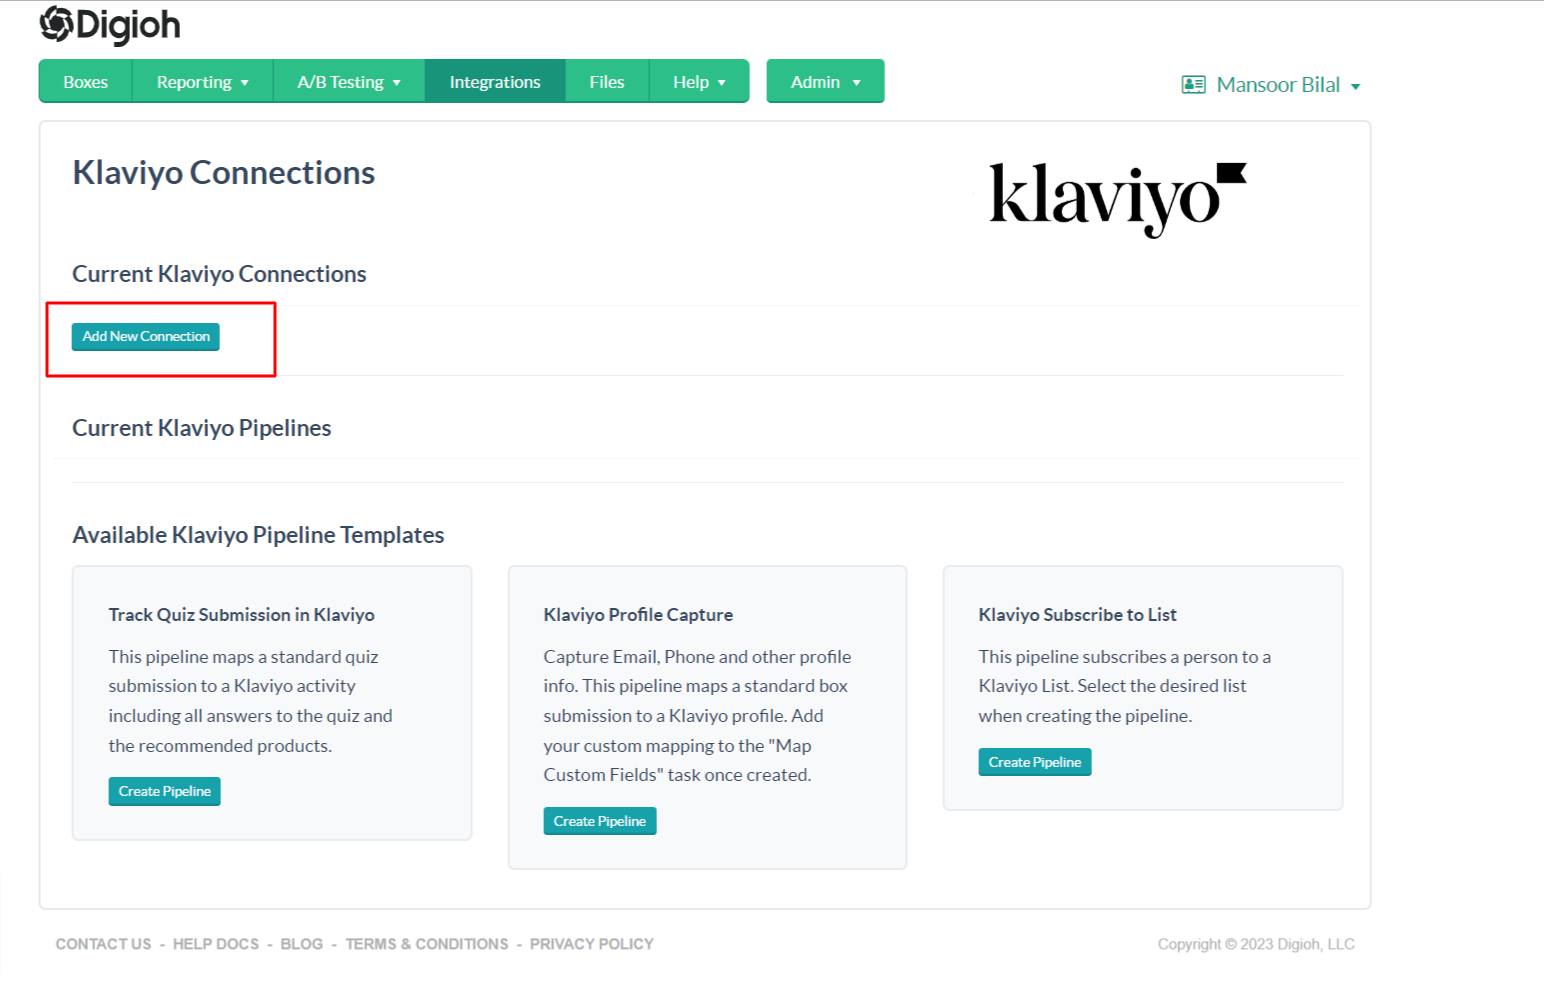
5. Next, set up your Klaviyo Authentication:
Click “Add New Connection.”
It will open the Klaviyo OAuth Page. Click on Click here to connect via API Keys on the following page (As you are going to manually adding you Klaviyo API Keys)
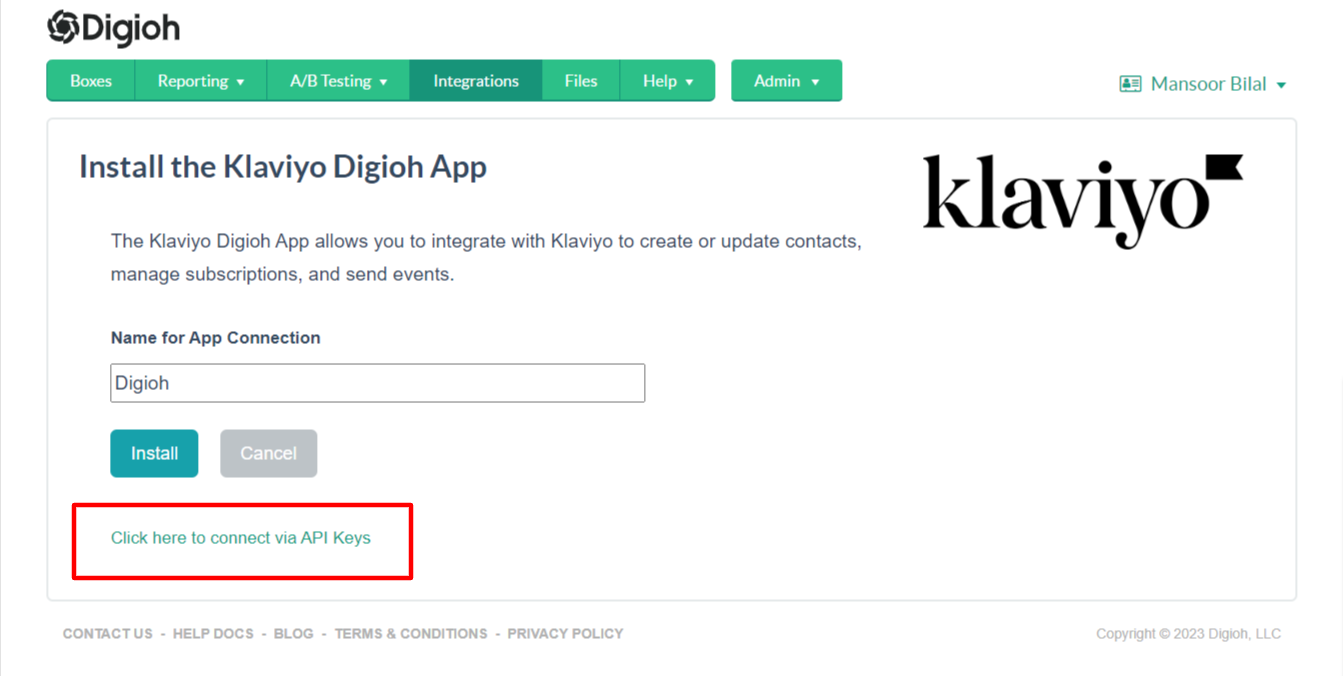
6. Enter your Klaviyo Public and Private API Keys.
You can get these from the Klaviyo API Keys Page.

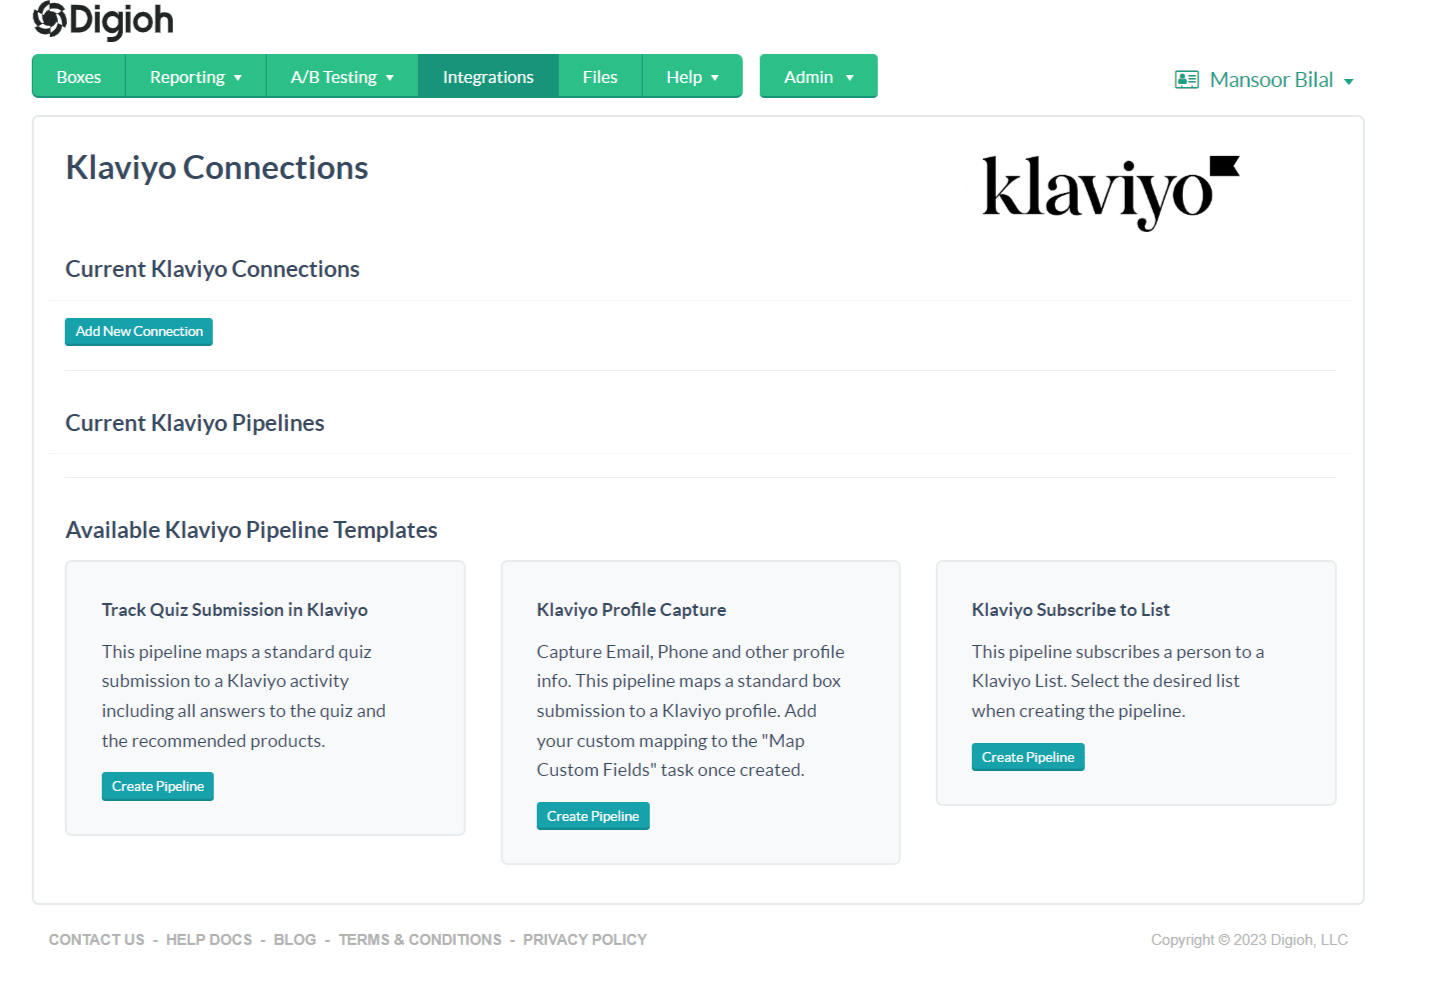
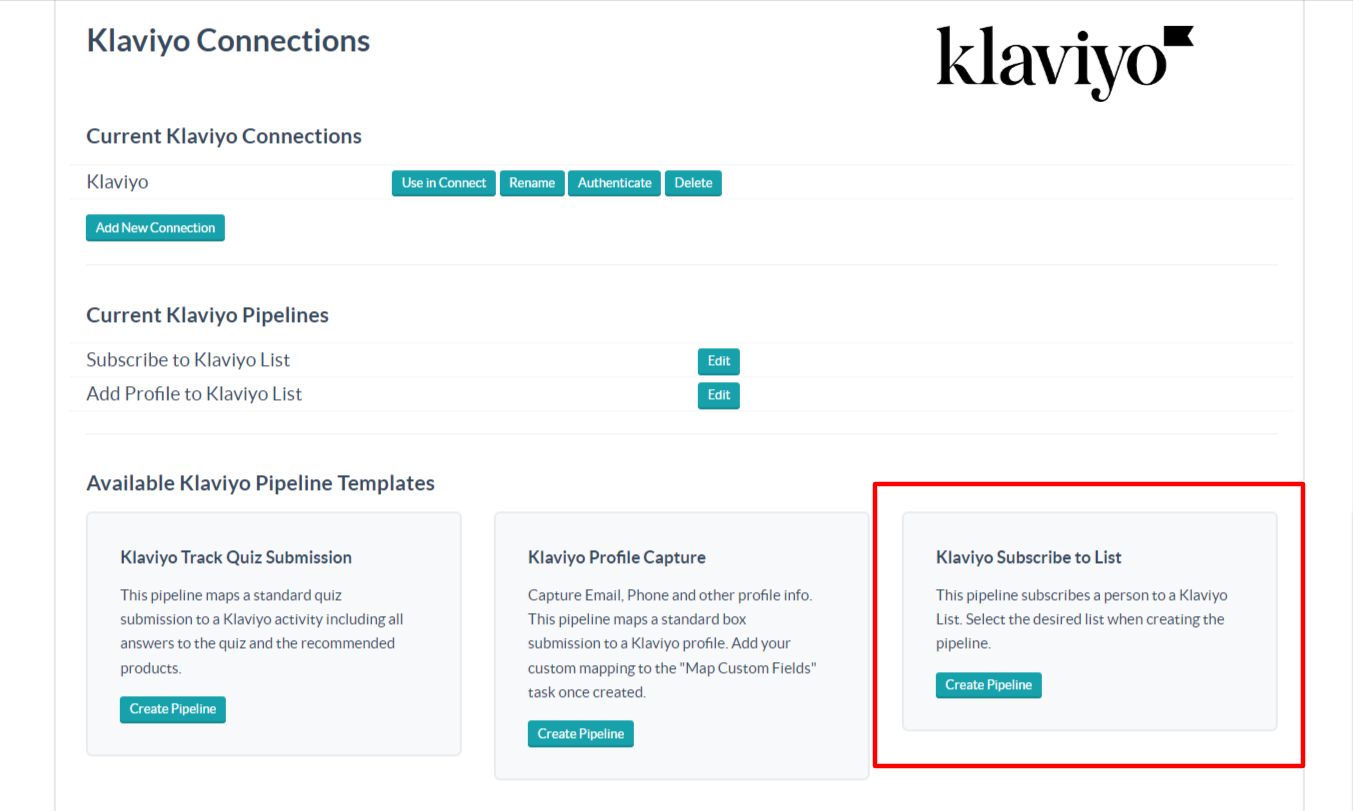
In Klaviyo Integration Page we have 3 Prebuilt Integration Templates.
- Subscribe to List
- Profile Capture
- Track Quiz Submission
1- Klaviyo Subscribe to List Use Cases:
- Email Capture Only
- Email and Phone Capture (Multi-Step Form)
- Phone Capture Only
Select Klaviyo Subscribe to List:
If you would like to capture User Email or Phone Number using a Digioh box, use this pipeline.
Click “Create Pipeline” under Klaviyo Subscribe to List:
Complete the following:
- Add Pipeline Name
- Select Klaviyo List
- Select Box
- Click Create
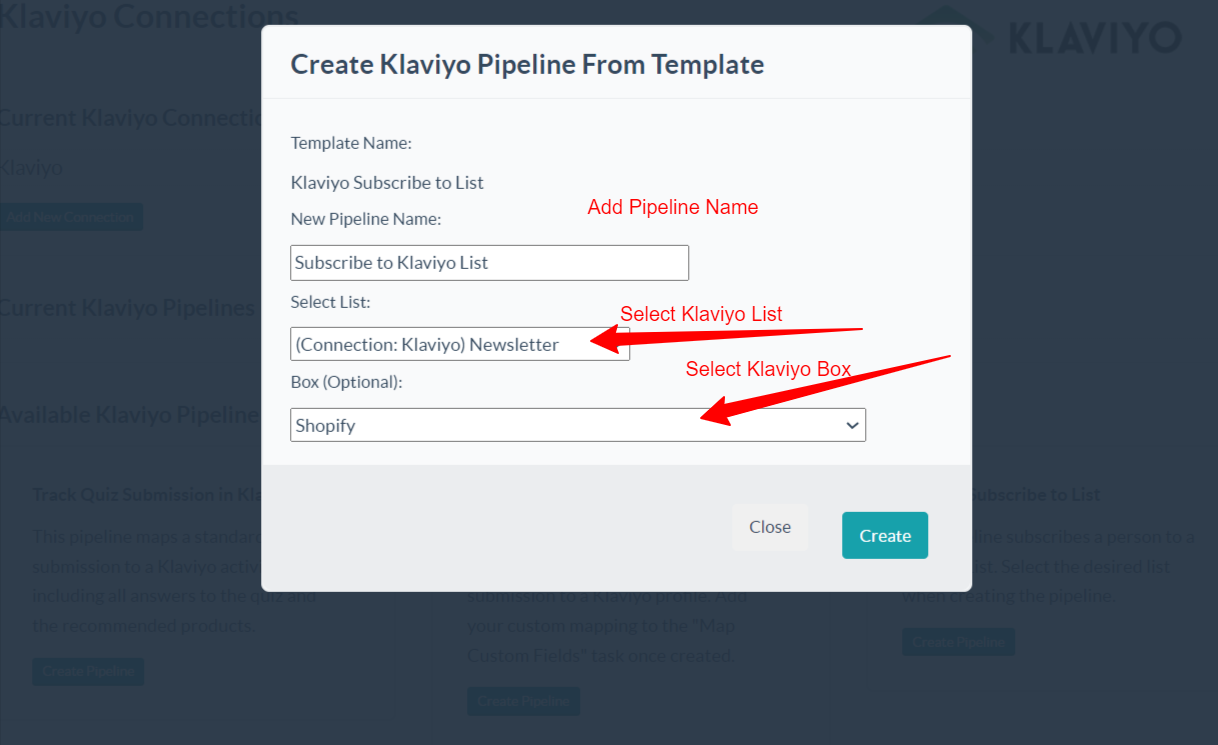
You are all Set Here. This integration will add the User to Mapped List id.
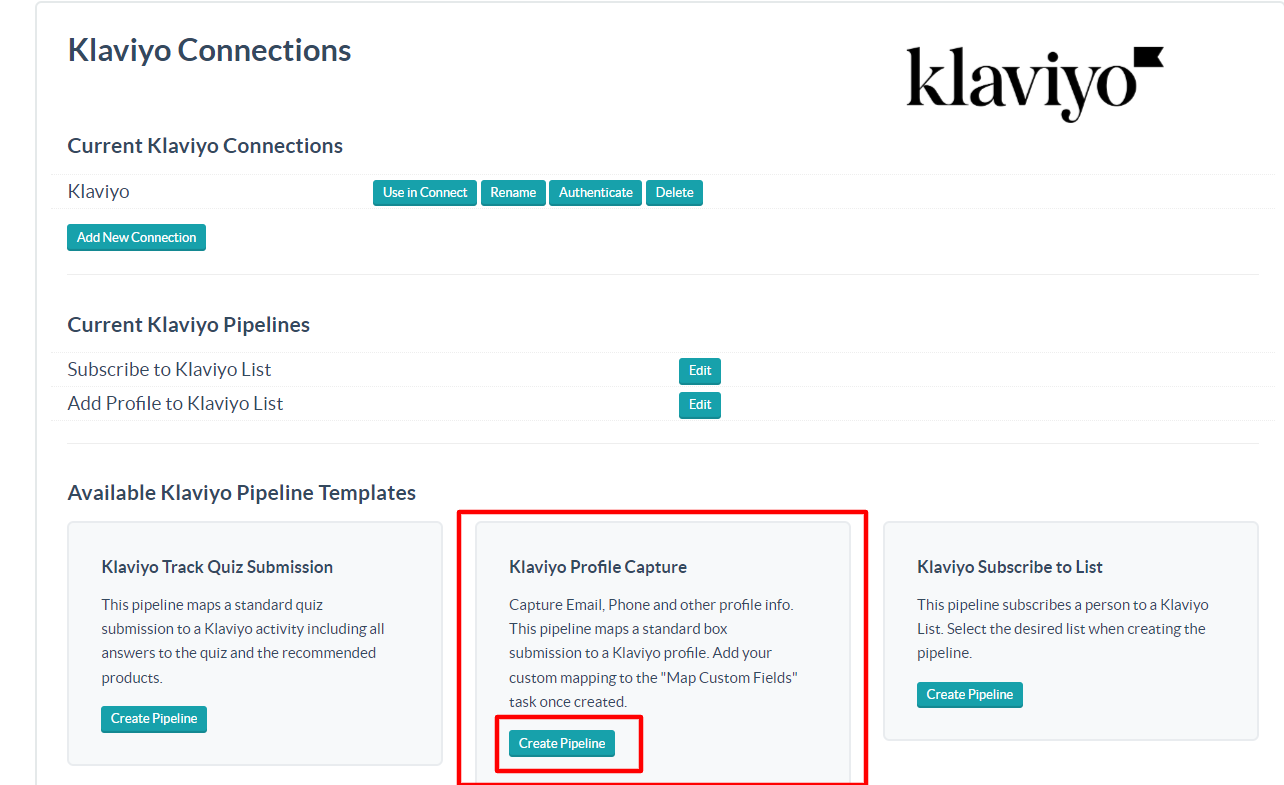
2- Klaviyo Profile Capture:
If you want to create a new Klaviyo Profile on Digioh Box or Quiz Submission then you can use this template. You can pass all Custom fields along with Analytics Fields Like City, Country etc to Klaviyo as well.
On Klaviyo Integration Page Select Klaviyo Profile Capture:
Click “Create Pipeline” under Klaviyo Subscribe to List:
Complete the following:
- Add Pipeline Name
- Select Klaviyo Connection
- Select Box
- Click Create
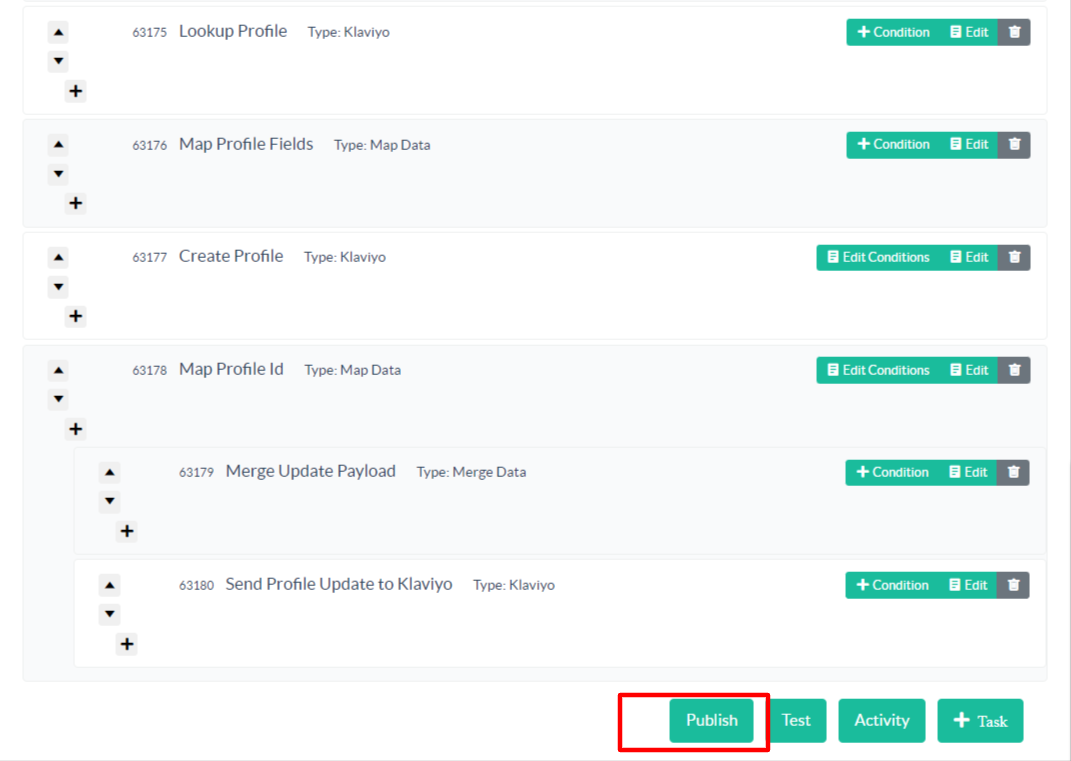
Once the template is created it will redirect you to the Pipeline (Template) tasks Page. If you would like to edit the profile fields Like the Usecase is to pass all the Quiz information to created Profile. In this Case we have to edit the Map Profile Fields Task.

ie In Digioh Quiz Custom_2 is mapped with a quiz question and you would like to pass it to Klaviyo as users_age field.
- Click on Mapping
- Add form.custom_2 in Input Field (Digioh Field).
- Add attributes.properties.user_age in output field (Klaviyo Field).
- Click Save
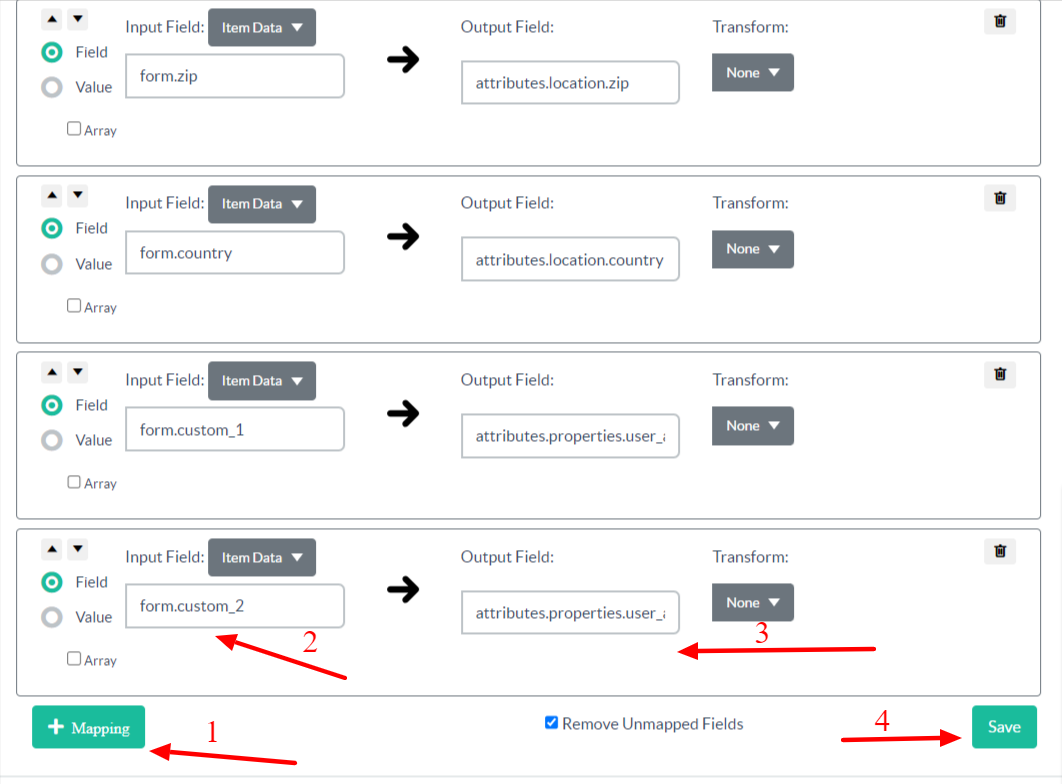
You can Map all the required fields that you want to push to Klaviyo by following above method.
Note: Once all the fields are mapped Publish the Pipeline (Template)
2- Track Quiz Submission
This Template is used for Sending Recommended Products as Quiz Results to Users using Klaviyo Email.
Note: Each Time User retake the Quiz this integration will send Updated Products Results To Klaviyo.

Complete the following:
- Add Pipeline Name
- Select Klaviyo Connection
- Select List
- Click Create
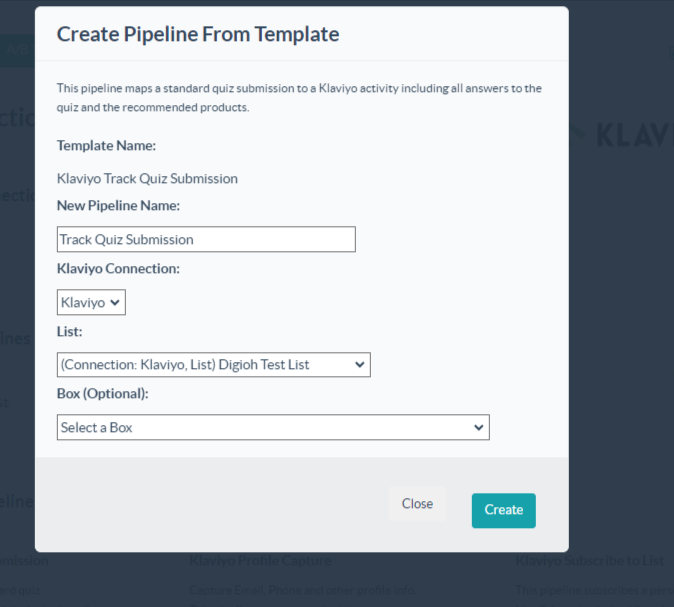
This Template will Automatically pass All the Quiz Answers along Question to Klaviyo. Also the Product Results will be Passed to Klaviyo By Default that can be used in Klaviyo Email Template.