
The Dynamic Images extension swaps the background image, button image, or page image in a campaign based on what a visitor selected in an earlier form field, or in real time as they pick options from dropdowns, checkboxes, and radio buttons.
What you’ll learn
• How to install the Dynamic Images extension on your account
• How to swap an image based on a single form field
• How to swap an image based on more than one form field
• How to drive image swaps from checkbox selections
Install the Dynamic Images extension
1. In your Digioh account, click your profile menu in the top-right corner and select Extensions.
2. Find Extension : Dynamic Images in the list and install it.
3. Publish your account to activate the extension.
How it works
When a visitor submits a form field, Digioh stores the value in the dataLayer. On a later page (or in real time, on the same page), the extension reads the dataLayer and matches the stored value against image URLs you have configured in metadata. The first match wins, and the extension swaps in the matching image.
For example, you can use a dropdown with the values “fireplace,” “garden,” and “bedroom” to control which background image shows on the next page of a campaign.
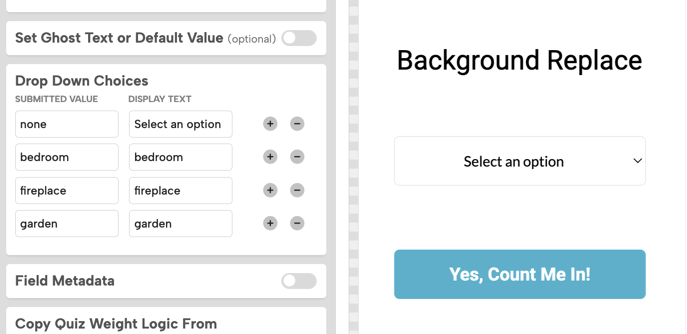
Configure dynamic images for a single field
1. Open the page, image, or button you want to update in the Design Editor.
2. Add a default image to the element. Default images set the size and styling that any replacement image will inherit.
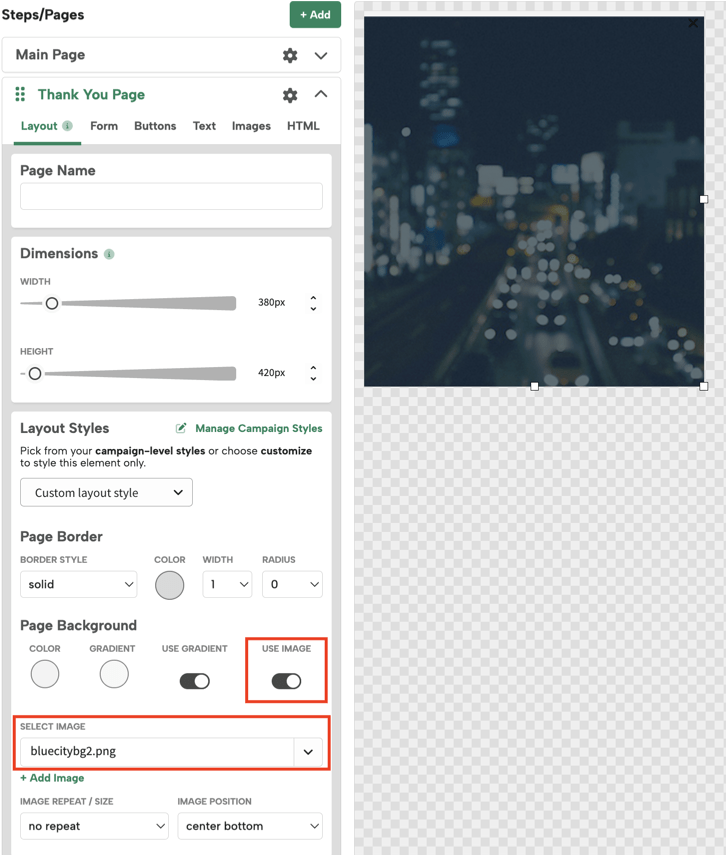
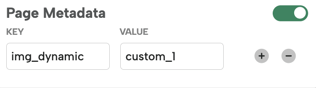
3. Add a page-level metadata command:
Key: img_dynamic
Value: the field name to compare (e.g. custom_1)
4. Add one metadata key for each form value you want to match. The key is the form value, and the value is the image URL.
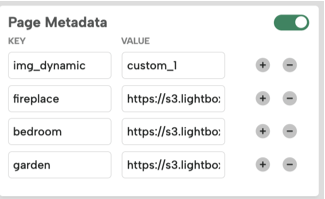
Tip: If your image is hosted in Digioh, find the URL in the Files menu, then right-click the image and copy the link.
Comparison values can be exact strings like “fireplace,” or numeric ranges like 1-100.
Best practice: Set a default image on the element before configuring replacements. The default controls sizing and styling that every replacement image inherits.
Use multiple fields per image element
A single image or button can respond to more than one form field. Pass a comma-separated list of field names to img_dynamic:
Single field (default)
img_dynamic = “custom_1”
Multiple fields
img_dynamic = “custom_1,custom_2”
When you list more than one field, the extension checks each field independently and uses the first matching image URL it finds. Fields are evaluated in the order you list them.
When to use multiple fields
• A single image needs to change based on answers from different pages of the form.
• You want a fallback field to be checked when the primary field is empty.
Drive image swaps from checkbox selections
The extension updates images in real time as visitors interact with checkboxes, the same way it does with dropdowns and radio buttons. Use checkbox triggers when an image should reflect a true/false answer. For example, “I want to subscribe” or “I am over 18.”
How it works
The extension listens for change events on input[type=”checkbox”] elements. When a checkbox is checked or unchecked, the extension reads the checkedval or uncheckedval configured for that field, writes that value to the dataLayer, and immediately swaps the image.
Configure a checkbox trigger
1. In the checkbox settings, set checkedval and uncheckedval to the values you want stored when the box is checked or unchecked.
2. Add an img_dynamic metadata command pointing to the field the checkbox populates (for example, custom_3).
3. Add image URL metadata keys for each value: one for the checked value and one for the unchecked value.
Note: Configuration is the same as for dropdowns. The only difference is that the trigger comes from a checkbox change event.
Best practices
• Always set a default image on the element. The default controls sizing and behavior that replacement images inherit.
• Keep field names consistent across pages so dynamic image rules apply cleanly.
• Use multi-field syntax for fallbacks instead of duplicating the rule on multiple elements.
Need help?
Questions about Dynamic Images? Reach out to support@digioh.com and we’re happy to help.