With Digioh you can call a Digioh Connect Pipeline from an Iterable Journey that will assign unique coupons from a Digioh coupon group to each profile going through the Journey. The Pipeline will save the coupon code back to the Iterable profile, and send an event indicating a coupon has been assigned.
Please note: To create this pipeline, your account will need Digioh Connect enabled. If you don’t have already have Digioh Connect, please reach out to our support team for more information.
Step 1: Add Coupons to Digioh
The first step you’ll want to take when setting this pipeline up is to create the coupon group that will be used by the pipeline.
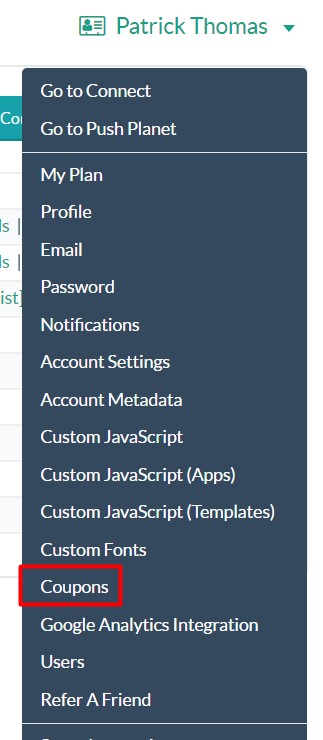
Within your Digioh account, select Coupons from the Account dropdown:
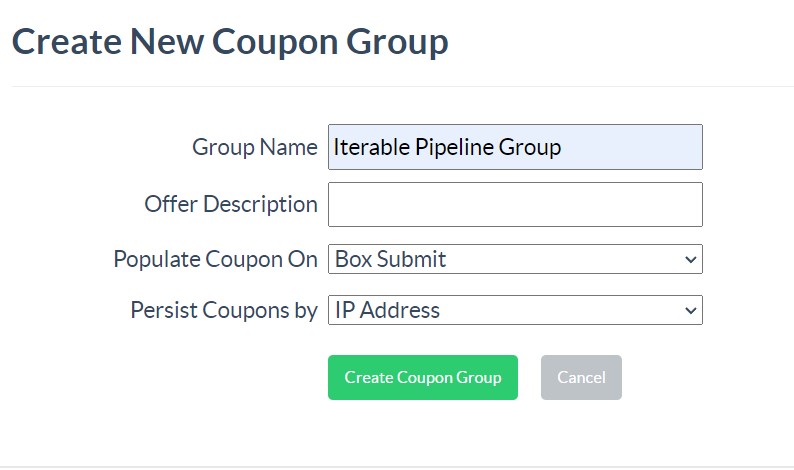
Select +New Coupon Group

Provide a name for the group and set the coupons to persist by IP Address
You can then add coupon codes to the group by either selecting and updating a .csv or .txt file, or by pasting in a list of comma or line separated coupon codes.
Step 2: Integrating with Iterable
Getting your Iterable API Key
Before creating a Digioh pipeline to integrate with Iterable, you’ll first need a server-side API Key from the Iterable project that you’re connecting to. If you don’t already have an API key, you can follow these steps to create one:
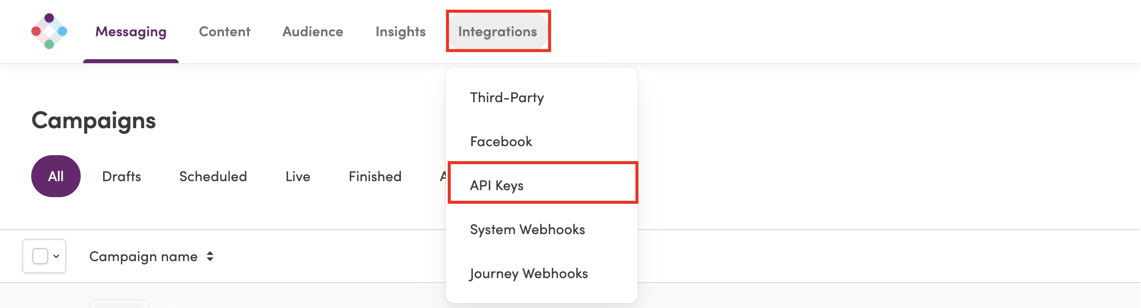
- Login to your Iterable account
- Select “Integrations” then “API Keys”
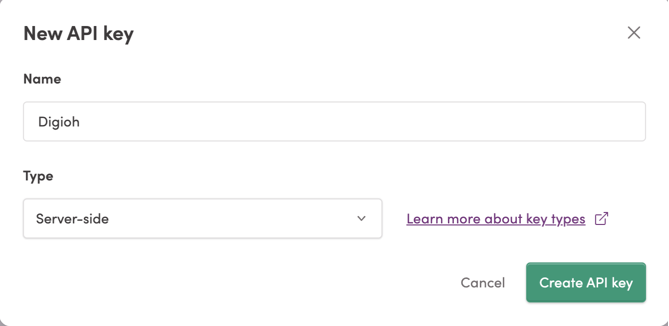
- Select “+ New API Key”

- Name your API Key and select Type: Server-Side, and then Create the API key
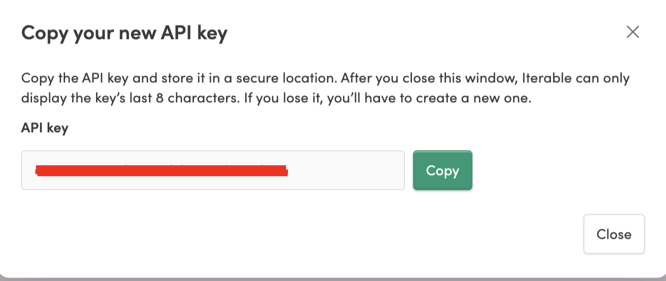
- Copy the API key shown and store it securely if needed, you’ll need this to integrate Digioh with Iterable. Please note: The API key is only ever shown once, so a new key will need to be created if this one is lost
Creating the Connection
To integrate the Digioh campaign you’ve created with Iterable, you’ll use a Digioh pipeline to send the submission data to the configured Iterable project.
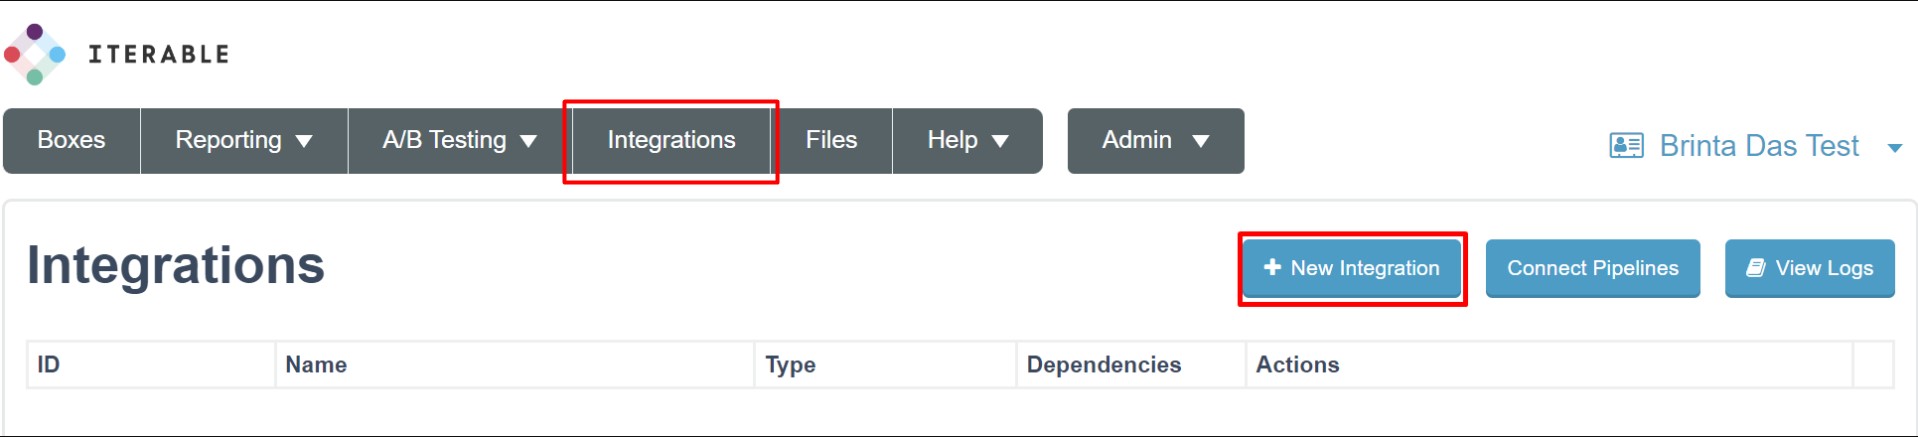
Log into your Digioh account and select “Integrations” and then “New Integration”:
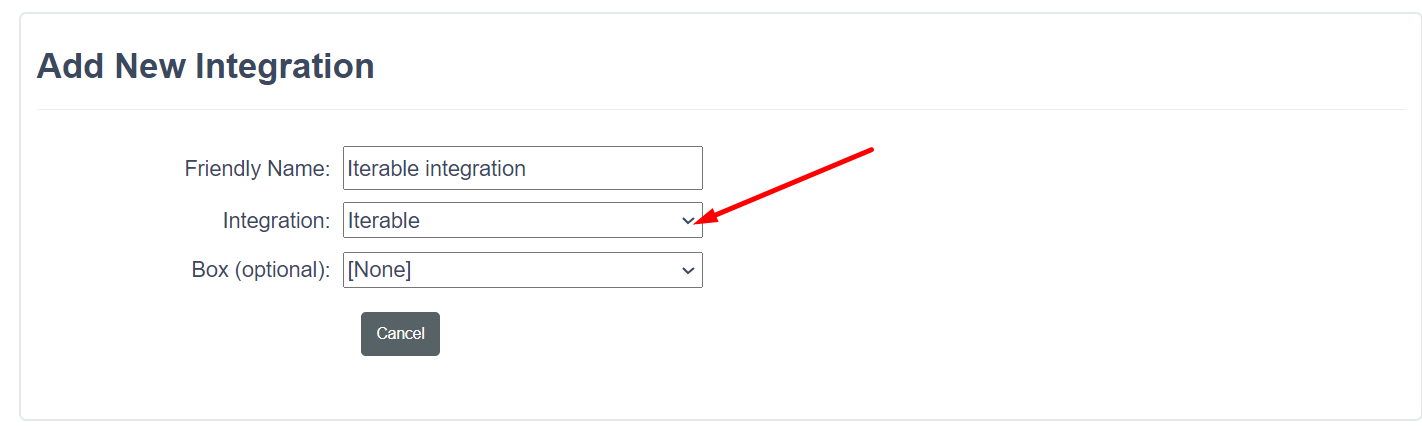
Select Iterable from the Integration dropdown menu:
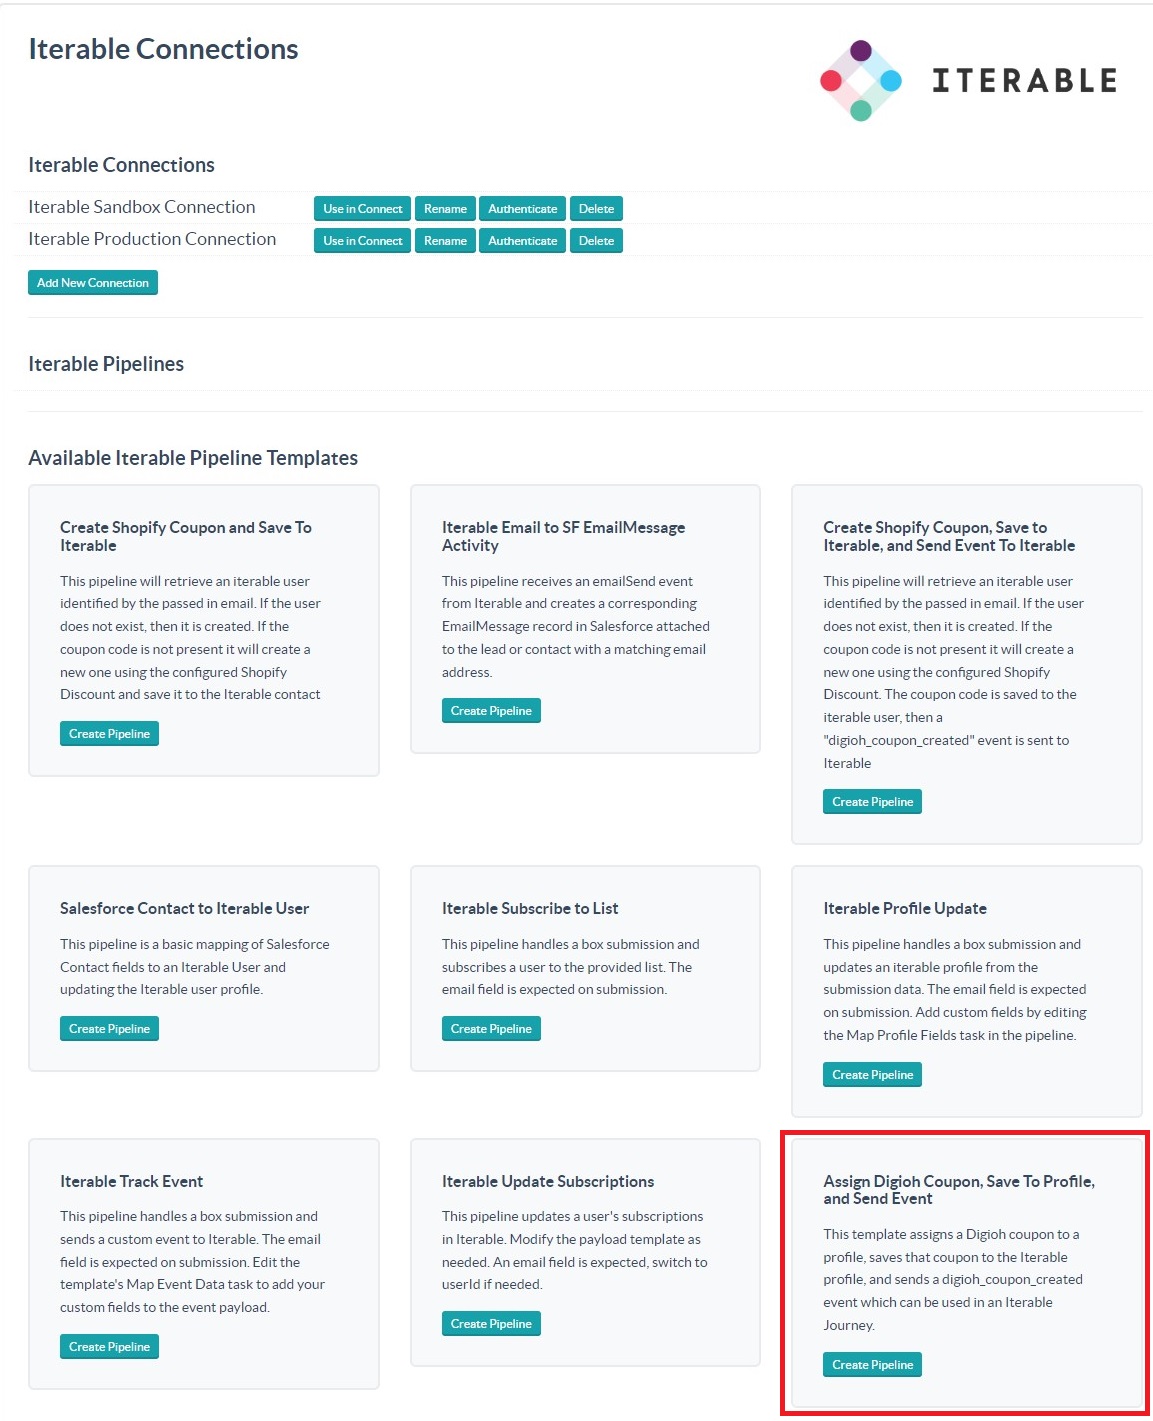
Once you do, you will be re-directed to see all of our available Iterable pipeline templates:
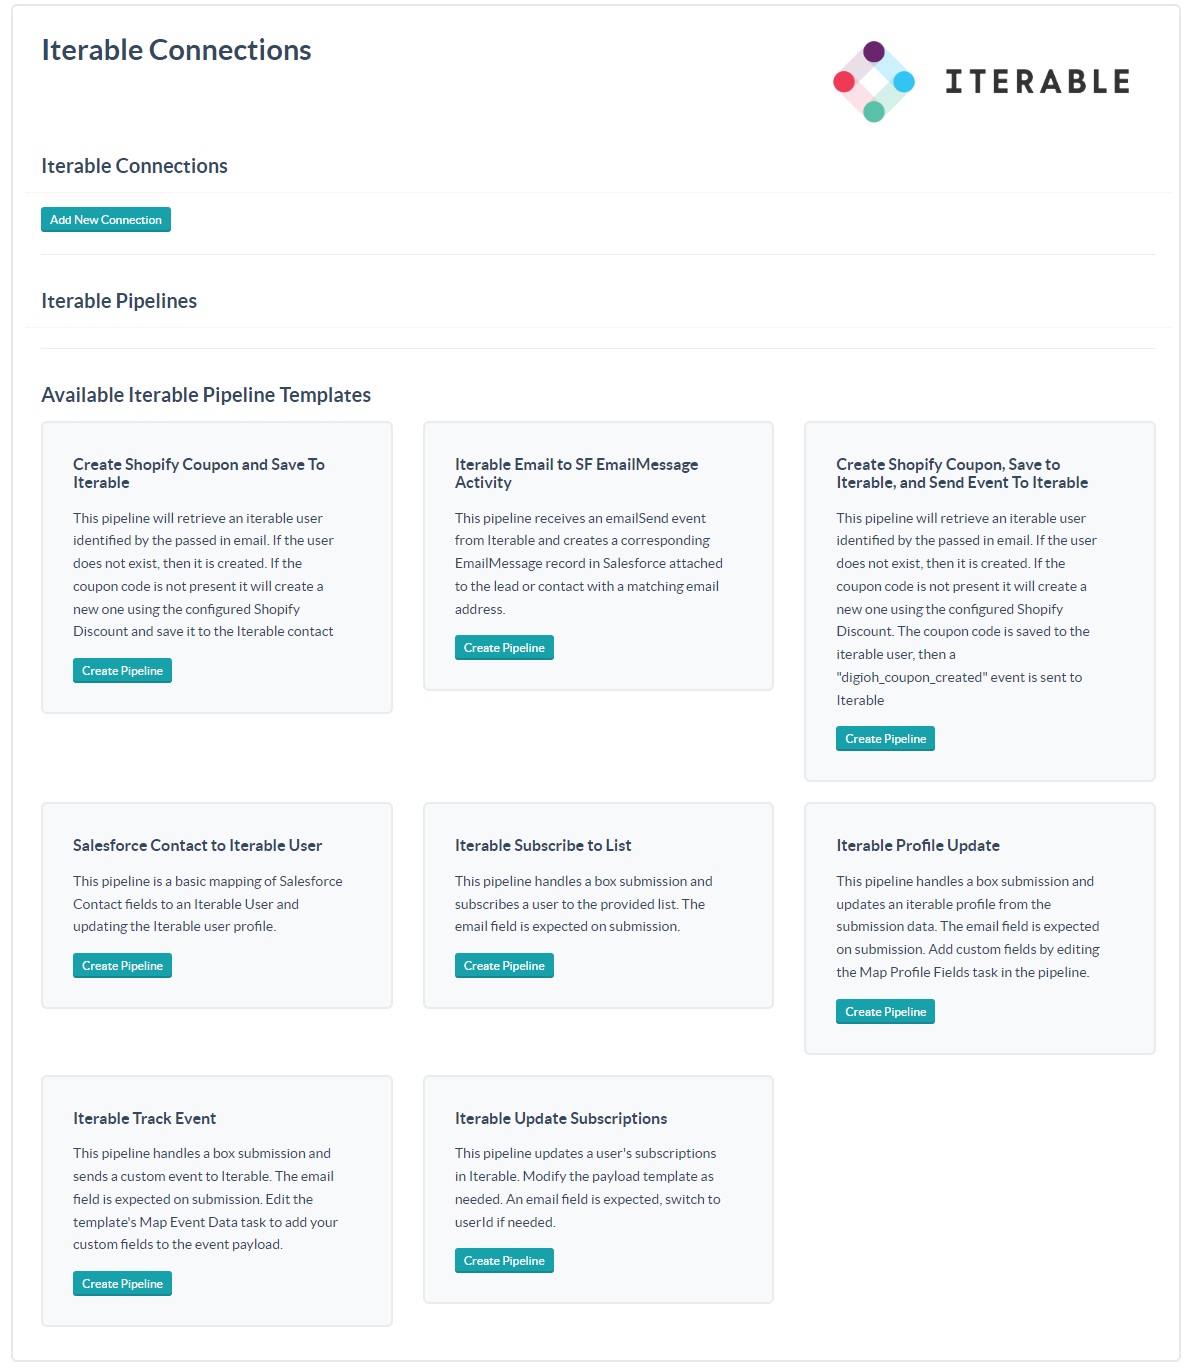
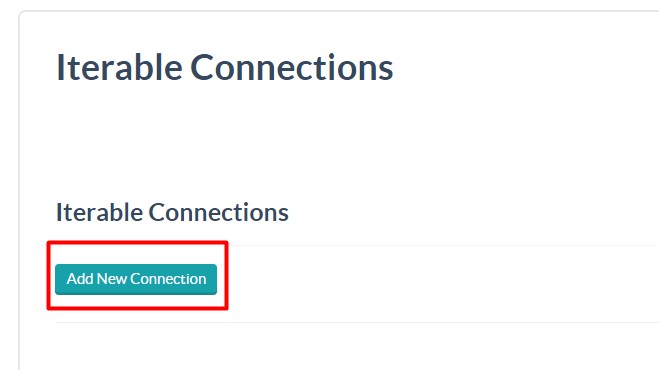
To add a new connection, select “Add New Connection”
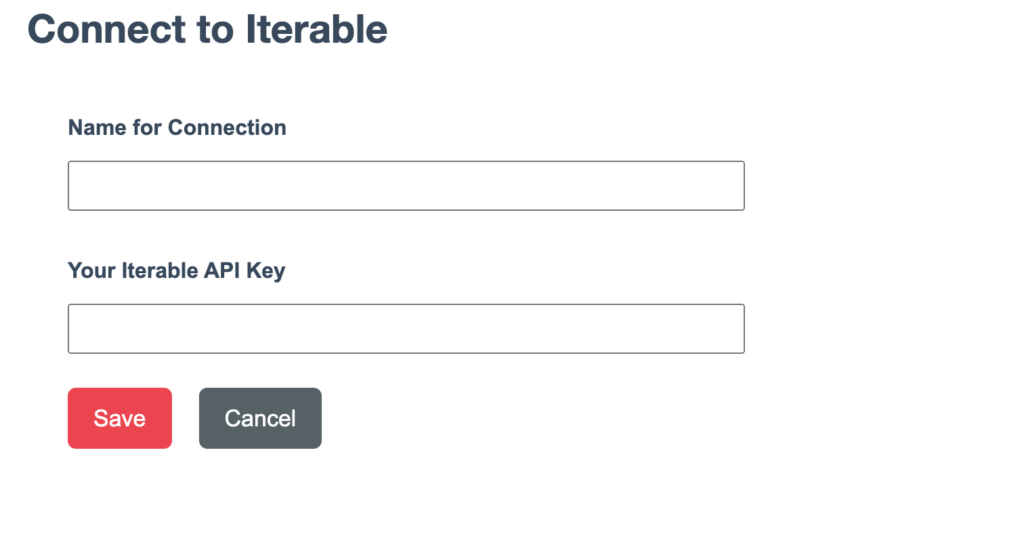
Enter in a name for the connection (e.g. “Iterable Sandbox Connection”) and paste in the Server-Side API key from Iterable.
Creating the Pipeline
Now that you’ve got your connection, it’s time to create the necessary Pipeline to send the data to Iterable!
Back in the Iterable connection page, select the “Assign Digioh Coupon, Save To Profile, and Send Event” template:
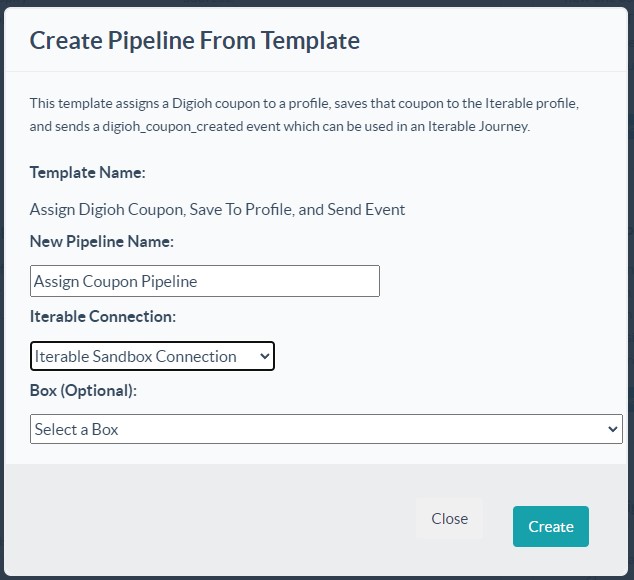
 Provide a Name for the pipeline and select which connection should be used.
After the pipeline has been created, select ‘Edit’ on the pipeline to set which coupon group it will use: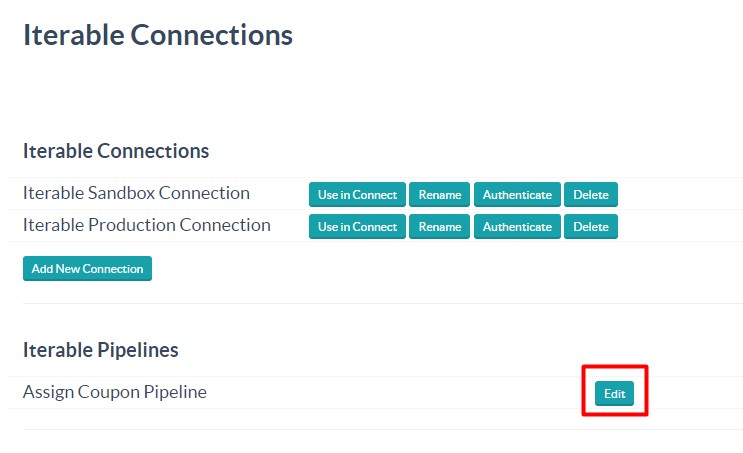
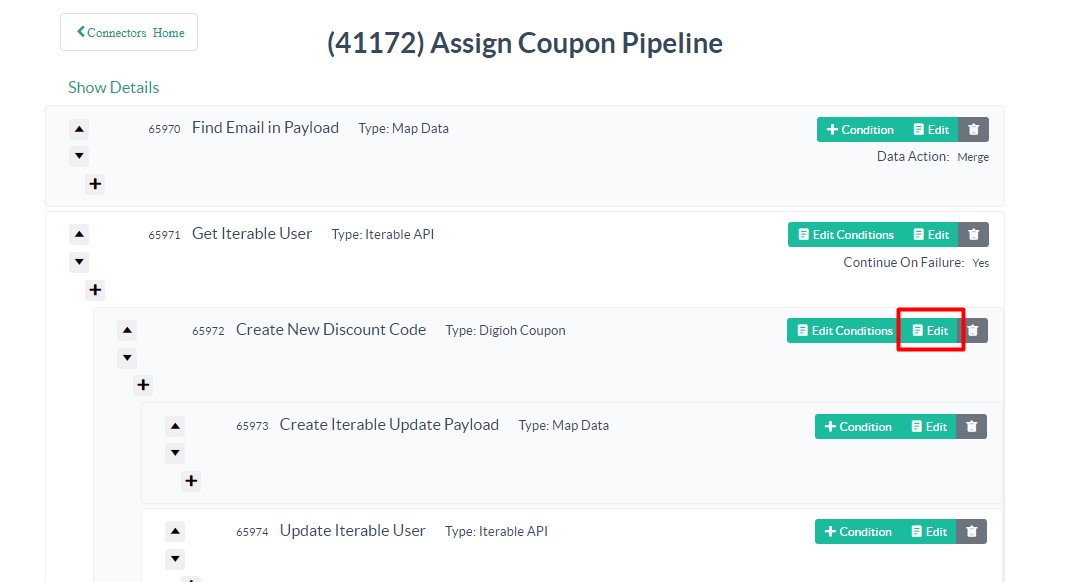
Select ‘Edit’ on the “Create New Discount Code” step:
On the next page, select which coupon group should be used:
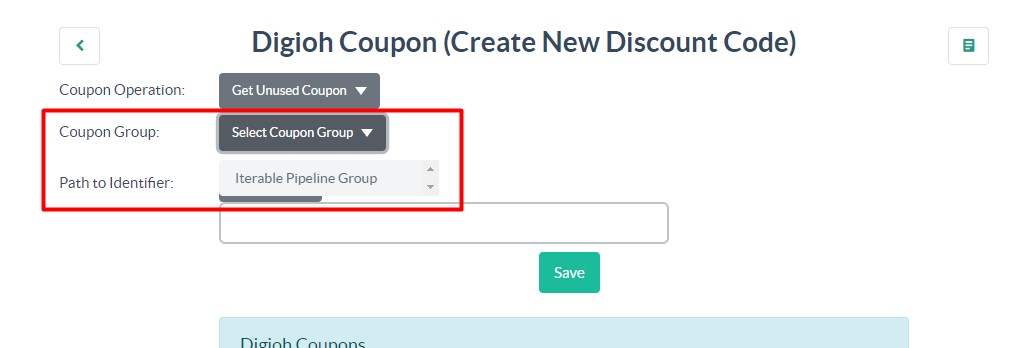
Once done, select ‘Save.’ Make sure you also hit the back arrow and publish your changes for them to take effect!
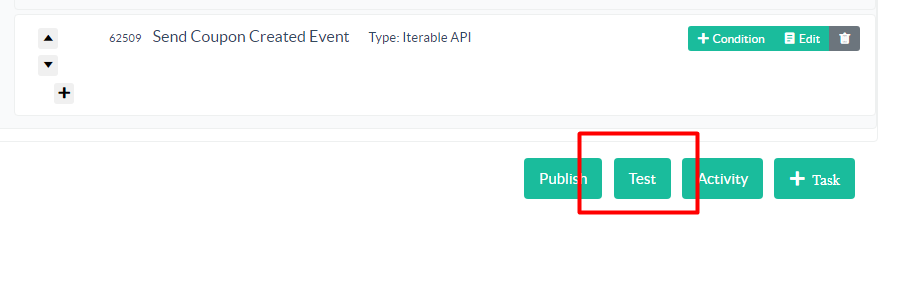
Finally, you’ll want to run a test of the pipeline to ensure that the necessary attribute and event are created in Iterable. At the bottom of the Pipeline screen, select ‘Test’:
In the Test Data (JSON) enter:
{ "email": "test@test.com" }and then run the test.
You should see a log showing each of the steps in the pipeline being run. As long as everything worked correctly, you should see a series of Successful steps:
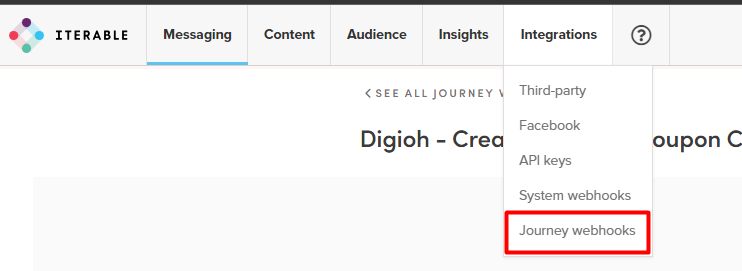
Step 3: Create the Iterable Journey Webhook
- Log in to your Iterable account and navigate to Integrations -> Journey webhooks:
- Add a new webhook.
- Name your webhook as needed. The method should be POST. For the Endpoint, paste in the Hook URL from your Digioh Pipeline.
- Hit ‘Create webhook’
Step 4: Create the Iterable Journey
In your Iterable account, navigate to Messaging -> Journeys:

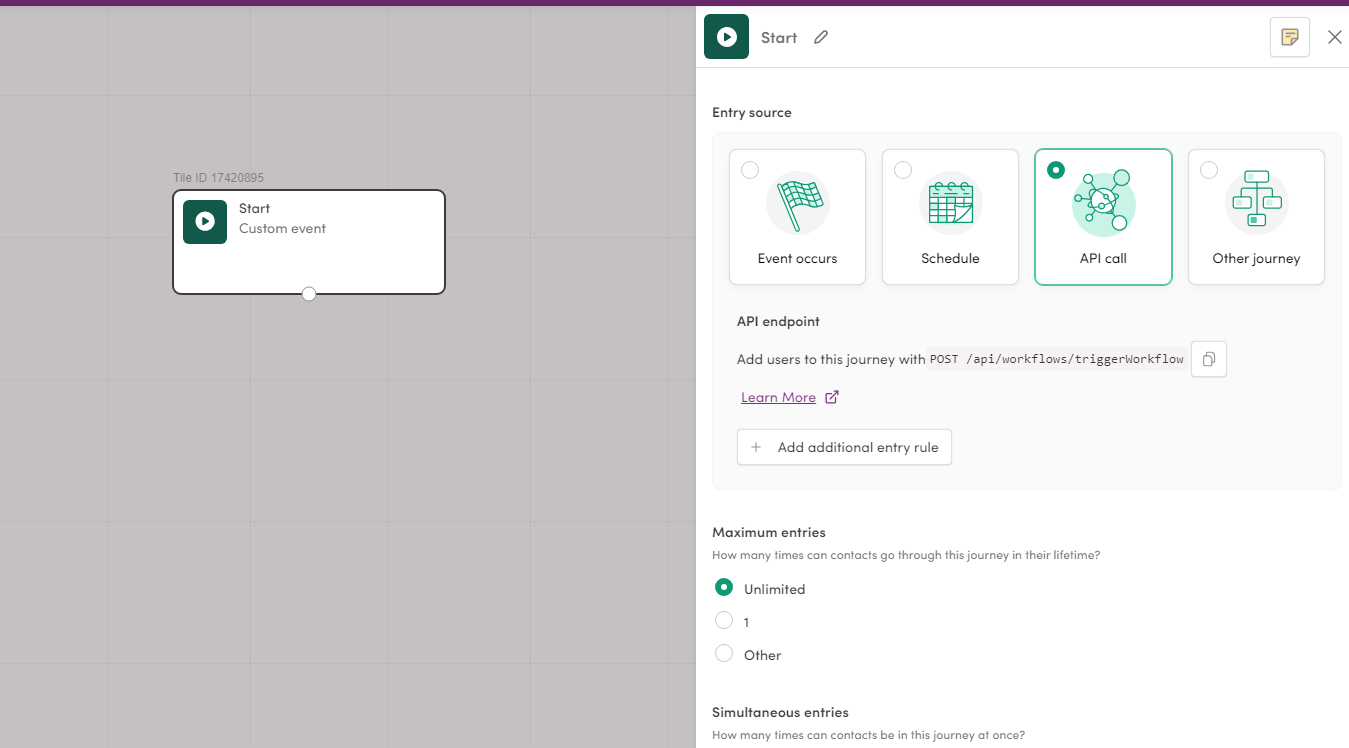
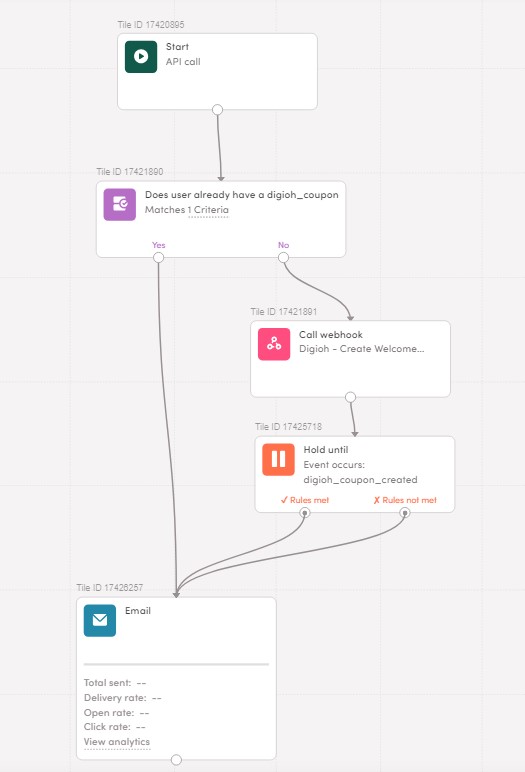
Create your new Journey as needed. For this example, our Journey will: Start with an API call. it will then check if the user already has a coupon on their profile or not: If they already do, it will send them an email; if they don’t have a coupon, it will then call the Digioh Pipeline to assign them one.
Add the Iterable API call start tile:
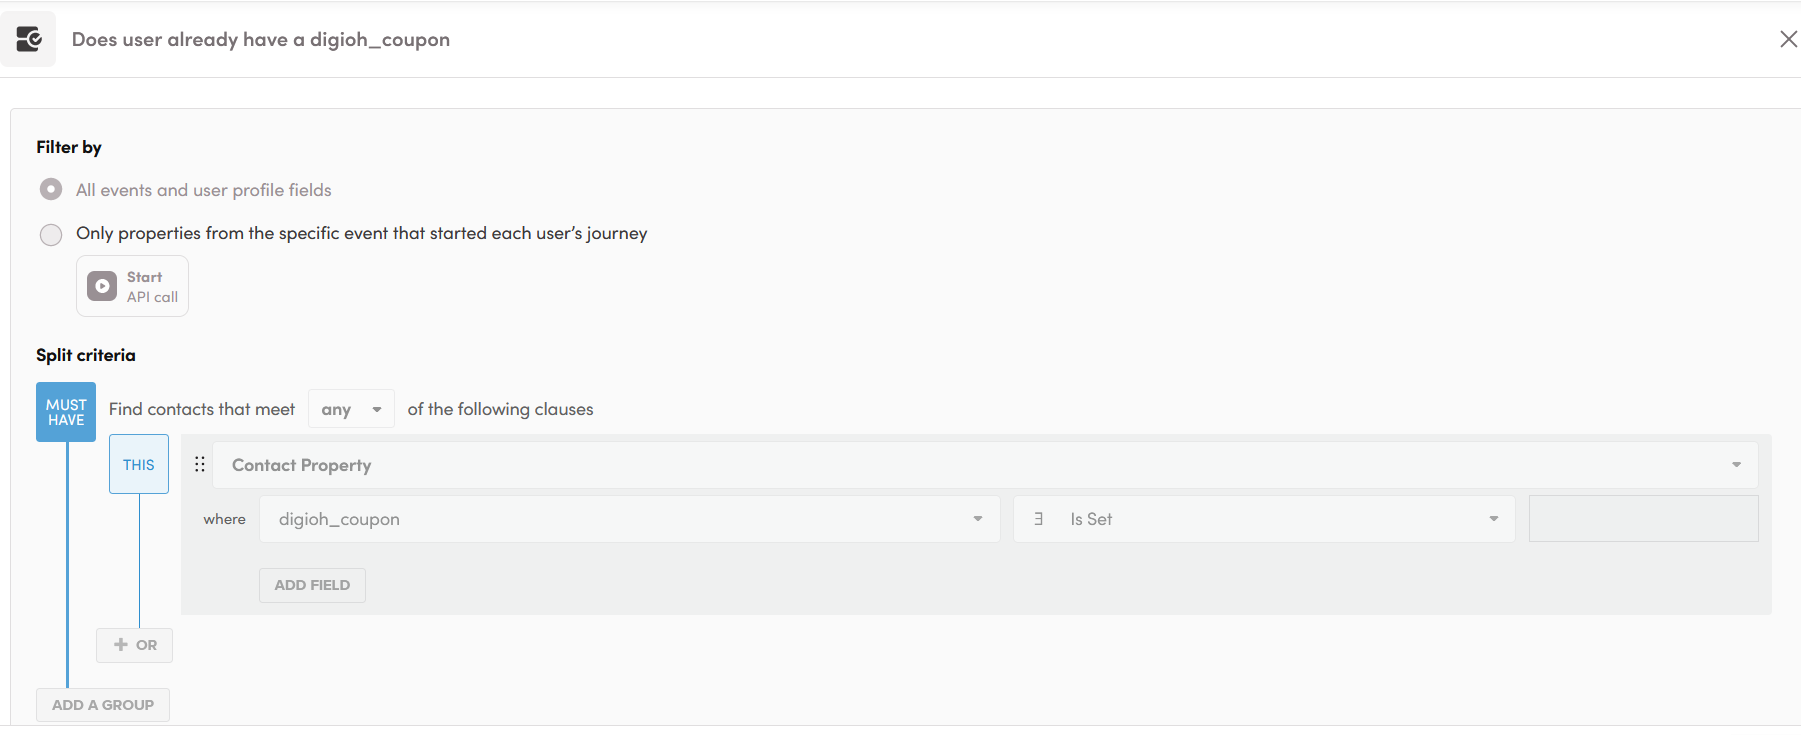
Add a Yes/no Split conditioned to check if the digioh_coupon has already been set for the user:
Add a Call Webhook tile and configure it to call the webhook you created in Step 3
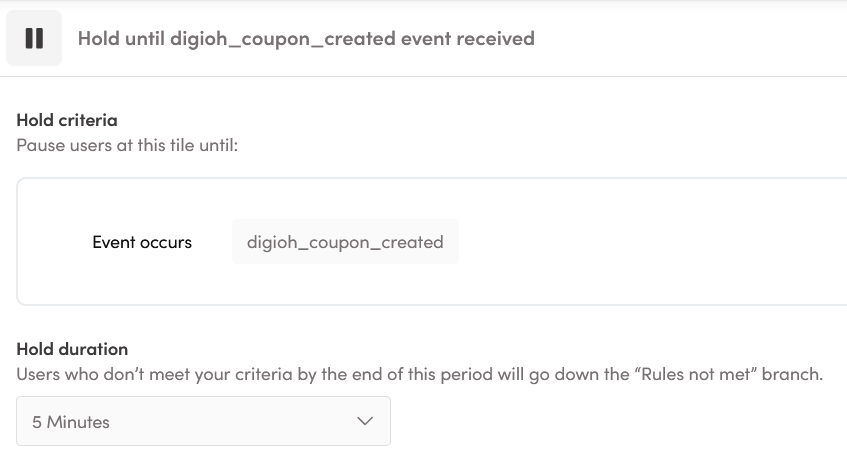
Add a Hold Until tile and configure it to hold until the digioh_coupon_created event has occurred:
Finally, add an Email tile, configuring its template as needed to send the user their coupon via the tag {{digioh_coupon}}.
The Complete Journey:
Now that you have your configured Digioh Connect Pipeline, and have integrated it with an Iterable Journey, you can send profiles through the journey to create coupons, and send messages to those profiles that include their unique coupon code.
If you have any questions or run into any issues, feel free to reach out to our support team at support@digioh.com!