Marketo is Software-as-a-Service (SaaS)-based marketing automation software owned by Adobe and built to help organizations automate and measure marketing engagement, tasks, and workflows.
- 1. Introduction
- 2. Prerequisites
- 3. Step-by-Step Integration Guide
- Step 1: Create the Pipeline
- Step 2: Set Up Marketo API Authentication
- Step 3: Configure the Lead Creation Task
- Step 4: Map Fields According to HTTP Request
- Step 5: Add Lead to List Task
- 4. Securing Your Integration
- 5. Conclusion
1. Introduction
This guide provides detailed instructions on integrating Marketo with Digioh, focusing on automating the creation or updating of leads from Digioh into Marketo.
2. Prerequisites
– Marketo account with API access
– Digioh account with permissions for setup
3. Step-by-Step Integration Guide
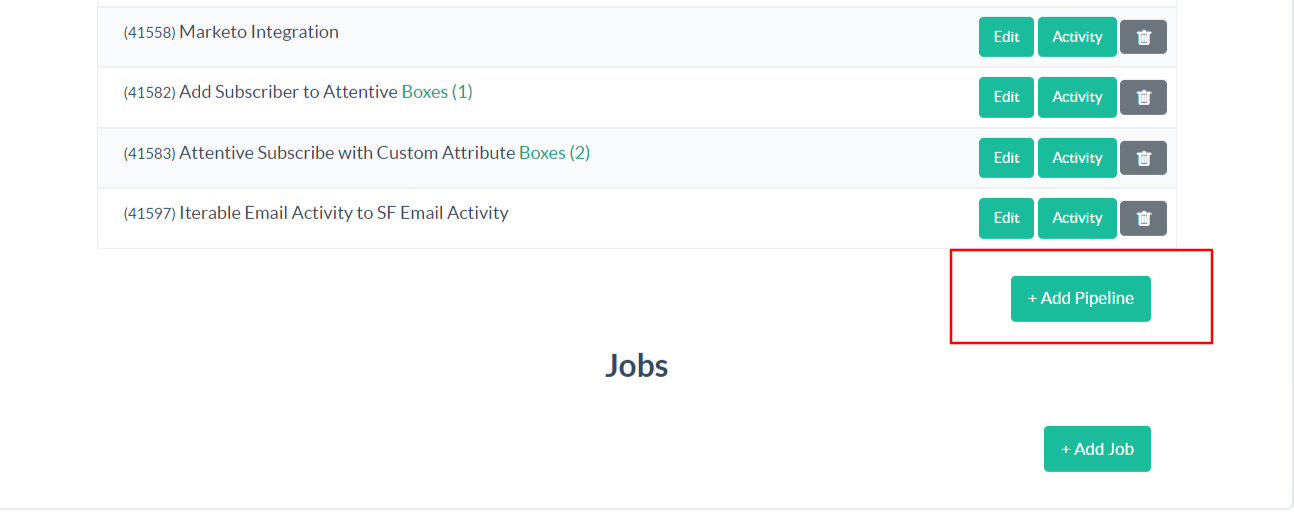
Step 1: Create the Pipeline
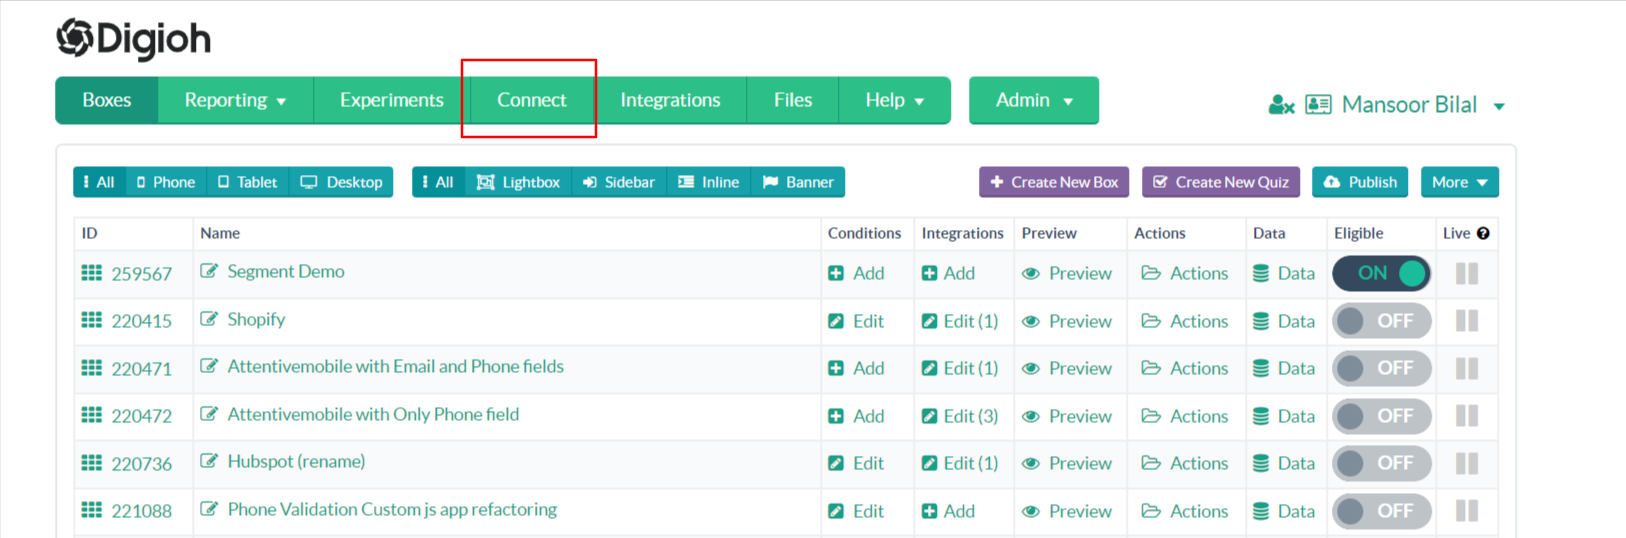
Log into Digioh, navigate to ‘Integrations’, and select ‘Create Pipeline’.
Step 2: Set Up Marketo API Authentication
– Obtain your Marketo credentials (Client ID, Client Secret, Identity URL).
– Construct and add an authentication URL in the pipeline setup:
– In the Pipeline add a new task.
- Add Name for the task.
- Select Task Type as Http Request.
- Click Add Task Button.

In the Task Field Request URL add the contructed URL like blelow.
https://<IdentityURL>/identity/oauth/token?grant_type=client_credentials&client_id=<ClientID>&client_secret=<ClientSecret>
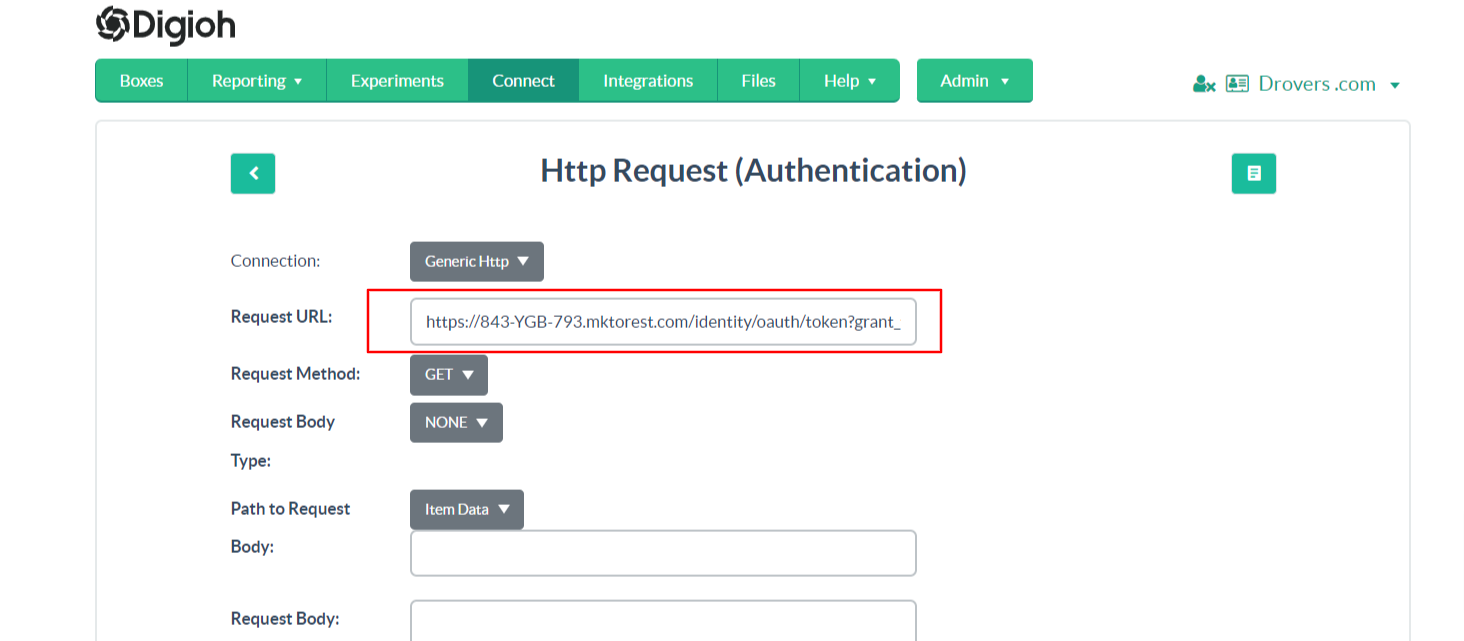
- After Adding the URL, Click on Save and Go Back to Pipleline Main page.
Step 3: Configure the Lead Creation Task
– Set up the lead creation or update request:
– In the Pipeline add a new task.
- Add Name for the task.
- Select Task Type as Http Request.
- Click Add Task Button.
Add Request URL Like Below.
Note: Add Your Marketo Identity URL <IdentityURL>
https://<IdentityURL>/rest/v1/leads.json
Step 4: Map Fields According to HTTP Request
Add the Request Body:
{
  "action": "createOrUpdate",
  "lookupField": "email",
  "input": [
    {
      "email": "[EMAIL]",
      "optInSource": "[OPTIN]",
      "LeadSource": "[CUSTOM_1]"
    }
  ]
}
Note: Update the Above payload according to your Usecase.
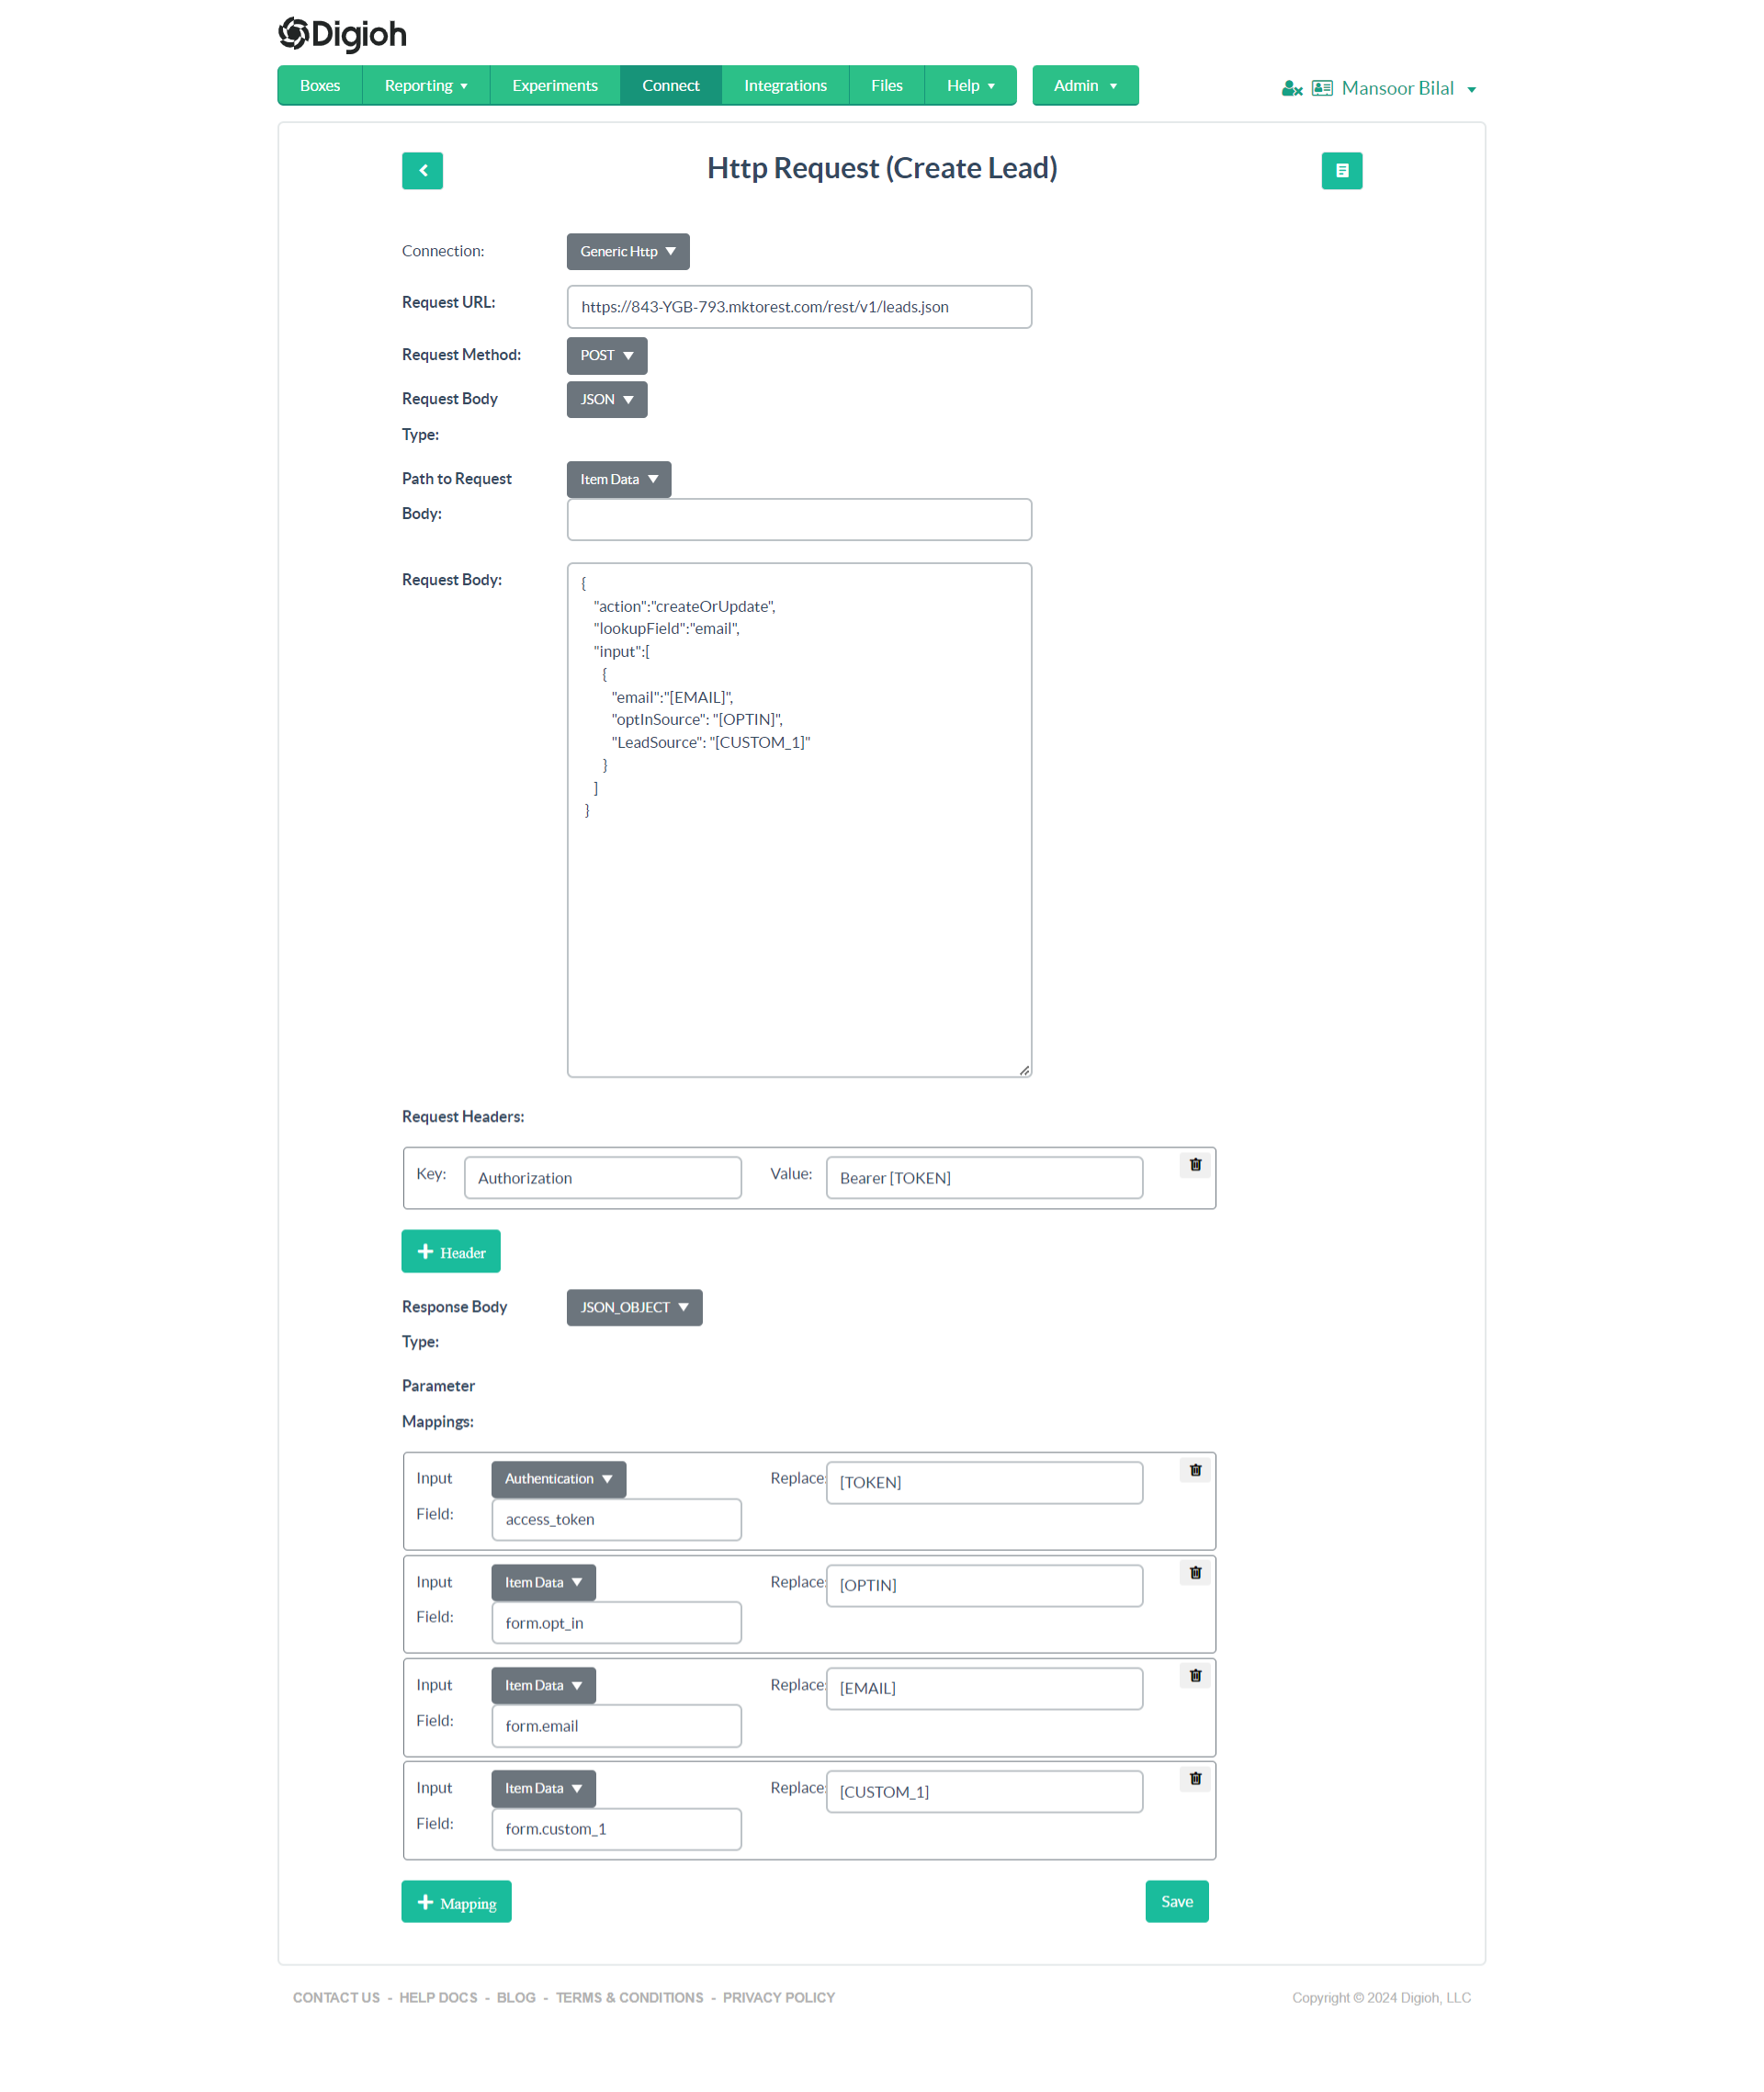
Ensure correct mapping of Digioh fields to Marketo fields in the pipeline settings.
Note: If you would like to add the list in a Speciefic List you have to follow the Step 5 and Step 6 as well else you can jump to step 7.
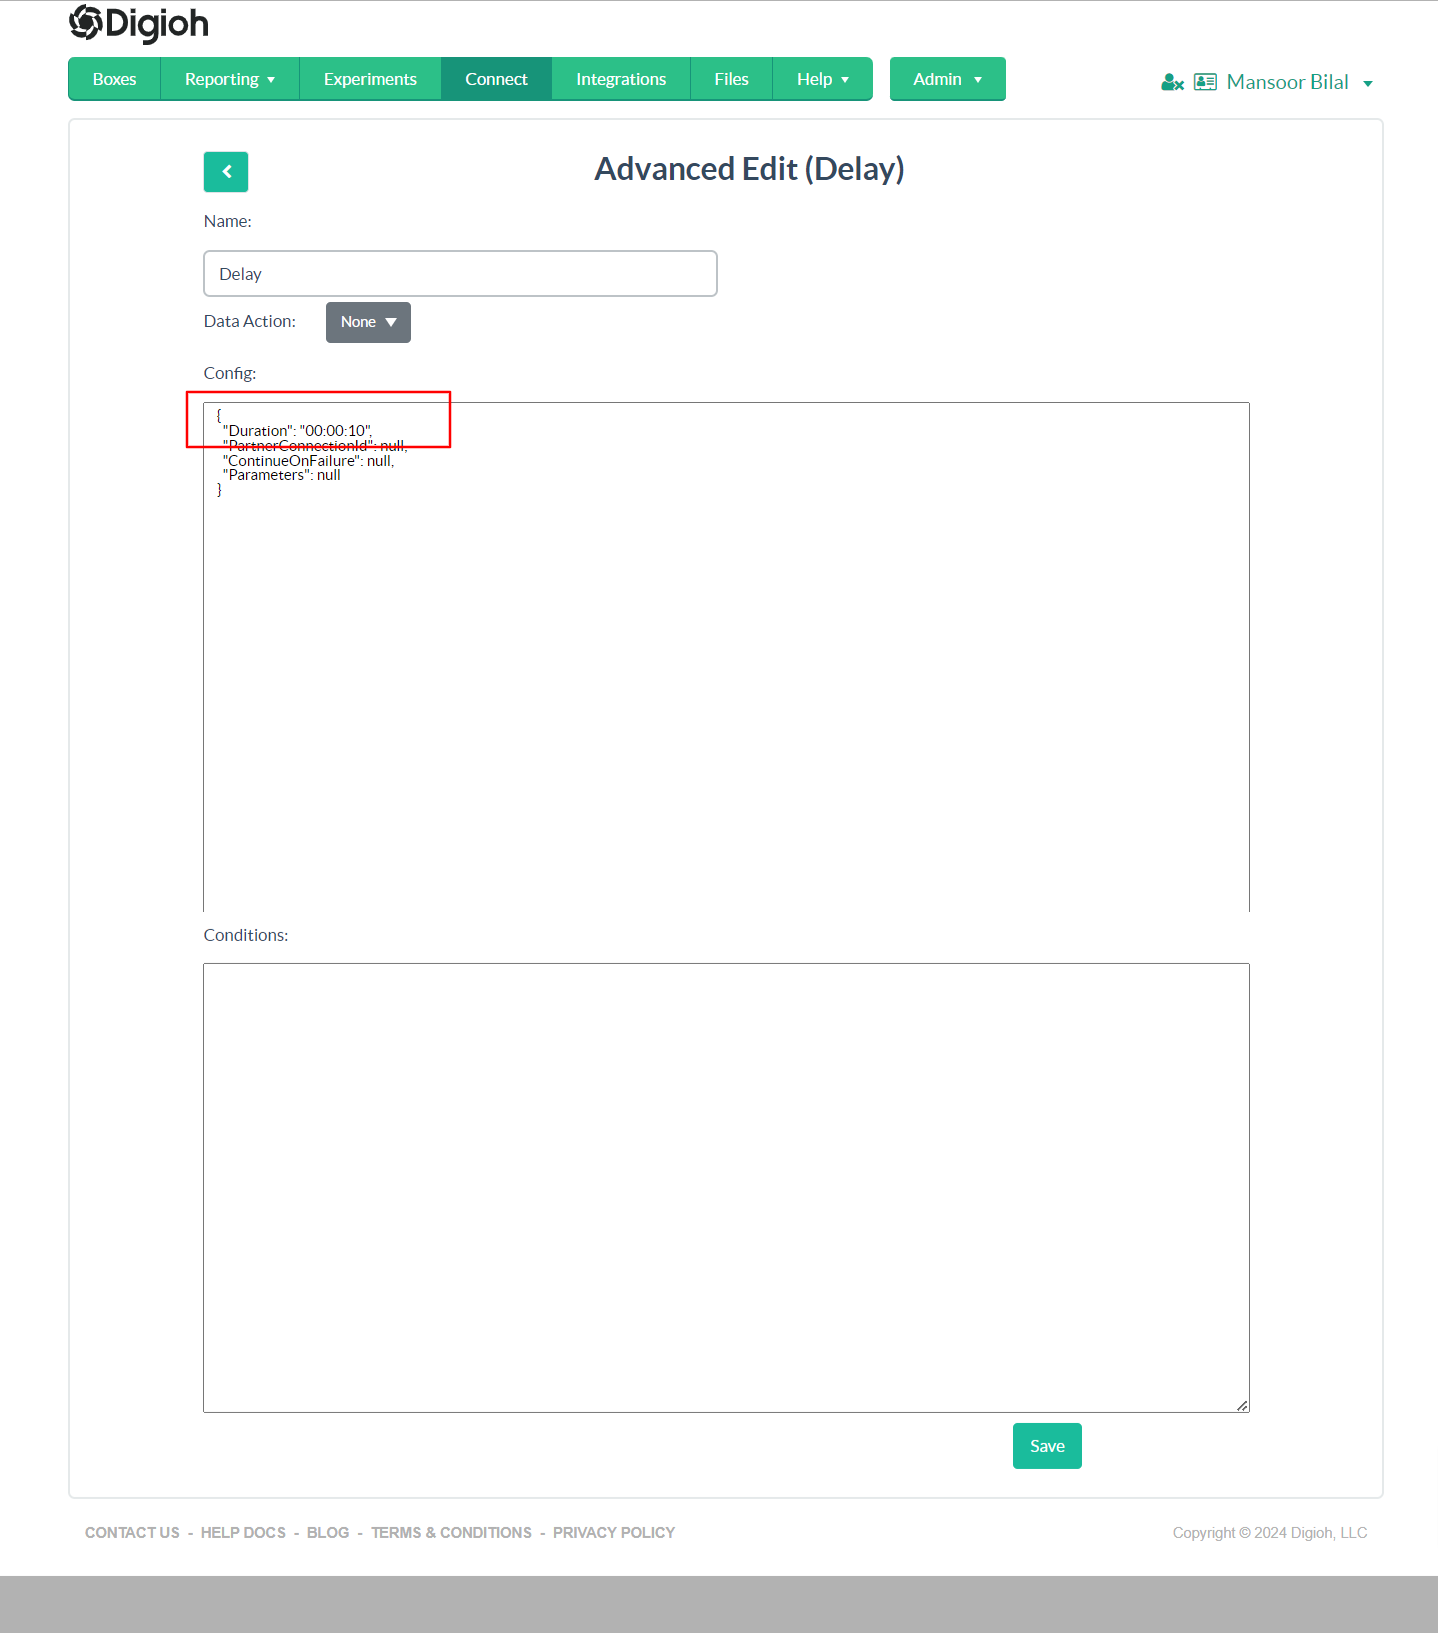
Optional Step 5: Adding 10 seconds Delay for List API
Add a Delay task for Marketo List API.
We will add a 10 seconds delay to add the lead in the Marketo List as well.
– In the Pipeline add a new task.
- Add Name for the task. Like 10 Seconds Delay
- Select Task Type as Delay.
- Click Add Task Button.
Once the task is added. Edit the task and update the duration value to 00:00:10 seconds. Click Save and Go Back to Pipeline Main Page.
Step 6: Add Lead to List Task
– Add a new HTTP request task with the Below Endpoint.
- Add Name for the task : Add Lead to List
- Select Task Type as Delay.
- Click Add Task Button.
Replace the List ID and Identity URL in the list addition task to correctly associate leads:
https://<IdentityURL>/rest/v1/lists/<ListID>/leads.json
Once All the tasks are added you have to publish the pipeline.
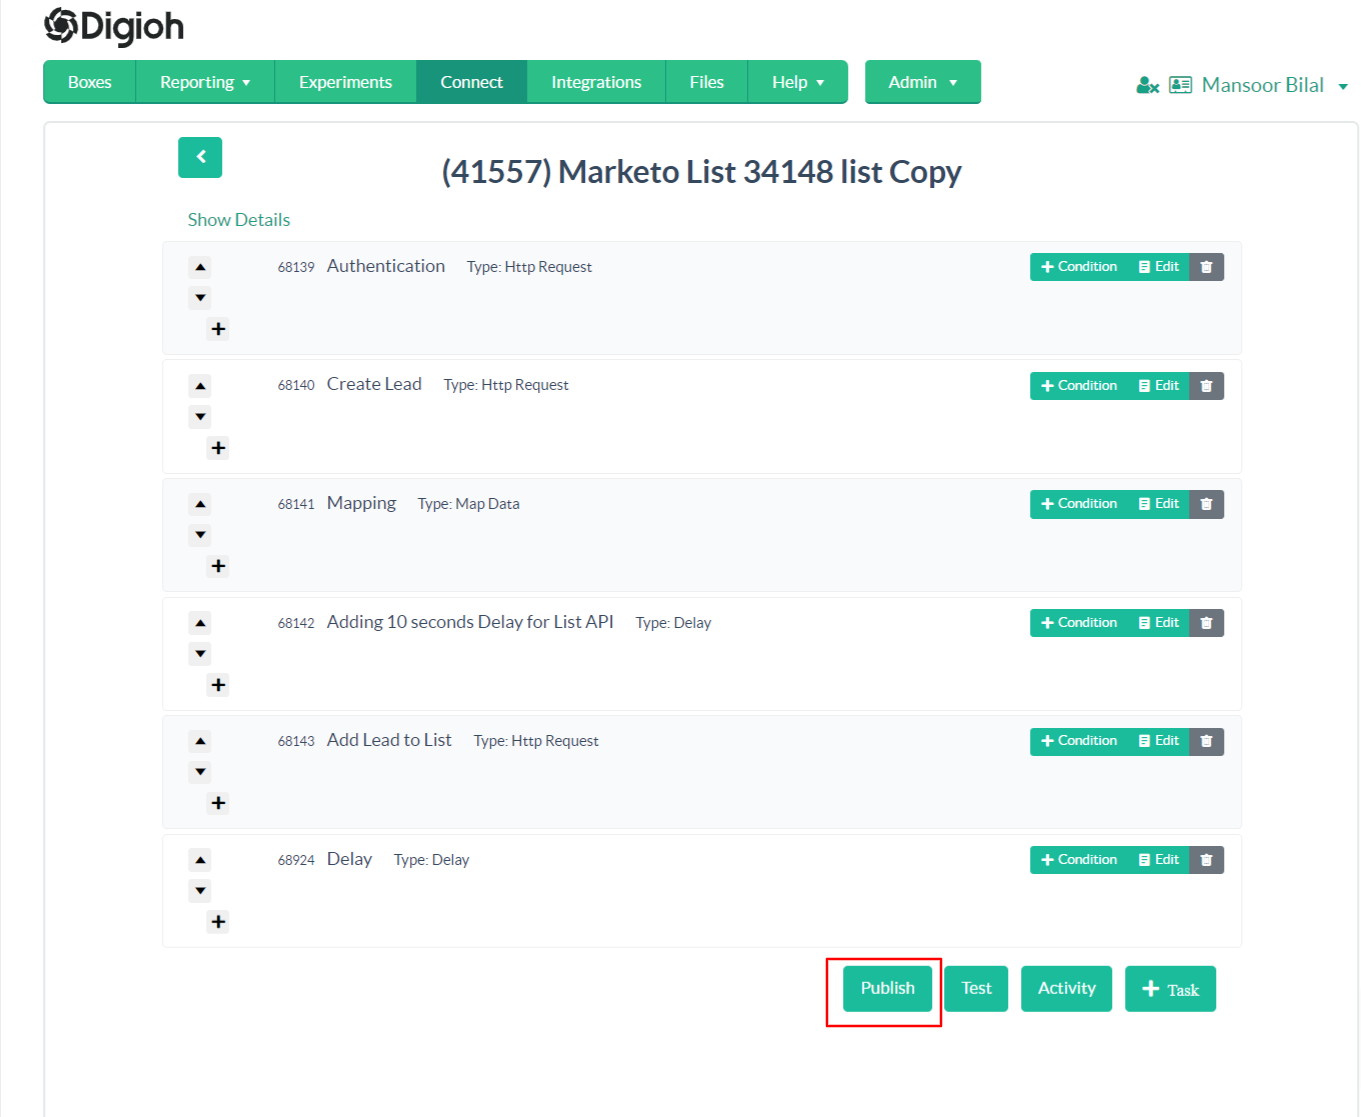
Now Assign the Pipeling to the Relevant Boxes and Check Pipeline Activity Logs for Debugging.
4. Securing Your Integration
– Use environment variables or secure storage for API credentials.
– Regularly update your API keys and secrets.
5. Conclusion
Follow these steps to ensure a successful integration between Marketo and Digioh, streamlining your lead management processes.
If you ever need additional assistance, you can always email us via support@digioh.com and our Support Team will be happy to answer any questions you have and assist with investigating any problems you run into!