Copper CRM, formerly known as ProsperWorks CRM, is a customer relationship management (CRM) software designed specifically for integration with Google’s line of cloud applications.
Digioh’s Copper integration allows you to capture leads with pop-up forms, lightboxes, surveys, and quizzes, then pass that data to Copper CRM in real-time.
Copper Integration Requirements
The following parameters are required from Copper CRM:
- API key
- Enable Leads Feature
- API User Email (The email address of the user who created the API Key)
If you are setting up a Digioh integration by yourself, we first recommend reading about Digioh Integration Basics.
Follow these instructions to set up a Copper CRM integration.
1. Add a New Integration
2. Set a friendly name in the Friendly Name field.
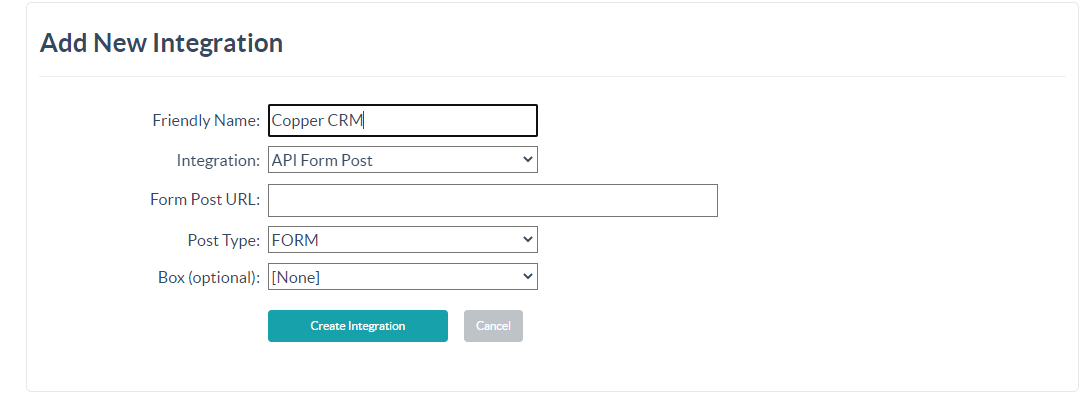
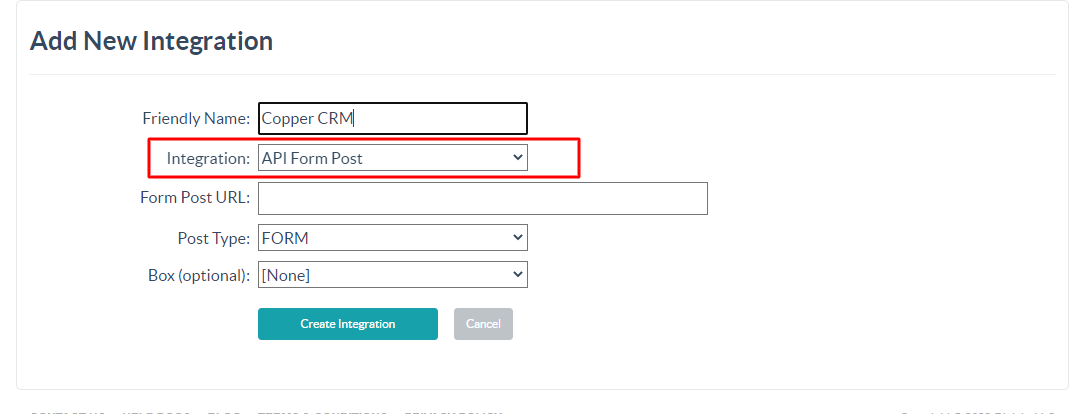
3. Select API Form Post in Integration options.
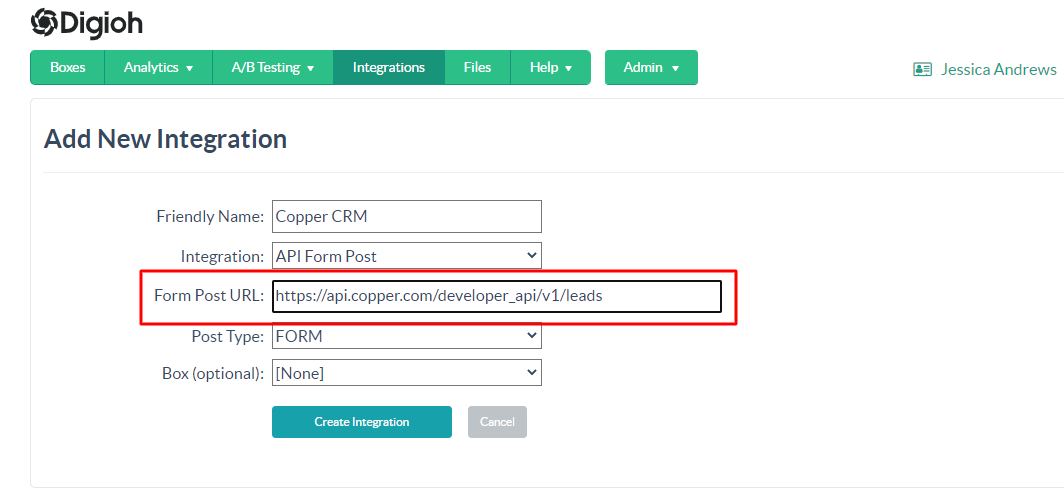
4. Enter the Form Post URL.
Enter the Copper CRM Leads API Endpoint.
https://api.copper.com/developer_api/v1/leads
5. Select JSON Raw in Post Type.

6. Select Box.
Select which Digioh Box you will integrate with Copper, then click Create Integration.
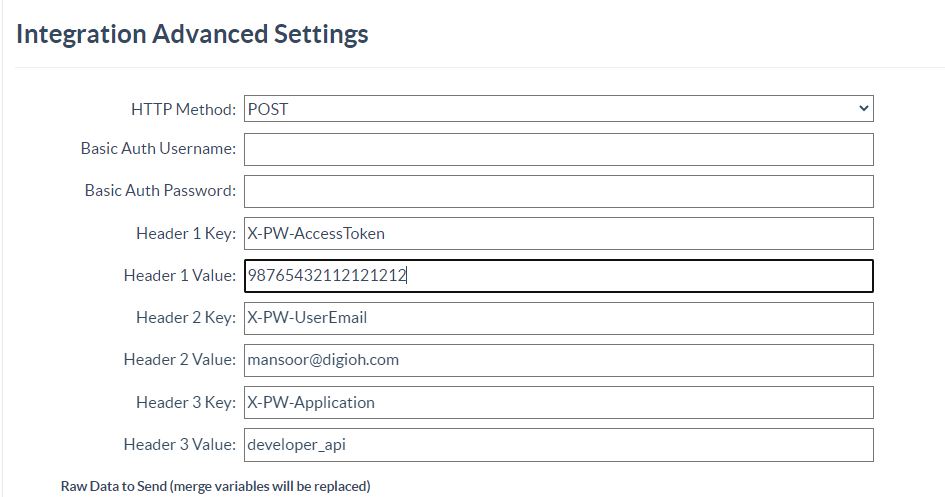
7. Configure the Advanced Integration Settings.
You will set 3 Headers for this integration.
- X-PW-AccessToken
- X-PW-Application
- X-PW-UserEmail
Set the HTTP method to POST, then fill in the Header fields as follows:
- Header 1: Enter the X-PW-AccessToken in Header 1 Key, and enter the Copper CRM API key in Header 1 Value.
- Header 2: Enter the X-PW-Application in Header 2 Key and developer_api in Header 2 Value.
- Header 3: Enter the X-PW-UserEmail in Header 3 Key, and the User Email in Header 3 Value.
Then, set up your payload in the Raw Data to Send section.
{
  "name":"[FIRST_NAME] [LAST_NAME]",
  "email": {
    "email":"[EMAIL]",
    "category":"work"
  },
  "phone_numbers": [
    {
      "number":"[PHONE]",
      "category":"mobile"

    }
  ],
  "address": {
   "street": "123 Main Street",
    "city": "[CITY]",
    "state": "[REGION]",
    "postal_code": "[POSTAL_CODE]",
    "country": "[COUNTRY]"
  },
}
You can also pass custom fields like Custom1, Custom2, etc. to Copper CRM. First, create the custom field in Copper (see Copper custom properties documentation). Then, add the field ID and its merge tag value to the RAW JSON section. Check the example payload below.
{
  "name":"[FIRST_NAME] [LAST_NAME]",
  "email": {
    "email":"[EMAIL]",
    "category":"work"
  },
  "phone_numbers": [
    {
      "number":"[PHONE]",
      "category":"mobile"

    }
  ],
  "address": {
   "street": "123 Main Street",
    "city": "[CITY]",
    "state": "[REGION]",
    "postal_code": "[POSTAL_CODE]",
    "country": "[COUNTRY]"
  },
"custom_fields": [
    {
      "custom_field_definition_id": 100764,
      "value": "Text fields are 255 chars or less!"
    },
    {
      "custom_field_definition_id": 103481,
      "value": "Text area fields can have long text content"
    }
  ]
}
To see which Analytics Data Digioh can push please see this document
For additional Box metadata fields, see this list
That’s all Your Copper create lead integration is ready to go!
If you have any questions about setting up your Copper CRM integration, send us an email, and we’ll be glad to help!